Open bottomed workbench
 This article is about one of the workbenches in my current workshop,
but it's actually a workbench I built back in 2000.
This article is about one of the workbenches in my current workshop,
but it's actually a workbench I built back in 2000.
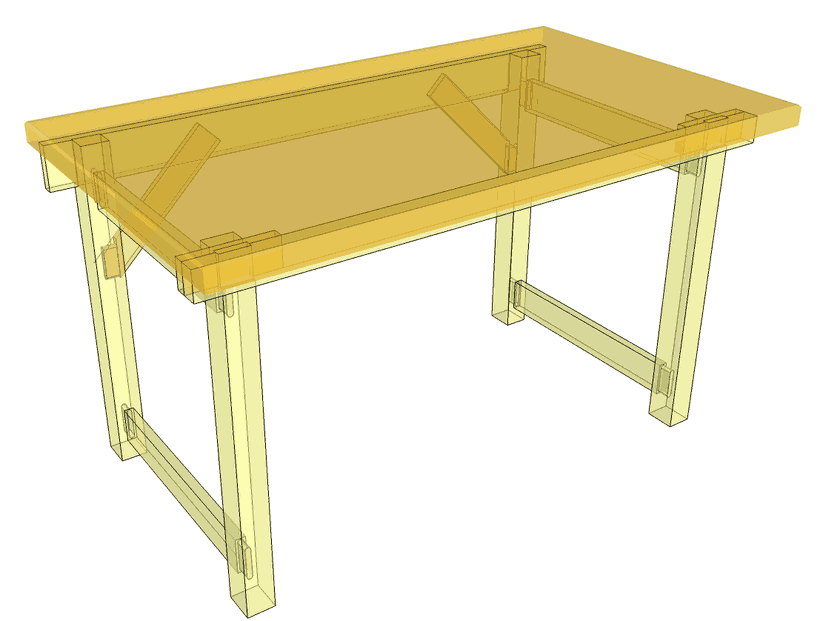
My goal for this workbench was to build something sturdy and elegant. I wanted a bench that was sturdy and stiff enough to use for hand planing, completely open on the bottom for storage, and dismantle-able for moving.
 If I attached everything together with mortise and tenon joints, it would be easy to
get a workbench that is stiff and sturdy, but it would be impossible to take it apart for moving.
If I attached
it together with screws, I'd need to make the apron rail (that connects the legs)
quite wide for the screws to have enough leverage to resist side movements.
If I attached everything together with mortise and tenon joints, it would be easy to
get a workbench that is stiff and sturdy, but it would be impossible to take it apart for moving.
If I attached
it together with screws, I'd need to make the apron rail (that connects the legs)
quite wide for the screws to have enough leverage to resist side movements.
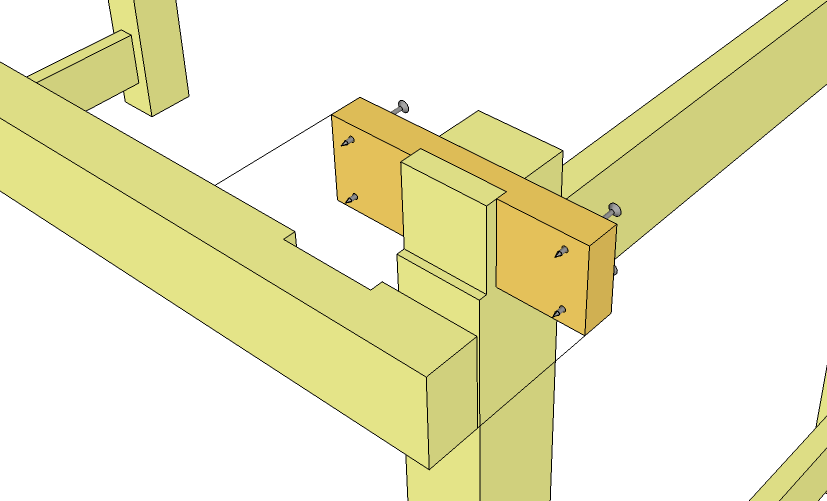
So my solution was to glue a hardwood crosspiece into the ends of the front legs, and screw that to a front rail. The hardwood crosspiece makes for a very rigid connection with the legs, and provides a wide enough sort of flange to screw the front rail to. This made for a solid front corner connection that could still be taken apart.
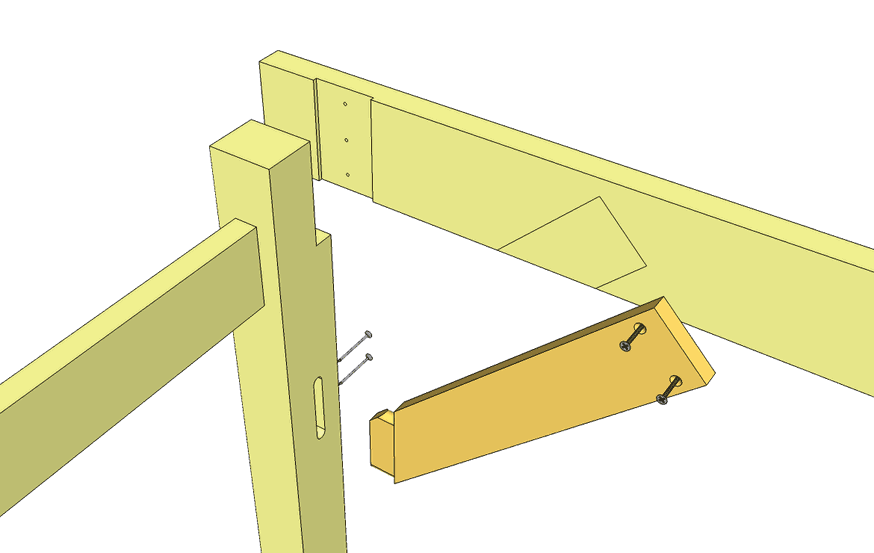 There was no need to keep the back open, so I just added a diagonal brace to the legs.
The diagonal brace fits into a mortise on the back leg and screws against the horizontal rail
on the top. The tenon is held in the mortise by two screws so that the brace can be removed
for moving.
There was no need to keep the back open, so I just added a diagonal brace to the legs.
The diagonal brace fits into a mortise on the back leg and screws against the horizontal rail
on the top. The tenon is held in the mortise by two screws so that the brace can be removed
for moving.
 The side frames have two rails mortised into them front to back. This makes for a lot of rigidity
in that direction.
The side frames have two rails mortised into them front to back. This makes for a lot of rigidity
in that direction.
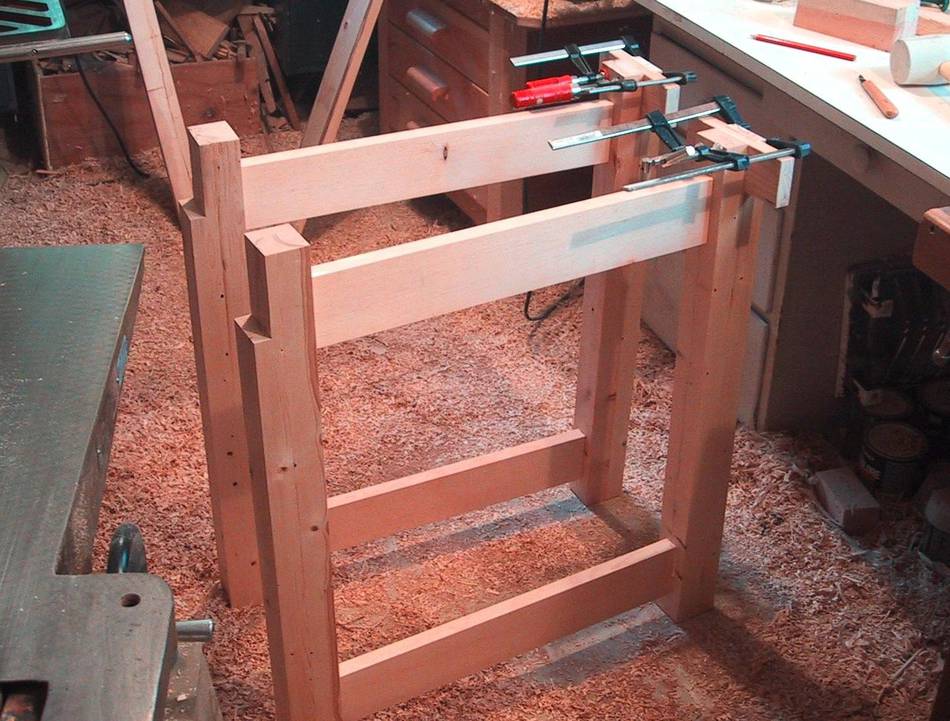
In this photo, I had just glued the hardwood blocks into the front legs of the two side frames. The clamps help ensure the joint is tight.
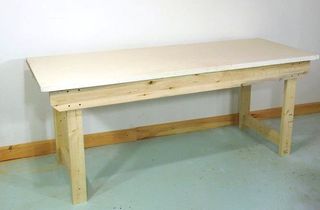
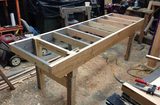
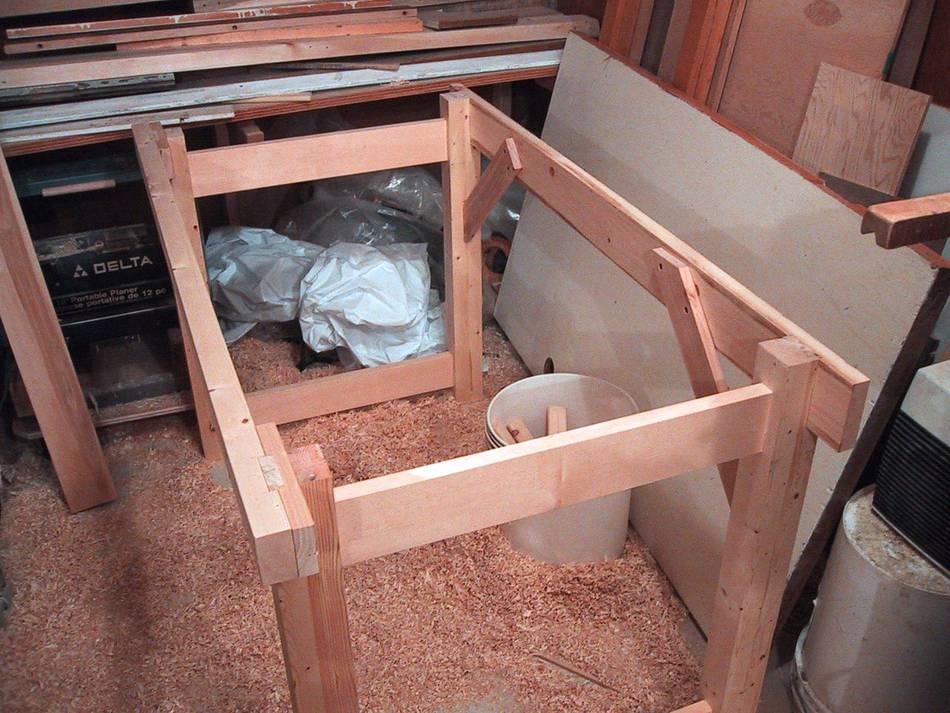 And here's the frame of the workbench assembled.
These photos were taken in my old workshop - I built that bench back in 2000.
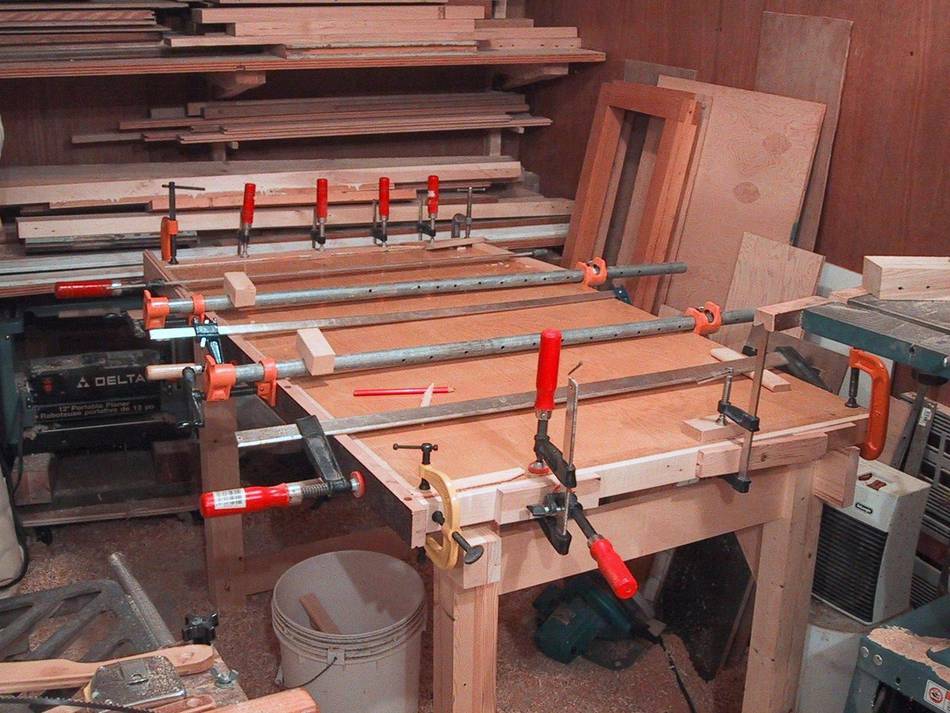 I used an old solid-core door for the top of the workbench. I had just glued on the edge trim
in this photo. I used my edge clamp trick to glue the trim
onto the sides.
I used an old solid-core door for the top of the workbench. I had just glued on the edge trim
in this photo. I used my edge clamp trick to glue the trim
onto the sides.
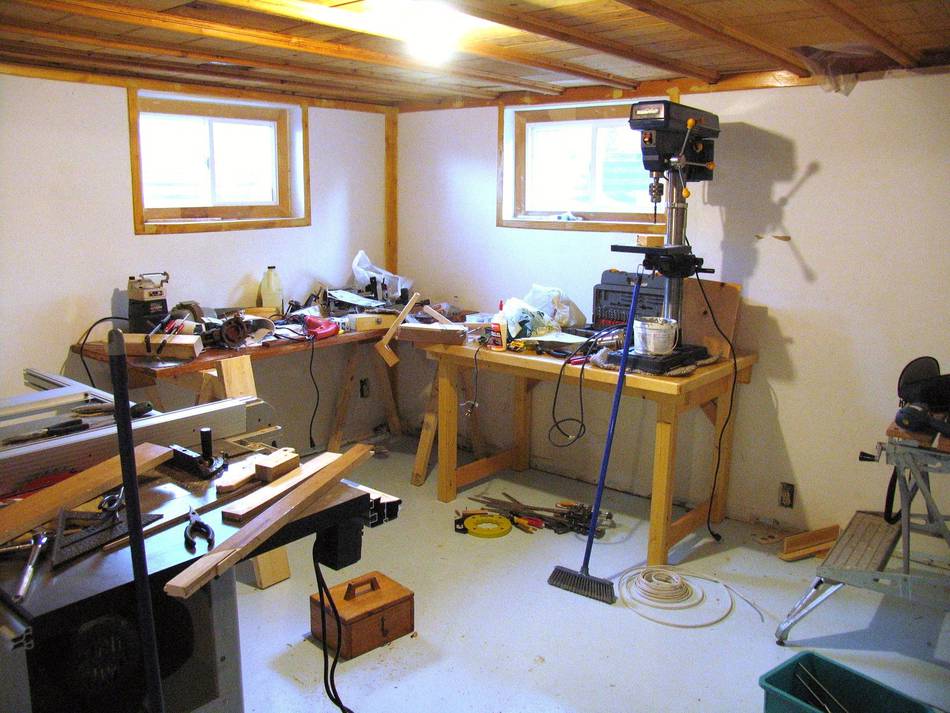
 The first place I set up that workbench was in the basement of my house at the time.
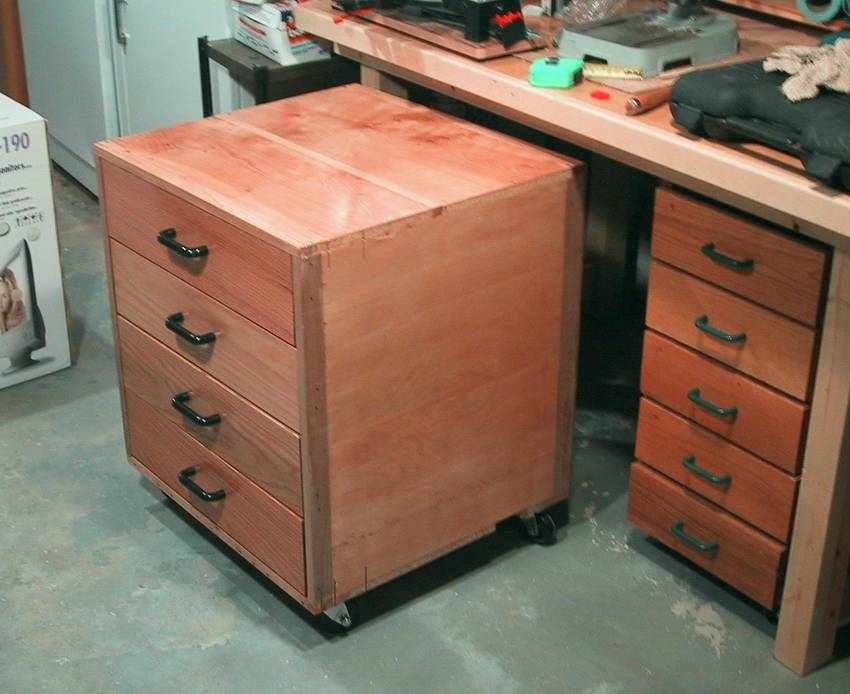
With the workbench conveniently open at the bottom, I made some rolling storage units that just fit under the workbench.
 Those rolling storage units consisted of just a plywood box, with drawers mounted on the inside.
A thin piece of plywood keeps it square on the back, and
splines for the box corners.
Those rolling storage units consisted of just a plywood box, with drawers mounted on the inside.
A thin piece of plywood keeps it square on the back, and
splines for the box corners.
First workbench in the new shop
 Because the workbench was easy to take apart and move, it was one of the first things I moved into
my present basement workshop.
Because the workbench was easy to take apart and move, it was one of the first things I moved into
my present basement workshop.
I hadn't yet built my other workbench with the many drawers, and I had re-purposed the rolling storage cabinet for upstairs. So at this point, I had no place to put away any of my tools when I took this photo. That's why it's so messy. Usually, when I feel overwhelmed, I clean up. But not being able to put things away was frustrating. One of my first projects was the workbench drawers.
 A year later, I made some drawers to go under this workbench. First I made a really big drawer that
rolls on rollerblade wheels on the floor. It's basically a wider and taller version of my
under bed storage drawers. That drawer is for
heavy and bulky items.
A year later, I made some drawers to go under this workbench. First I made a really big drawer that
rolls on rollerblade wheels on the floor. It's basically a wider and taller version of my
under bed storage drawers. That drawer is for
heavy and bulky items.
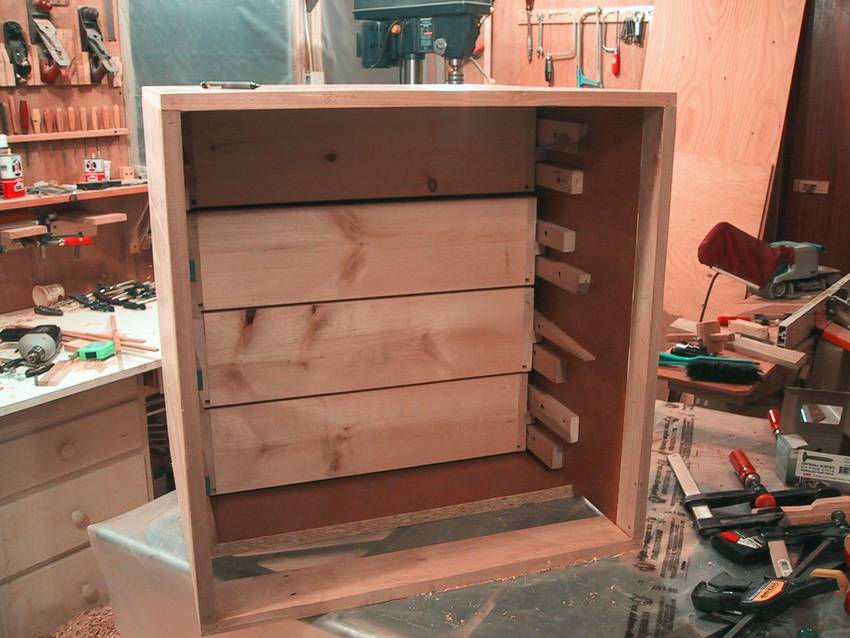
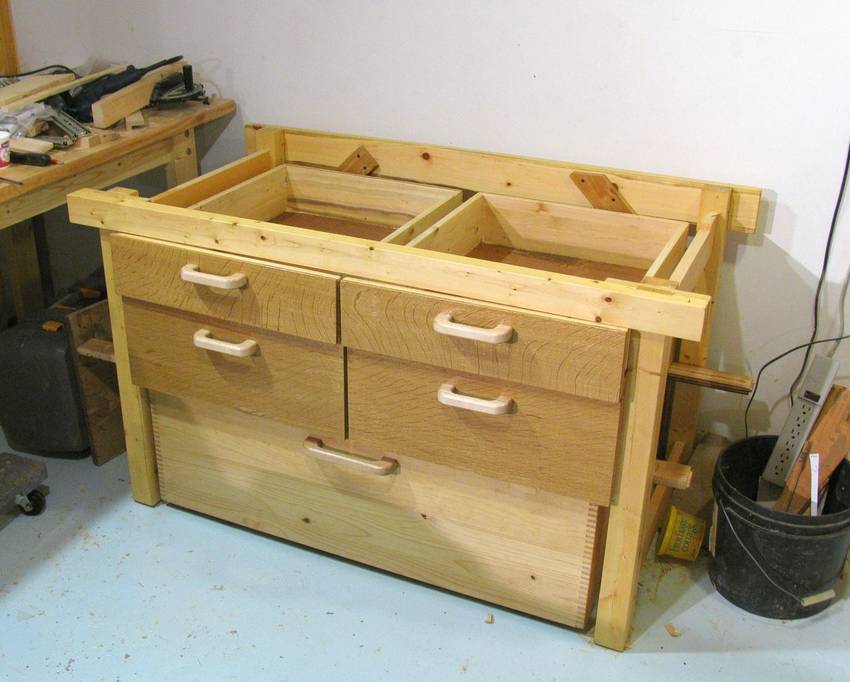 Next I built the smaller drawers to go above the large one. Here's checking how the drawers
will fit under the bench. They are just stacked on the bottom drawer with spacers to check the
layout.
Next I built the smaller drawers to go above the large one. Here's checking how the drawers
will fit under the bench. They are just stacked on the bottom drawer with spacers to check the
layout.
I had just built my screw advance box joint jig, so all the corners for the drawers are box joined. I also explored some ways of doing the front corners of drawers with box joints
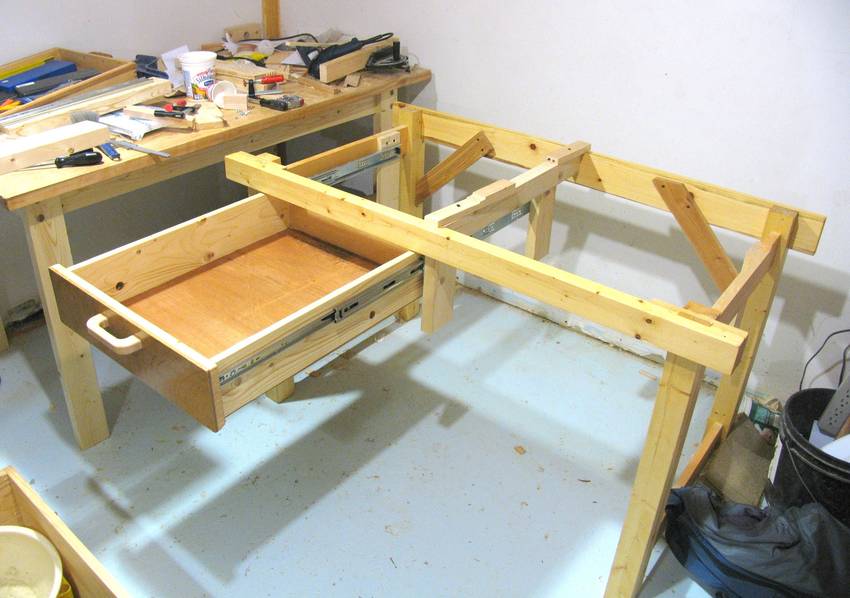 First drawer mounted. The support for the drawer slides in the middle of the
bench is only temporarily fixed in place so I can still slide it side to side.
The idea being to mount a drawer on either
side of the middle support , and then fix it in place based on that.
First drawer mounted. The support for the drawer slides in the middle of the
bench is only temporarily fixed in place so I can still slide it side to side.
The idea being to mount a drawer on either
side of the middle support , and then fix it in place based on that.
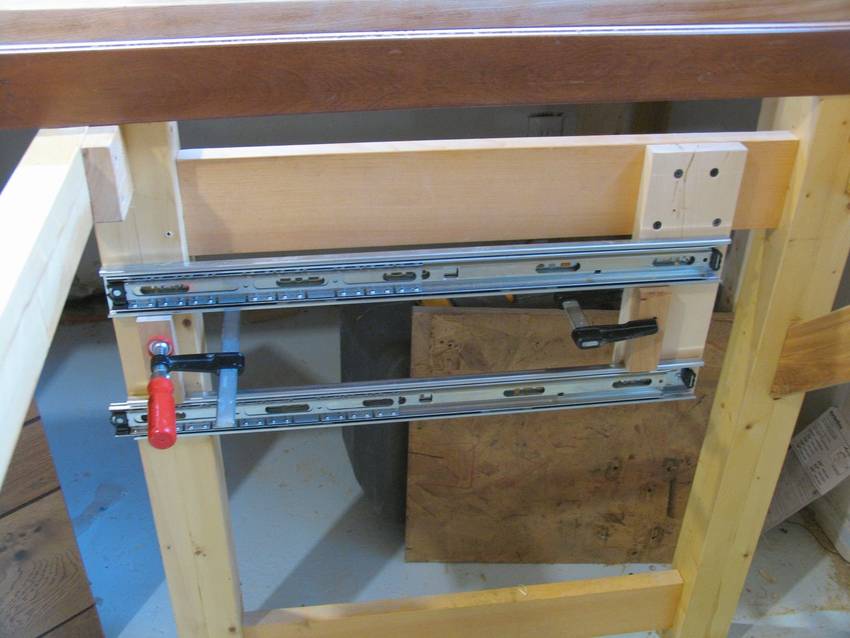 I'm using full extension telescopic drawer slides. Here's using two spacers (held in place with clamps)
to make sure the two slides are parallel to each other.
I'm using full extension telescopic drawer slides. Here's using two spacers (held in place with clamps)
to make sure the two slides are parallel to each other.
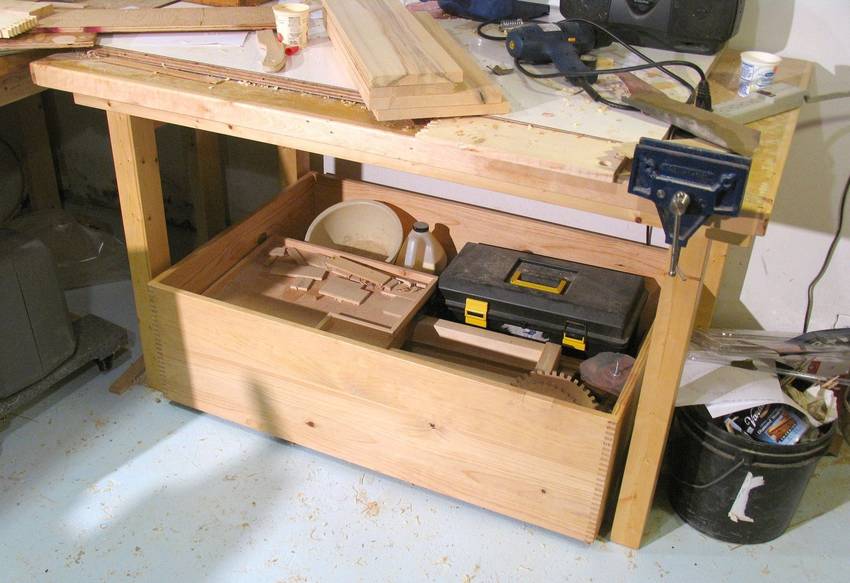
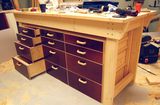
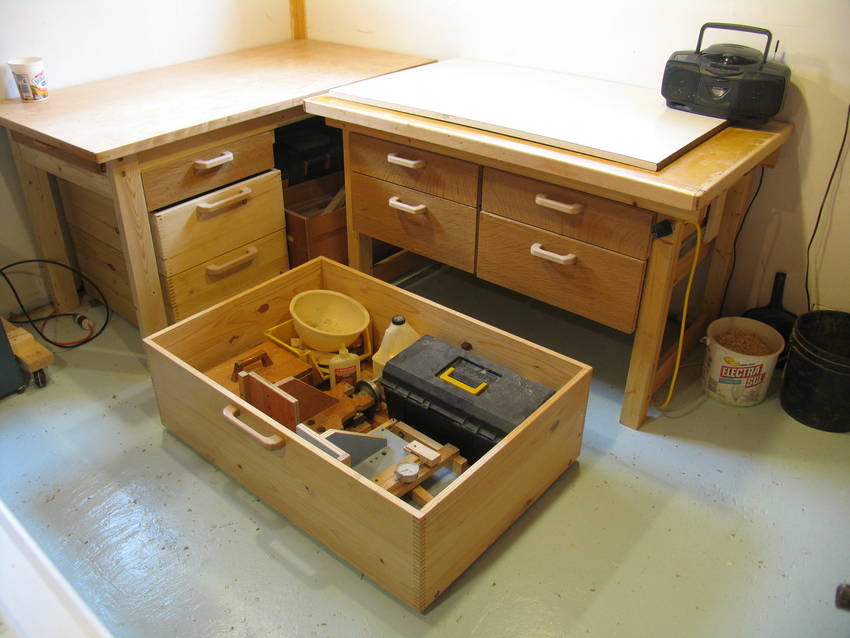 And here's the workbench in it's present state, with the big drawer on the bottom pulled out.
I really like that big drawer - useful for keeping bulky and heavy items in. For example, The thing
just in front of the toolbox is my quick set tenon jig.
And here's the workbench in it's present state, with the big drawer on the bottom pulled out.
I really like that big drawer - useful for keeping bulky and heavy items in. For example, The thing
just in front of the toolbox is my quick set tenon jig.
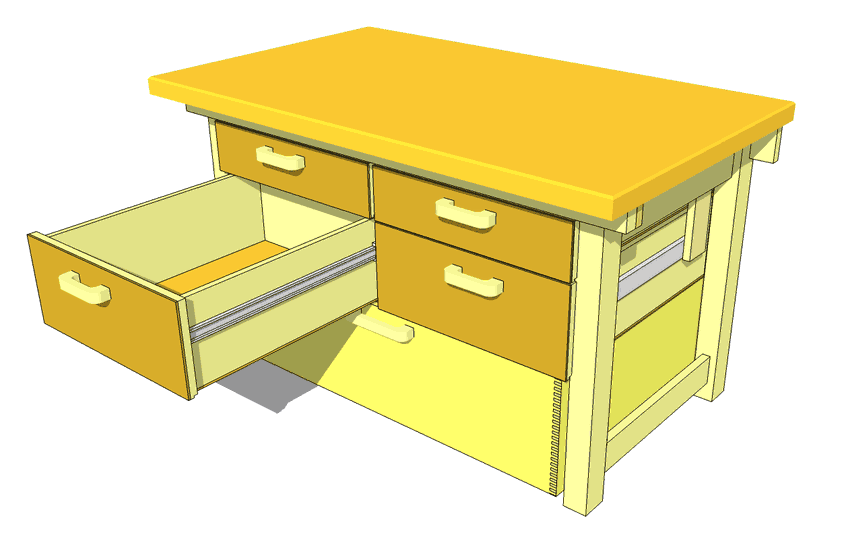 I drew up a fairly detailed SketchUp
model of this workbench to get the illustrations for this
article. You can download the SketchUp model. However,
unlike my plans, this model doesn't contain a lot of detailed and dimensioned views.
I drew up a fairly detailed SketchUp
model of this workbench to get the illustrations for this
article. You can download the SketchUp model. However,
unlike my plans, this model doesn't contain a lot of detailed and dimensioned views.
If you'd like to see proper plans for this workbench, email me. If enough people ask, I may take the time to draw up a nice set of plans for it.
New melamine workbench top
After many years of use, the white melamine coated piece of plywood I kept on top of it was getting scuffed up. I found a large slab of melamine coated particle board by a dumpster in 2016, which made for a prefect new top for this workbench!I like shooting stuff with a white background. And the melamine is great because glue drippings can easily be scraped off with a chisel.
In the above video, you can see the screws drawer is quiet a mess. Have since made a video about that drawer: Screws drawer organized
See also:
 Building a (much simpler)
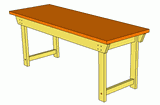 Simple workbench plans
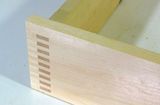 Box joined drawers
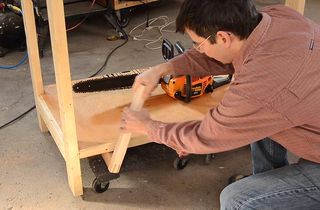 Dolly movable workbench
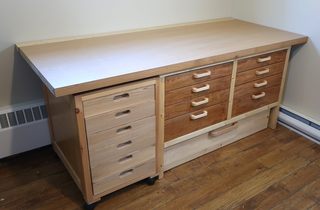 Building a workbench with lots of drawers
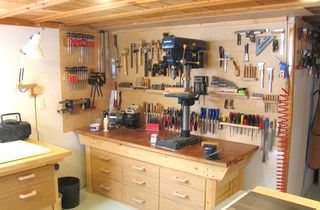 My basement workshop (2009)
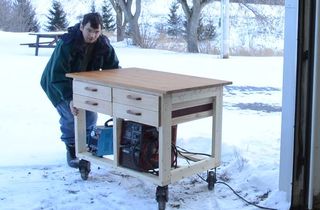 Workbench on wheels
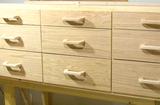 Workbench drawers
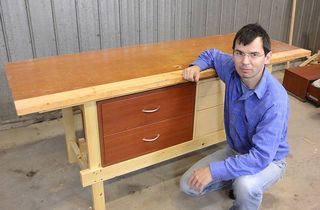 Quickie workbench
with the pantorouter
 Kevin's knock-down
workbench
 Mattias Karlsson's workbench project
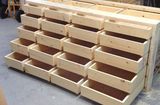 Ryan's Workbench
drawers
Back to my woodworking website.