Installing an electrical socket in an existing wall
My friend Melissa wanted to have an electrical socket installed to be hidden behind
her new wall mounted LCD TV, and managed to persuade me to do it.
The socket needed to be mounted just 1 meter above an existing socket, so the
installation didn't involve much of a challenge fishing wires through walls.
So I knew the whole thing could be done within a relatively deterministic
amount of time.
 I started by making a small hole in the drywall roughly where I wanted the socket to go.
I started with a small hole, so I could make sure there was hollow space where I wanted
the socket to go, and also to feel for the exact location of the stud before I cut it
much bigger.
Even though I was using a rework socket that can be mounted directly in drywall, it's
always best to put a new socket next to a stud, so that it can be screwed directly into
the wood for good measure.
Shown is the outline I drew from the template that came with the socket, though I didn't draw
the part of the outline on the left - that's where I attach it straight to the stud.
Rework sockets have flip out wings on the ends for holding the socket straight in drywall.
The wing flips out when the screw it's attached to is turned
clockwise for tightening. This causes the socket to clamp the drywall between the flip out
wing, and the larger flanges on either end of the electrical box. It's a neat system,
although I am always skeptical how well the socket would hold if mounted just
to the edges of the drywall like that.
|
| 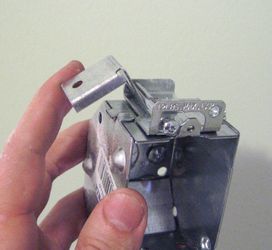
The flip-out wing |
|
| 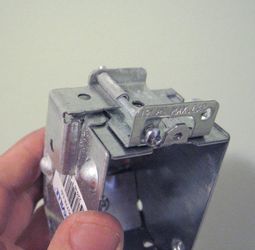
Wing position while inserting |
|
| 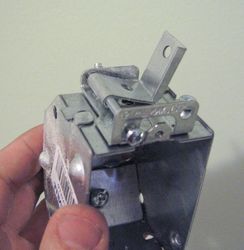
Wing position once installed
|
 It's best not to try to follow all the corners of the outline when initially cutting the hole.
In fact, I usually like to go a little smaller than the outline. It's easy enough to enlarge
the hole afterwards, but impossible to make it smaller. And the template is nearly the size
of the cover plate (see first image of the article), so there's little room for error.
A utility knife will do the job just fine for drywall. First cut firmly along the lines,
then keep doing this until you get fairly deeply, next use a saw-like action with the knife
to cut all the way though.
If your house uses plaster walls (1950's or earlier), its not as easy to cut a nice hole for
a socket, you might want to read about installing in plaster walls.
 A fairly clean cut, the initial rectangle is removed.
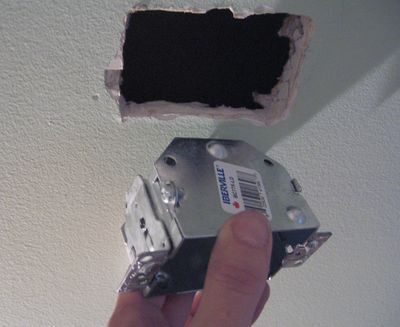 Next it's time to fit the socket, expanding the hole to allow for all the
bumps and protrusions on the socket. Also note that I removed the wing on the left side of the socket,
and bent the metal flat, so that I could screw that side directly to the stud.
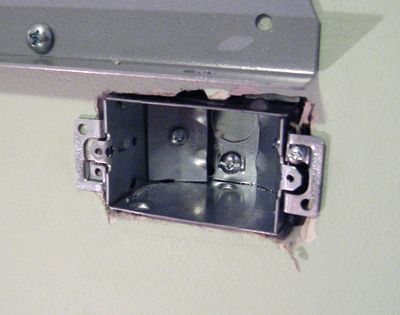 And checking the fit in the final sized hole. Note how the hole has been expanded on the right side
to make room for the flip out wing. The hole is still smaller than the one the template
would have suggested.
Wiring to an existing socket
Next it was time to tap into the existing socket, which was just a meter below
the new socket. Don't forget to take out the breaker before you do this, or you will get
a rather jolting reminder to do so when you grab the socket by its terminals (speaking from
experience, although not on this occasion)
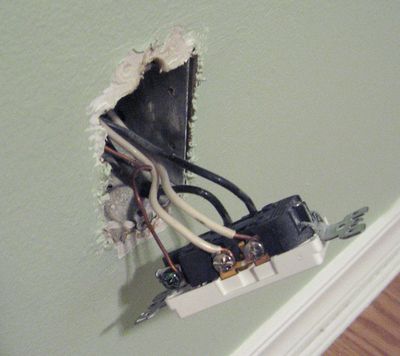 Removing this socket, we can see that it is part of a chain of socket, as it is
not a split socket but has two cables hooked up to it, one feeding power, the other
going on to the next socket.
They used the socket to
connect the wires together - this may or may not be conforming with present electrical
codes in some jurisdictions. I think primarily because if somebody does work, one can
mess up the circuits down the line. Especially if one interrupts neutral (white) while
leaving hot (black) connected.
Of greater concern to me was that both wires fed in from the top, so those holes
in the metal box were already full.
I could have tried pulling a second wire into one of the holes, but that
is kind of ugly, and probably also a violation of electrical codes.
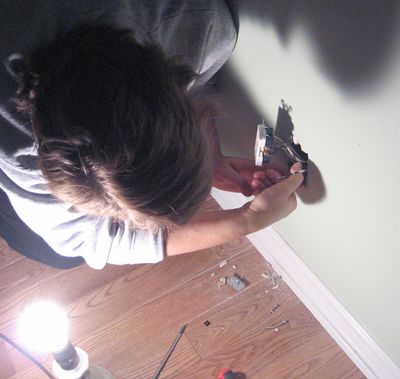 So I decided to try to pass the wire behind the socket, catch it with
a pair of surgical forceps through the hole on the bottom and pull it in.
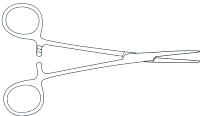
Surgical forceps are good for
this sort of job, because they are narrow, with the hinge fairly close
to the front, so you can reach through a small hole and still open them.
You can usually find used surgical forceps at surplus stores for a few dollars each.
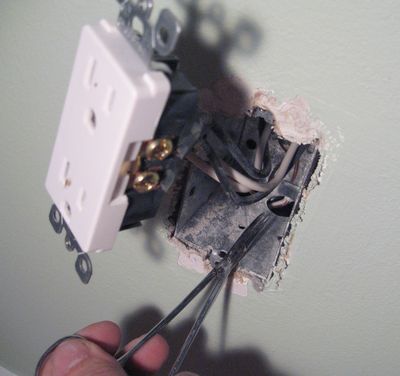 To make it easier to catch the wire, I stripped the outer insulation off
the end of it, so that I could pull one conductor at a time into the hole.
In retrospect, it would have been easier if I had stripped the inner insulation
off the very end of the wires as well.
The forceps were barely strong enough to get one wire into the hole at a time.
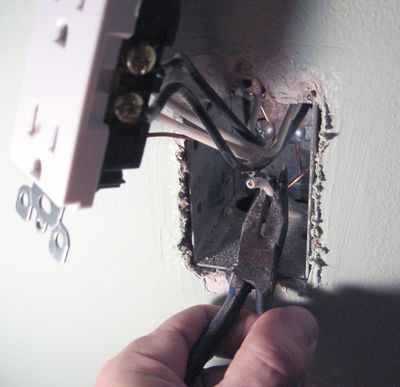 Once I had the wires in, I used a pair of needle-nose pliers to pull them further
into the socket far enough so that the main insulation sheath was pulled into
the socket.
The next step was to put the strain relief back on the bottom of the socket, though
I neglected to take a photo of that step.
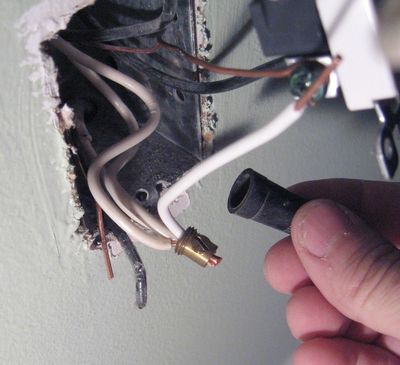 To be on the safe side, I decided to make the connection of the neutral wires
all with one wire nut.
With the feed wire, one wire going off to the next socket, one wire to the new socket, and a
short wire to the existing socket, it was four wires to connect together.
For four or more wires, the screw terminal wire nuts
work pretty good, as long as you tighten them enough. It's best to hold
the brass sleeve in a pair of pliers while tightening the set screw,
just to get enough torque. Next, screw the plastic cap back on it.
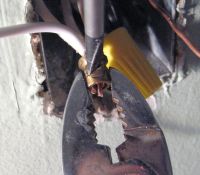
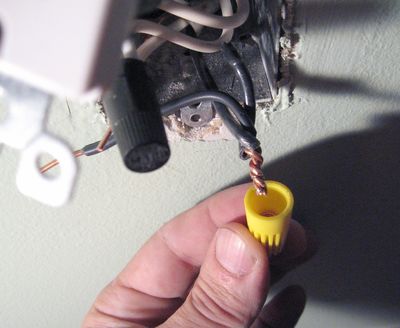 For the hot (not neutral) lead, I left it going through the socket, so I only had three
wires to contend with, and used a regular wire nut.
The key to having these work well is to twist the wires together with a pair of square
nosed pliers before twisting the wire nut on.
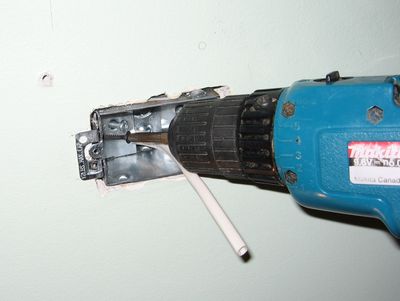 With the wire connected into the bottom socket installed and secured, it was time to feed
the wire through the rework socket, and then stick
the rework socket back in the hole and screw it in.
A great advantage of the rework sockets is the way they wires feed into them
at the back, which allows you to insert the socket into the hole in the wall with the wires
already in it.
With the funny clamping wing removed from the left side, I was able to screw the socket
directly into the stud. I did have to drill a larger hole in that side of the box
to get even a drywall screw through.
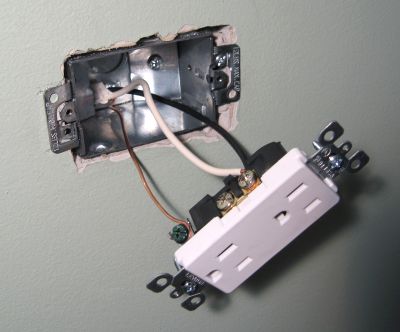 And with the wiring on the socket all done.
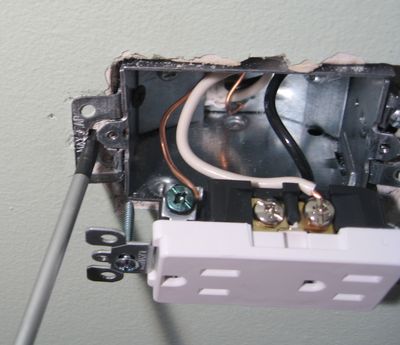 There is a bit of an incompatibility between the rework sockets, and the "decora" style
switch and socket plate covers. The screws for these tend to hit the flanges
of the rework sockets, so it helps to bastardize the rework sockets a little to
make room for the screws. Here's me opening the space a little with a screwdriver.
Another approach is to crimp the flange a bit narrower where the screw goes
with a pair of wire cutters. It's all a rather inexact business.
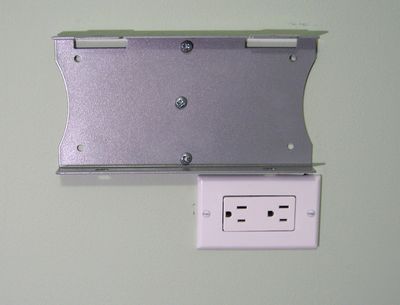 And finally, the socket, with the wall bracket mounted back on the wall.
Time to turn the electricity back on and mount the TV on the wall.
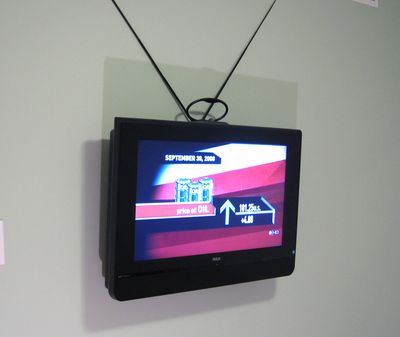 And with the TV mounted on the wall. Melissa likes the juxtaposition of the fancy
new HDTV and the rabbit ears. She's planning on mounting a shelf for the DVD player
just below the TV. With the socket behind the TV, there will be no dangling power
cords.
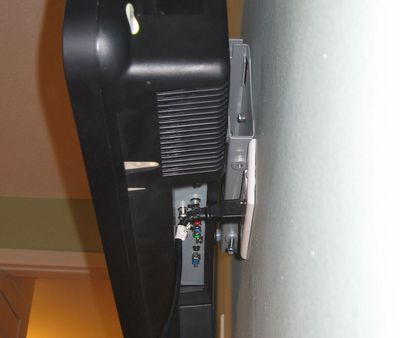 And the socket, as seen from behind the TV. Maybe we should have mounted it
a centimeter lower to give the plug a little bit more room. We wound the cord
around the bracket to get it out of sight.
 I started by making a small hole in the drywall roughly where I wanted the socket to go.
I started with a small hole, so I could make sure there was hollow space where I wanted
the socket to go, and also to feel for the exact location of the stud before I cut it
much bigger.


 It's best not to try to follow all the corners of the outline when initially cutting the hole.
In fact, I usually like to go a little smaller than the outline. It's easy enough to enlarge
the hole afterwards, but impossible to make it smaller. And the template is nearly the size
of the cover plate (see first image of the article), so there's little room for error.
 A fairly clean cut, the initial rectangle is removed.
 Next it's time to fit the socket, expanding the hole to allow for all the
bumps and protrusions on the socket. Also note that I removed the wing on the left side of the socket,
and bent the metal flat, so that I could screw that side directly to the stud.
 And checking the fit in the final sized hole. Note how the hole has been expanded on the right side
to make room for the flip out wing. The hole is still smaller than the one the template
would have suggested.
 Removing this socket, we can see that it is part of a chain of socket, as it is
not a split socket but has two cables hooked up to it, one feeding power, the other
going on to the next socket.
They used the socket to
connect the wires together - this may or may not be conforming with present electrical
codes in some jurisdictions. I think primarily because if somebody does work, one can
mess up the circuits down the line. Especially if one interrupts neutral (white) while
leaving hot (black) connected.
 So I decided to try to pass the wire behind the socket, catch it with
a pair of surgical forceps through the hole on the bottom and pull it in.
Surgical forceps are good for
this sort of job, because they are narrow, with the hinge fairly close
to the front, so you can reach through a small hole and still open them.

 To make it easier to catch the wire, I stripped the outer insulation off
the end of it, so that I could pull one conductor at a time into the hole.
In retrospect, it would have been easier if I had stripped the inner insulation
off the very end of the wires as well.
The forceps were barely strong enough to get one wire into the hole at a time.
 Once I had the wires in, I used a pair of needle-nose pliers to pull them further
into the socket far enough so that the main insulation sheath was pulled into
the socket.
 To be on the safe side, I decided to make the connection of the neutral wires
all with one wire nut.
With the feed wire, one wire going off to the next socket, one wire to the new socket, and a
short wire to the existing socket, it was four wires to connect together.

 For the hot (not neutral) lead, I left it going through the socket, so I only had three
wires to contend with, and used a regular wire nut.
 With the wire connected into the bottom socket installed and secured, it was time to feed
the wire through the rework socket, and then stick
the rework socket back in the hole and screw it in.
 And with the wiring on the socket all done.
 There is a bit of an incompatibility between the rework sockets, and the "decora" style
switch and socket plate covers. The screws for these tend to hit the flanges
of the rework sockets, so it helps to bastardize the rework sockets a little to
make room for the screws. Here's me opening the space a little with a screwdriver.
Another approach is to crimp the flange a bit narrower where the screw goes
with a pair of wire cutters. It's all a rather inexact business.
 And finally, the socket, with the wall bracket mounted back on the wall.
Time to turn the electricity back on and mount the TV on the wall.
 And with the TV mounted on the wall. Melissa likes the juxtaposition of the fancy
new HDTV and the rabbit ears. She's planning on mounting a shelf for the DVD player
just below the TV. With the socket behind the TV, there will be no dangling power
cords.
 And the socket, as seen from behind the TV. Maybe we should have mounted it
a centimeter lower to give the plug a little bit more room. We wound the cord
around the bracket to get it out of sight.
 Installing a 240 volt circuit
 Pulling wires through walls
 Making a simple remote switch
 240 volt from dryer plug
 Fishing wires through a wall using magnets