Curved window trim capture and layout
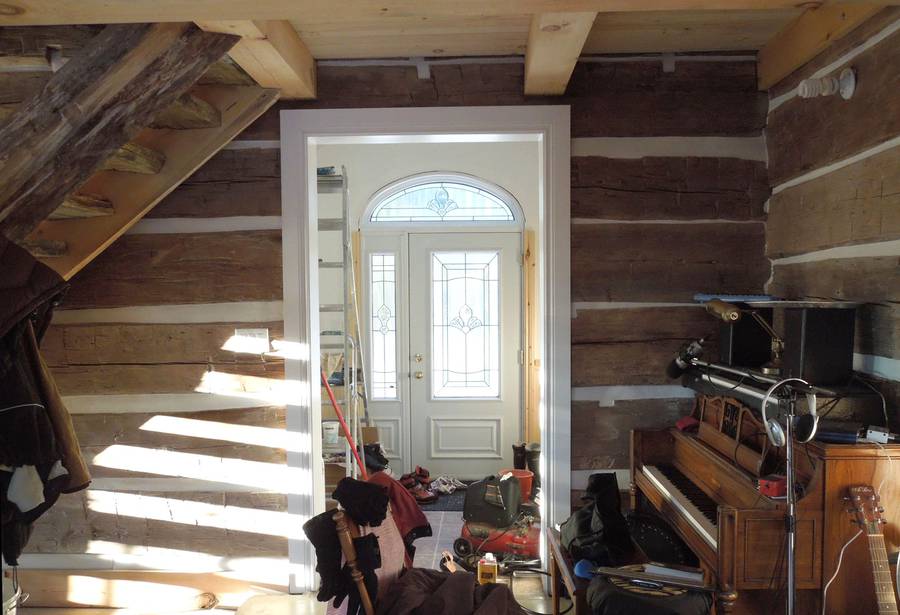 My friend Luc is in the process of finishing up his very unique
log house. He made use of used building materials where
he could. One item he managed to get cheaply was a new entrance door
with a curved window above it. But getting curved molding made to
go around that window proved to be a rather expensive prospect.
My friend Luc is in the process of finishing up his very unique
log house. He made use of used building materials where
he could. One item he managed to get cheaply was a new entrance door
with a curved window above it. But getting curved molding made to
go around that window proved to be a rather expensive prospect.
I figured this would be an interesting challenge, so I offered to try to make some curved molding for that window.
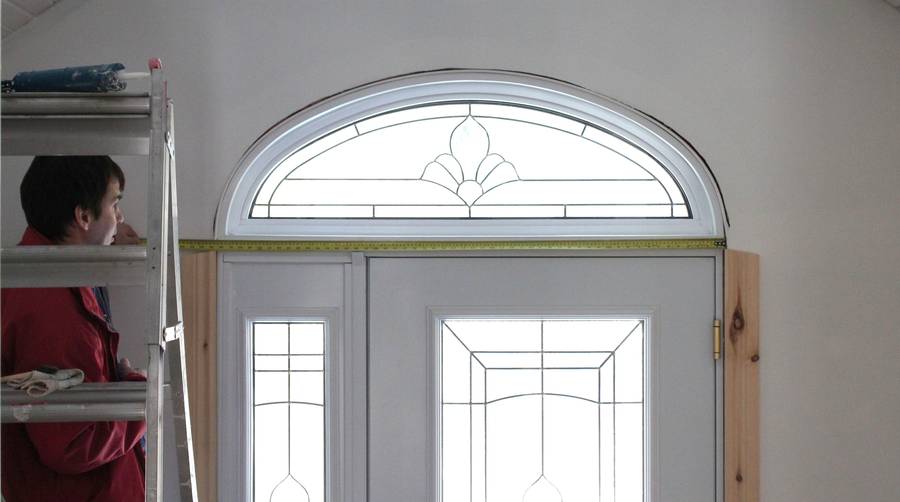 I captured the shape of that curved window by taking a photo of it.
Here's me holding a tape measure under window to add a scale reference.
I'll use that photo to make a template later.
I captured the shape of that curved window by taking a photo of it.
Here's me holding a tape measure under window to add a scale reference.
I'll use that photo to make a template later.
There's a few things to watch out for when doing this sort of thing. The camera needs to be parallel to the wall, and it's best to only use part of the frame near the center of the lens for the shape. Zoom lenses often have a bit of distortion near the edges - out of focus wouldn't be so bad, but often the image is actually a little warped towards the edges. If straight lines near the edges of a picture don't come out straight in the picture, that's camera distortion. A digital SLR with a 50 mm lens would probably be best, but we just used a regular zoom lens here.
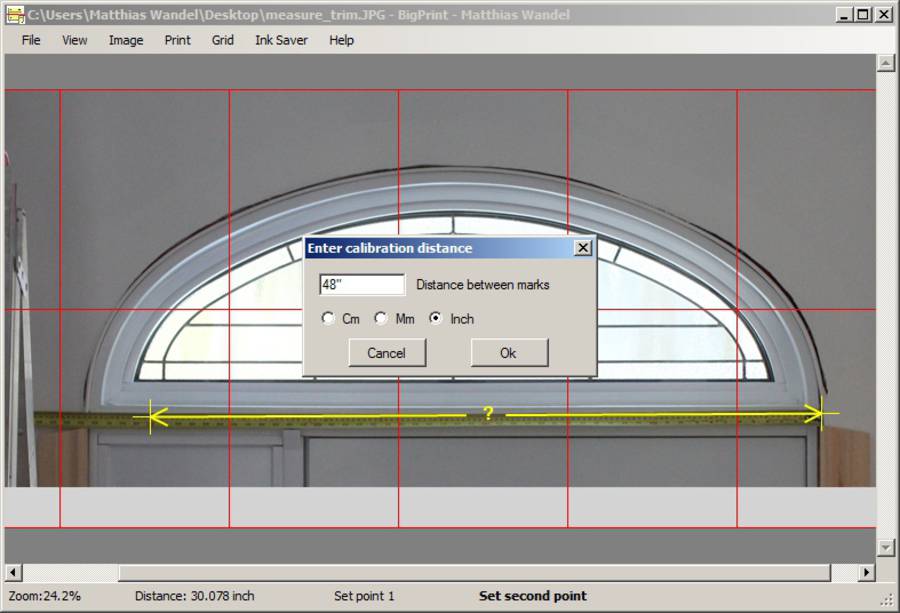 Next I load my image into my
BigPrint program.
I use "calibrate scale by distance" to get the size reference.
I mark the end and the 48-inch
mark on the tape measure, and tell the program that that these two
points are supposed to be 48 inches apart.
I normally use metric for this sort of thing, but the
numbers were too small to read and the 48-inch mark was conveniently in red.
Next I load my image into my
BigPrint program.
I use "calibrate scale by distance" to get the size reference.
I mark the end and the 48-inch
mark on the tape measure, and tell the program that that these two
points are supposed to be 48 inches apart.
I normally use metric for this sort of thing, but the
numbers were too small to read and the 48-inch mark was conveniently in red.
Once the scale is calibrated, the red grid indicates the page boundaries for printing it 1:1 across many pages.
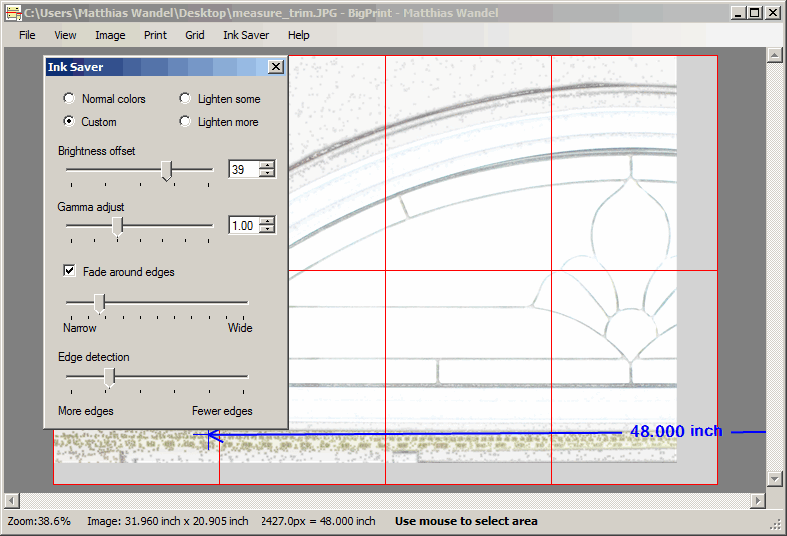 I hate wasting printer ink, so next I use the "InkSaver" menu
to turn up the brightness, and additionally fade out smooth areas
away from edges.
I only care about the second edge from the outside of the window.
That edge is the inside of the window opening, which is where
the window trim needs to go to.
I hate wasting printer ink, so next I use the "InkSaver" menu
to turn up the brightness, and additionally fade out smooth areas
away from edges.
I only care about the second edge from the outside of the window.
That edge is the inside of the window opening, which is where
the window trim needs to go to.
I also cropped the image to include just the left half of the window. The right half is just a mirror image of the left side.
 Next I turn on a diagonal grid to help line up the printed pages. Having
whitened out most of the image, I really need that grid to line the pages
up accurately.
Next I turn on a diagonal grid to help line up the printed pages. Having
whitened out most of the image, I really need that grid to line the pages
up accurately.
I don't need to print all the pages. So I select a rectangle that spans the four pages along the top, and select to print just that. After that, I separately select the bottom left page and print just that one. No need for the bottom right three pages - those don't contain any part of the curve.
The BigPrint program isn't a free program, but it costs much less than an ink jet cartridge, so if you end up doing this sort of thing often, it easily pays for itself. Too much ink on the paper can also cause it to distort a little.
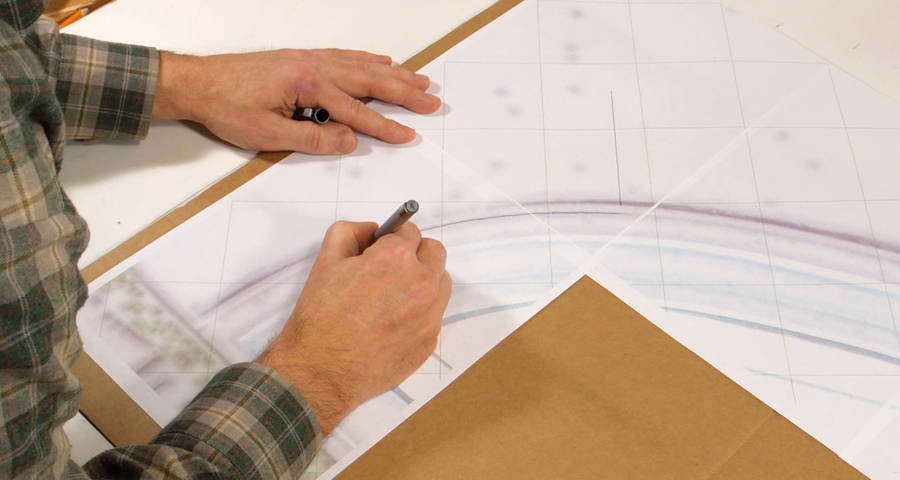 Having printed the pages and glued them together, I figure out where
I want to join the trim. I'm drawing a heavy line with a ball point
pen along the curve I need and where the pieces join.
Having printed the pages and glued them together, I figure out where
I want to join the trim. I'm drawing a heavy line with a ball point
pen along the curve I need and where the pieces join.
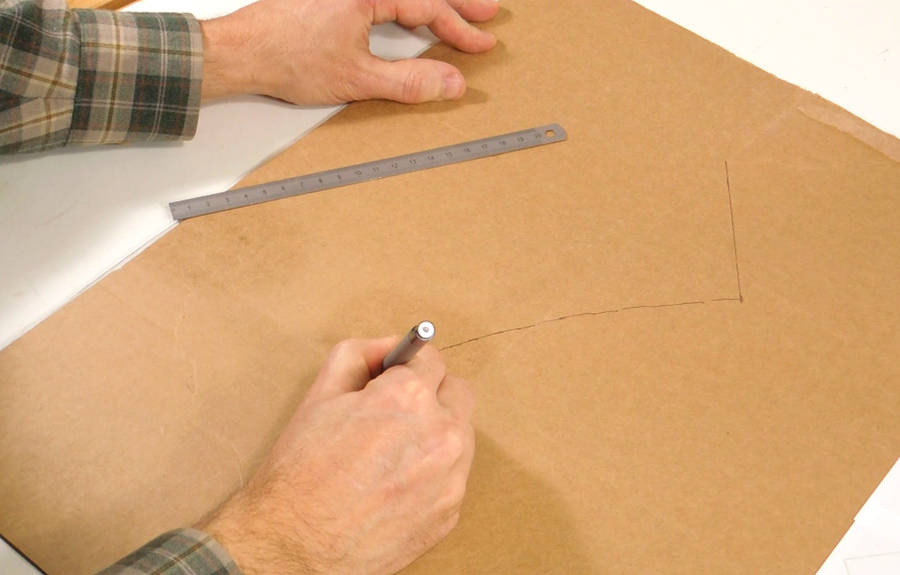 Drawing that deep dark line left a slight indentation in the cardboard,
so next I trace that indentation on the cardboard. This way, I can make
cardboard templates without destroying the paper original.
Drawing that deep dark line left a slight indentation in the cardboard,
so next I trace that indentation on the cardboard. This way, I can make
cardboard templates without destroying the paper original.
Boxboard from a large breakfast cereal box would have been better than the cardboard I used, but I always mix oatmeal and berries for breakfast, and those come in bags, not boxes (also much cheaper).
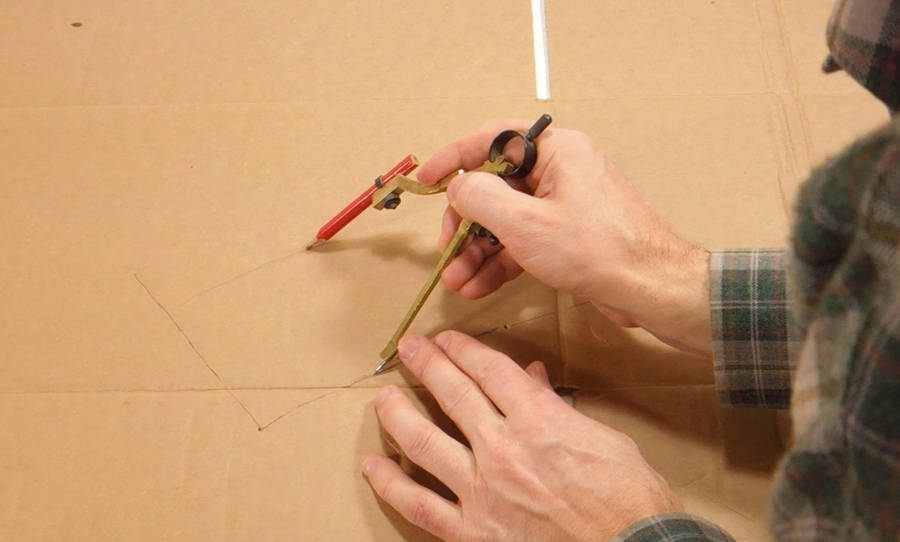 Next I set a compass to the width that I need the trim to be, and
use it to mark the outside edge of the curve.
Next I set a compass to the width that I need the trim to be, and
use it to mark the outside edge of the curve.
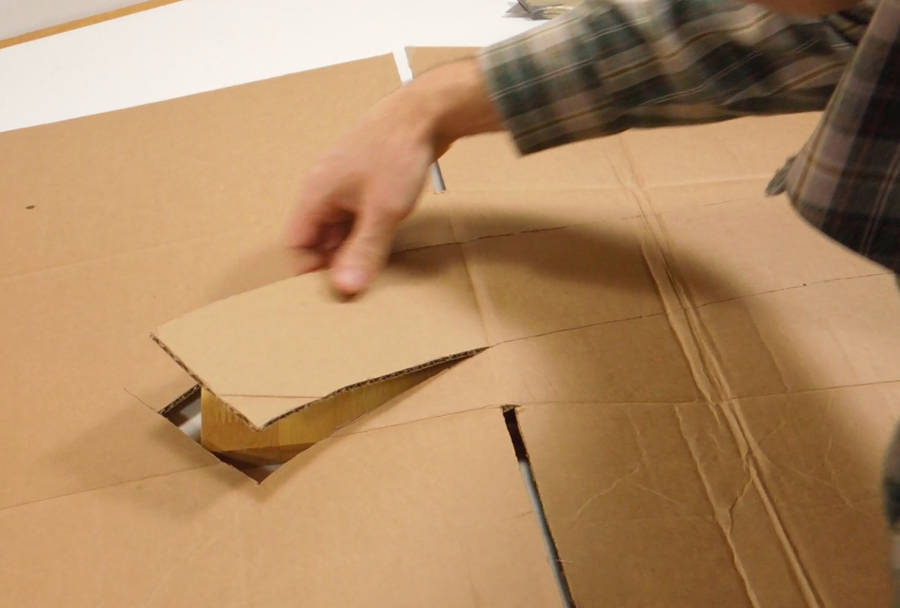 Then scoring along the lines with a utility knife, and my templates
pop out of the cardboard.
Then scoring along the lines with a utility knife, and my templates
pop out of the cardboard.
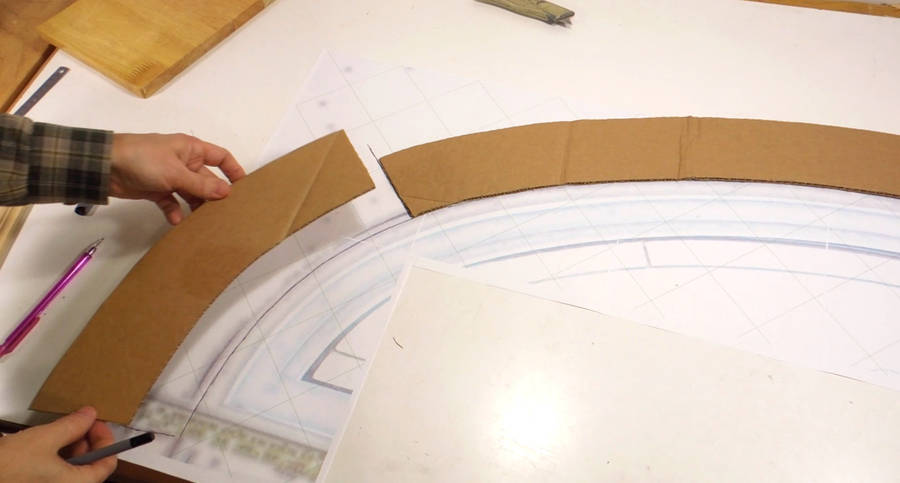 Checking the cardboard segments against the printout, just to be safe.
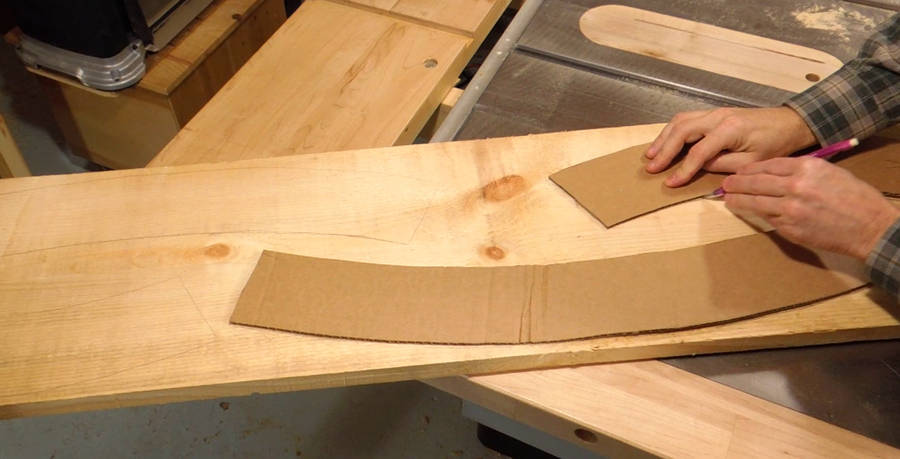 And then using the cardboard templates to lay out where I will
cut the templates out of the board.
And then using the cardboard templates to lay out where I will
cut the templates out of the board.