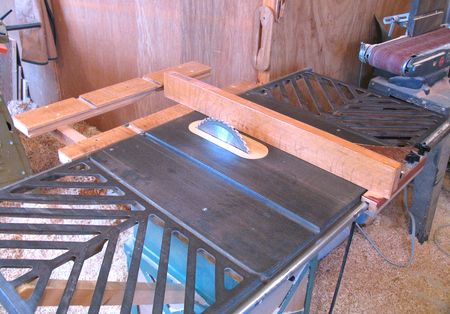

I found an old Rockwell Beaver contractor style table saw at a yard sale, for $135 back in 1996. It had some dried paint stuck to the rusty table, a dull 7 1/4" blade mounted, and somewhat neglected looking, but with some potential. I bought the saw as a stop-gap measure to keep me from spending $2000 on a proper cabinet maker's table saw.
Even with a good blade in it, I could tell there was a bit of blade wobble. I disassembled it and took the arbour out to see what I could do with it, but couldn't even get one of the bearings off it. Calling a local electrical repair business, I was surprised that I was still able to buy a new arbour for it, for a cost of $50. It came with one of the bearings already attached - I guess it wasn't meant to come off. Mounting the new arbour, I found the pulley had a bit of slack, but shimming it up with the aluminium from a pop can, I got it on perfectly centered. It cut nice and smooth after that. I have no pictures of the shaft replacement part of the process, but the other improvements I have made are documented on this page. I have however since then come up with another procedure for fixing a saw arbour.
I also rewired the 1.5 hp motor for 240 volt operation, which gave it a little more 'oomph' because the voltage drops less when its under load.
This saw was my only table saw from 1996 to 2007. Not because I didn't want to spend the money, but because this cheap old saw, tuned up right, was good enough for my needs.
When I set up my new basement workshop in 2007 though, I had room for a bigger table saw, and bought a new Delta hybrid table saw.
When I moved the saw to my new workshop in 2017, I took the opportunity to make a video about it:
Later in 2017 I moved my Delta hybrid table saw into that shop and moved this one into the basement of the house to set up a shop in the basement there.
And in 2018, we moved again
and I set it up in a basement room, but rewired it back
to 120 volts
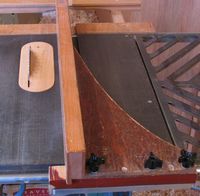 New rip fence
One of the first things I'd noticed about the saw when I bought it was that the rip fence was
very crooked. On examination, it was clear that the casting had at some point been broken, and
welded back together so inaccurately that the fence was rendered unusable. Short of re-breaking
and re-welding, there's nothing I could do to fix it. It wasn't a good rip fence to begin with
so I threw it away and built a new one.
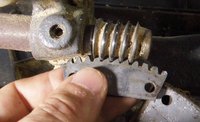 Worn out height adjustment repair
Fixing a worn out height adjustment mechanism on my brother's table saw.
This repair was accomplished by modifying the existing parts, so no new parts
were required.
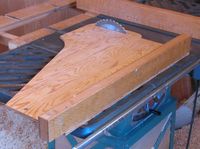 Sliding table substitute
The T-slot miter gauge for crosscuts was missing. I was accustomed to using a table saw
with a sliding table, so never thought very highly of these miter gauge things. So I built myself
a sliding table substitute.
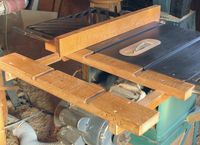 Table saw table extension
I often find the outfeed table on a lot of saws frustratingly short. So I built an
extension onto the table. I also found that the side extensions which were only supported
by a 5/8" steel rod would flex when cross cutting large pieces, so added a support for that.
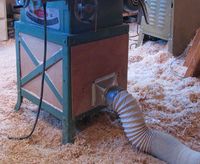 Dust extraction system
On ripping a lot of wood for one of my projects, I found myself choking with
dust, because the saw just ejected the flying sawdust out the bottom. So I closed
off the stand and added a dust hose to my dust vacuum..
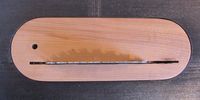 Zero clearance table saw throat insert
Finally, at some point the aluminium throat piece broke, so I built a new wooden throat
insert.
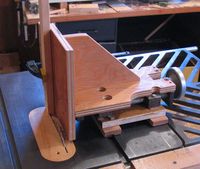 Tenon cutting jig
I also built myself a tenon cutting jig. This is the second jig.
The first one I built was meant as a stopgap measure until I was willing to splurge on a proper
commercial tenon cutting jig. But once I built my second jig, I came to the realization
that commercial jigs were no better than my home made one.
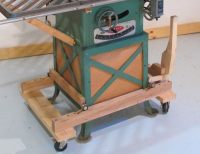 Mobile table saw base
After this table saw stopped being my primary table saw, I built a lifting mobile
base for it so that the saw could easily be wheeled out of the way.
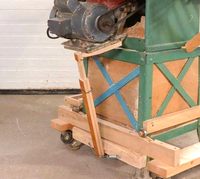 Vibration dapener
A friction dampener to cut down on vibrations coming from the motor.
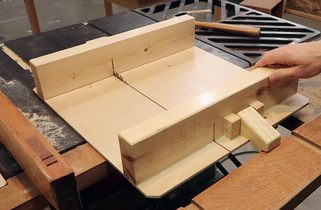 Making a sled for this saw (2018)
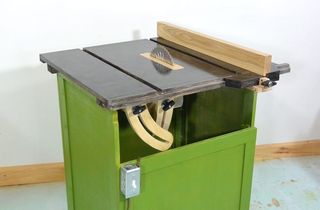 Building a table saw (2013)
 I cut my finger on the table saw (2017, video only)
 Dad's felder table saw (2013)
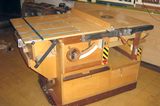 Hector's homemamde
To my Woodworking website, or go to the Woodworking tools & techniques index