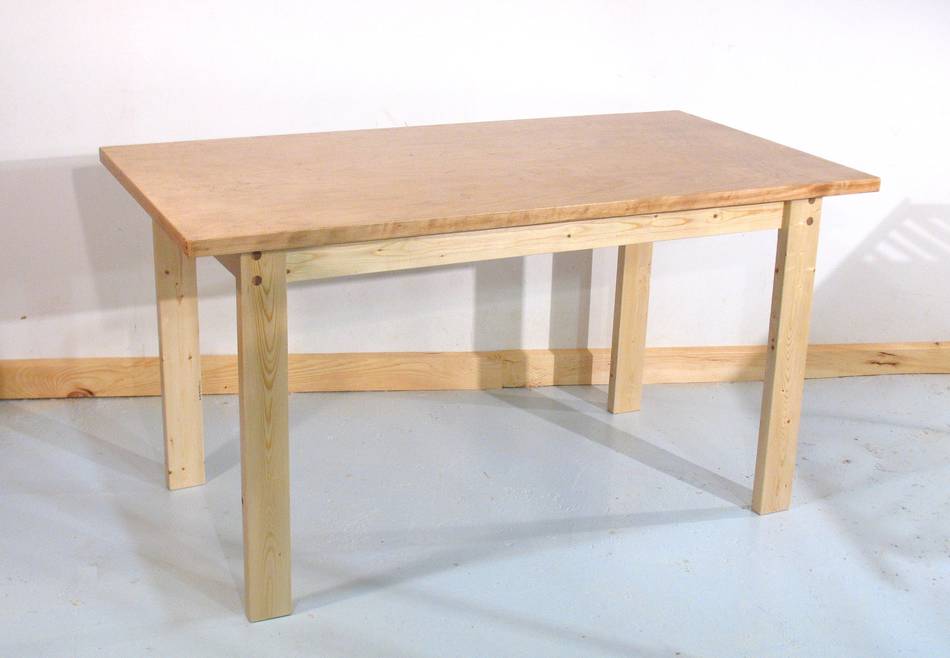
How to build a table
This article also available in Portugese,
Spanish and Russian
 I have come to realize that a lot of people who visit my website are not
expert woodworkers, and don't necessarily have a workshop full of tools.
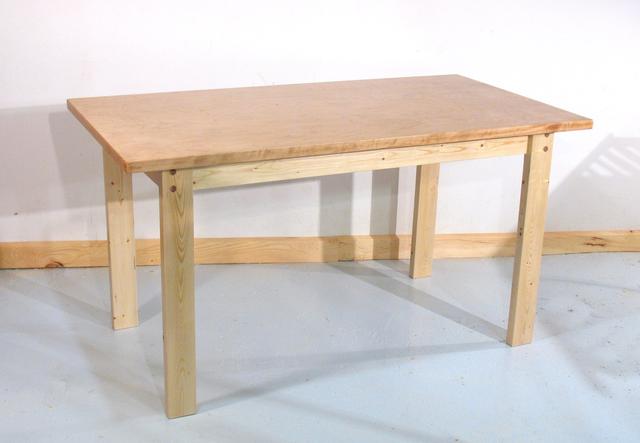
So I wrote this article on how to build a table without having a workshop full of
tools, or even a table saw. The main tools you will need are a circular saw, a hand drill,
a square, and at least two bar clamps.
I have come to realize that a lot of people who visit my website are not
expert woodworkers, and don't necessarily have a workshop full of tools.
So I wrote this article on how to build a table without having a workshop full of
tools, or even a table saw. The main tools you will need are a circular saw, a hand drill,
a square, and at least two bar clamps.
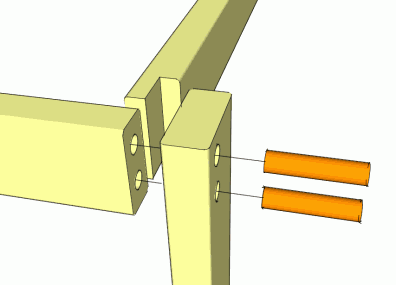 The table is put together from 2x4 lumber. The only joinery necessary is at the
corners. The corners are put together with dowels for one part, and screws for
the other part. The drawing at left shows how the pieces go together.
The table is put together from 2x4 lumber. The only joinery necessary is at the
corners. The corners are put together with dowels for one part, and screws for
the other part. The drawing at left shows how the pieces go together.
Ensuring square cuts
 When cutting off the 2x4's, it is important to make sure the cut is straight and square.
You can mark the cuts with a square and follow the cuts with a circular saw, but
using a square to actually guide the circular saw is even better.
When cutting off the 2x4's, it is important to make sure the cut is straight and square.
You can mark the cuts with a square and follow the cuts with a circular saw, but
using a square to actually guide the circular saw is even better.
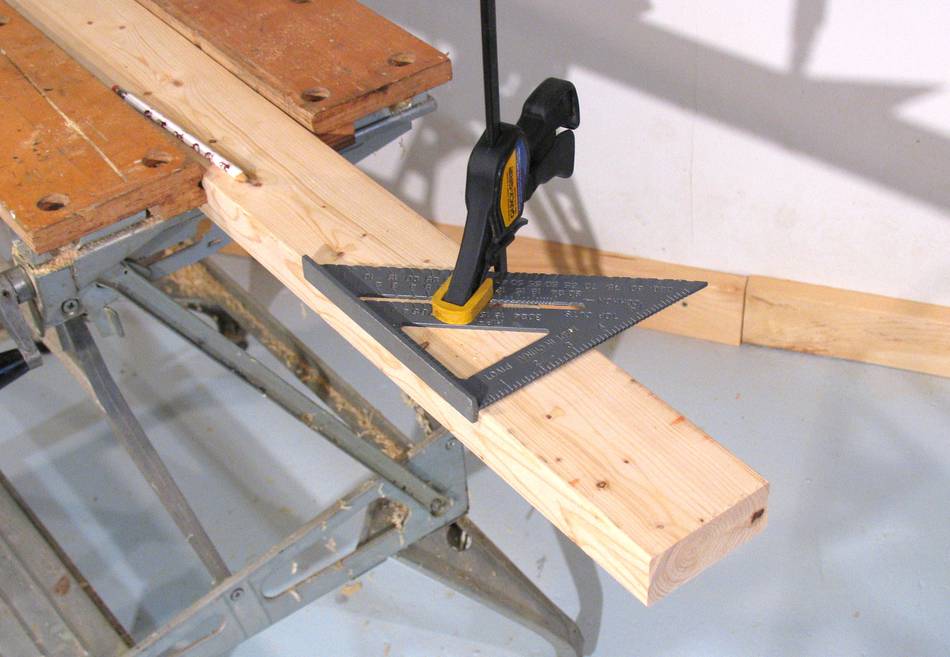
A rafter square, clamped to the 2x4 works quite well as a guide
for the circular saw. I like using a rafter square because they are small,
sturdy, accurate, and inexpensive. They are called rafter squares because they can be
used to mark angles for cutting off rafters at an angle.
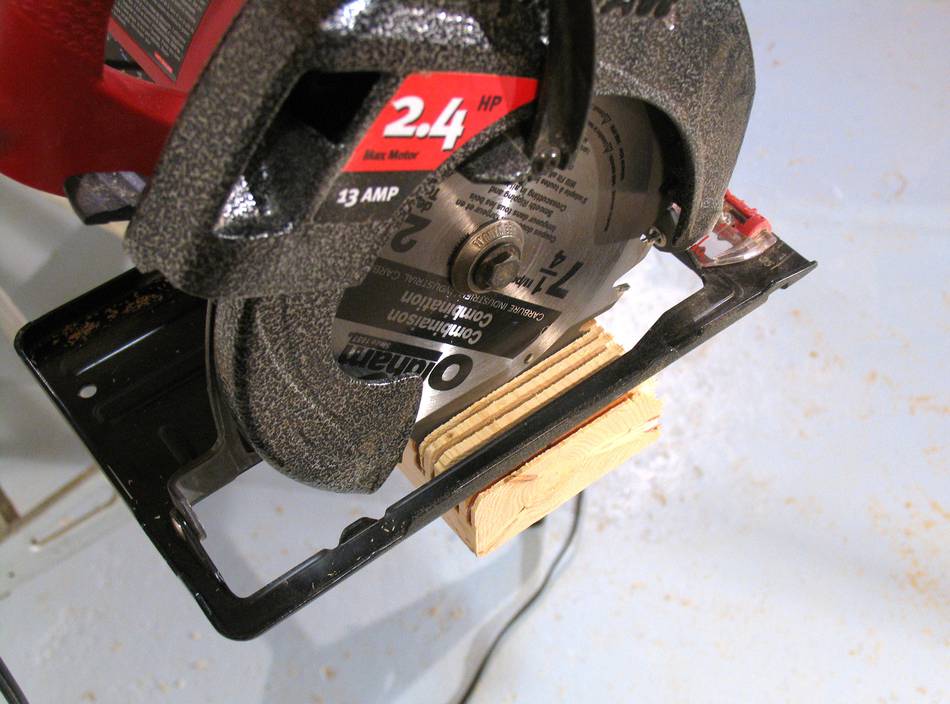
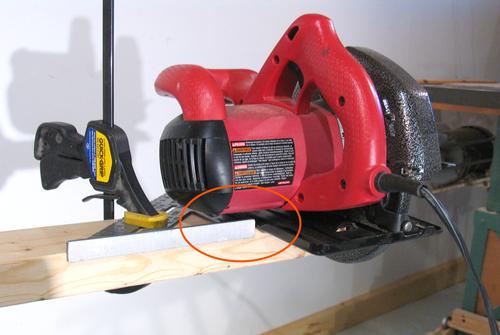 To make the cut, press the shoe of the circular saw up against the square. You will have to
set the saw to less than its full depth of cut, or the saw's motor will hit the square.
A normal (non cordless) circular saw can cut to a depth of about 2.5", so even at less
than full depth, it will still easily cut through a 2x4.
To make the cut, press the shoe of the circular saw up against the square. You will have to
set the saw to less than its full depth of cut, or the saw's motor will hit the square.
A normal (non cordless) circular saw can cut to a depth of about 2.5", so even at less
than full depth, it will still easily cut through a 2x4.
Depending on the shape of your circular saw's shoe, and the thickness of the square,
it may help to put something under the square to bring it up a bit, so that
its not pressing against the round edge of the circular saw's shoe.
Cutting the rabbet
 The design of this table requires a rabbet to be cut at the end of the rails, or 'apron'
that run under the table's edge. When cutting these with a circular saw, its easiest to just make a
series of side by side cuts, about 1/4" apart. Use a square clamped to the piece of wood
as your guide for the last cut. the last cut should be such that the rabbet is 1.5" wide.
The position of the other cuts doesn't matter too much, and
you can cut those freehand.
The design of this table requires a rabbet to be cut at the end of the rails, or 'apron'
that run under the table's edge. When cutting these with a circular saw, its easiest to just make a
series of side by side cuts, about 1/4" apart. Use a square clamped to the piece of wood
as your guide for the last cut. the last cut should be such that the rabbet is 1.5" wide.
The position of the other cuts doesn't matter too much, and
you can cut those freehand.
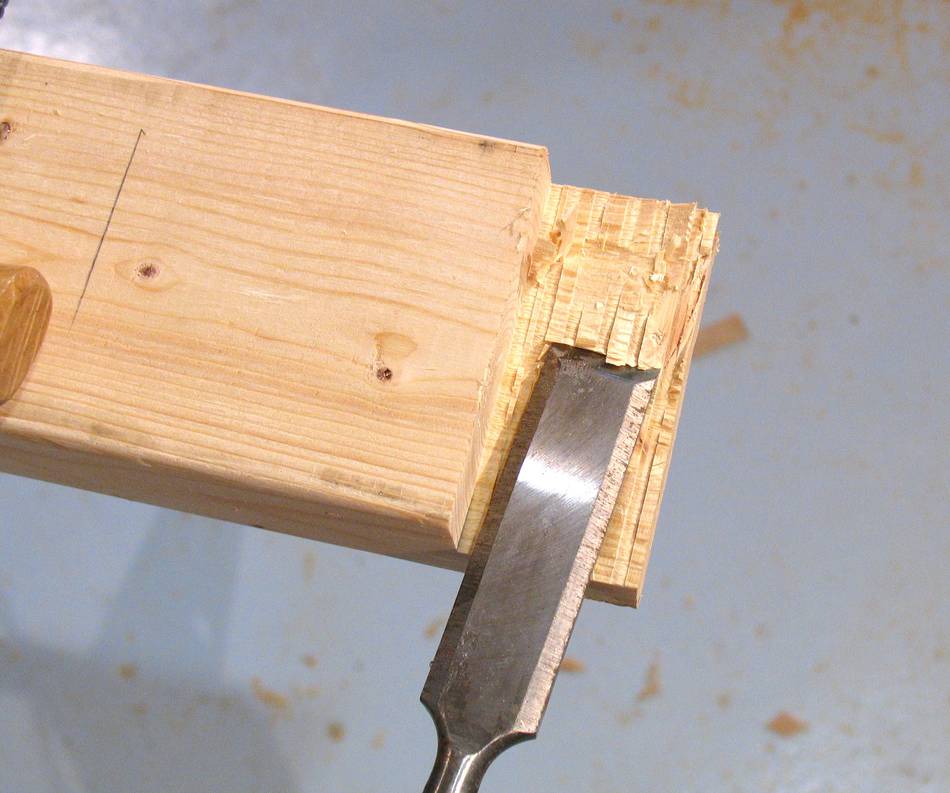
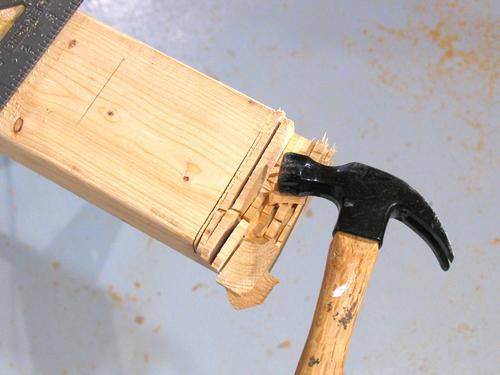 After making a series of cuts, just tap the remaining bits out with a small hammer.
These should come out quite easily.
After making a series of cuts, just tap the remaining bits out with a small hammer.
These should come out quite easily.
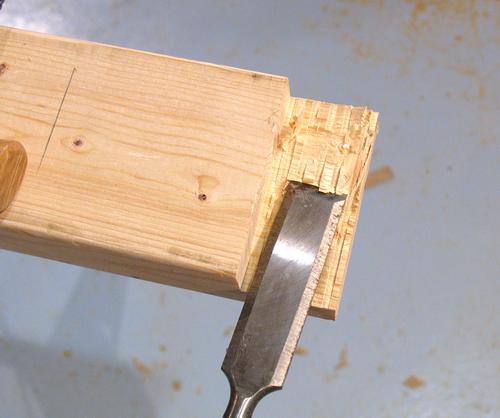 Use a chisel to clean out what is left. It's best to clamp your work piece against a
sturdy table while you do this. Provided that your chisel is sufficiently sharp,
you should be able to do this cleaning out just by pushing it, or tapping the back
of it with your wrist.
Use a chisel to clean out what is left. It's best to clamp your work piece against a
sturdy table while you do this. Provided that your chisel is sufficiently sharp,
you should be able to do this cleaning out just by pushing it, or tapping the back
of it with your wrist.
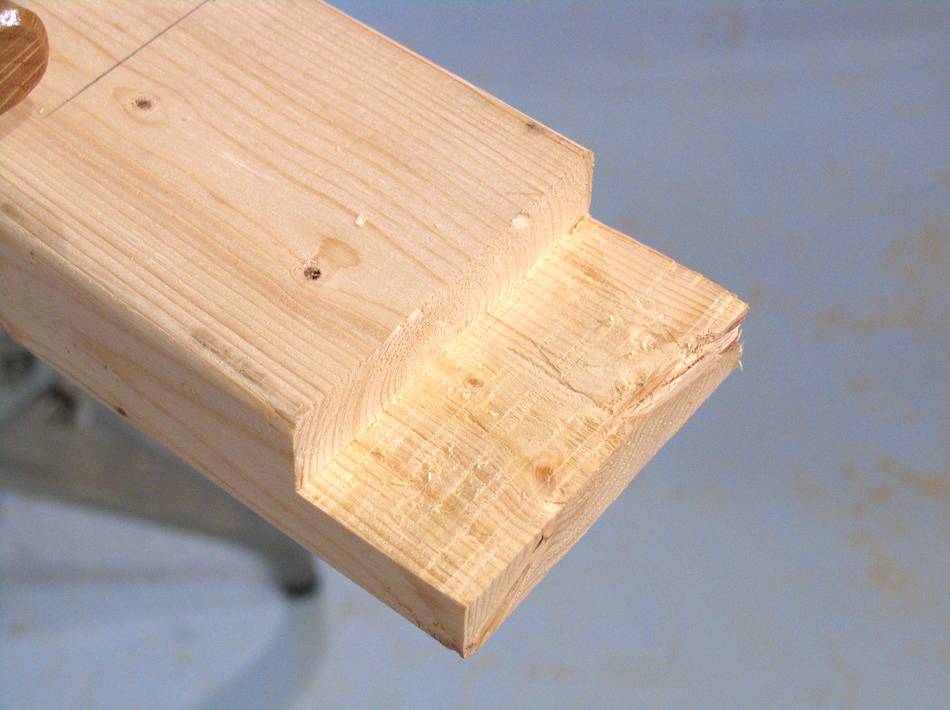
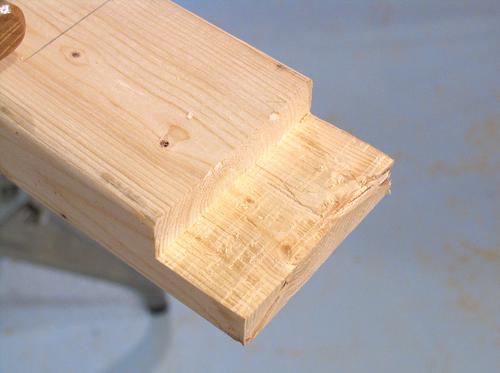 This is what the rabbet should look like when its cleaned out. It doesn't have to be super
smooth, just flat overall, as this surface doesn't show on the finished table. You will
need to cut four of these rabbets overall - one on the end of each rail that goes side to side.
This is what the rabbet should look like when its cleaned out. It doesn't have to be super
smooth, just flat overall, as this surface doesn't show on the finished table. You will
need to cut four of these rabbets overall - one on the end of each rail that goes side to side.
 I have come to realize that a lot of people who visit my website are not
expert woodworkers, and don't necessarily have a workshop full of tools.
So I wrote this article on how to build a table without having a workshop full of
tools, or even a table saw. The main tools you will need are a circular saw, a hand drill,
a square, and at least two bar clamps.
I have come to realize that a lot of people who visit my website are not
expert woodworkers, and don't necessarily have a workshop full of tools.
So I wrote this article on how to build a table without having a workshop full of
tools, or even a table saw. The main tools you will need are a circular saw, a hand drill,
a square, and at least two bar clamps.