Making the drawers for the storage cabinet
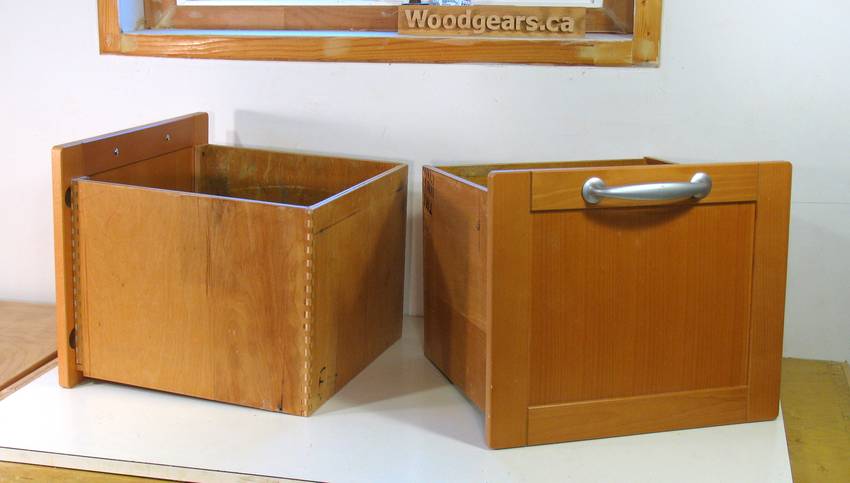 I made the drawers for this storage cabinet all out of plywood.
With drawers this deep and panel door style fronts, wood movement for solid wood drawers
this deep would have been a concern, so plywood was a good choice.
The other reason for that was that I had lots of used plywood of the right size
kicking around, and this would be a good way to use it up.
I made the drawers for this storage cabinet all out of plywood.
With drawers this deep and panel door style fronts, wood movement for solid wood drawers
this deep would have been a concern, so plywood was a good choice.
The other reason for that was that I had lots of used plywood of the right size
kicking around, and this would be a good way to use it up.
The drawer fronts came from a kitchen that was torn out of a friend's basement. They were almost new.
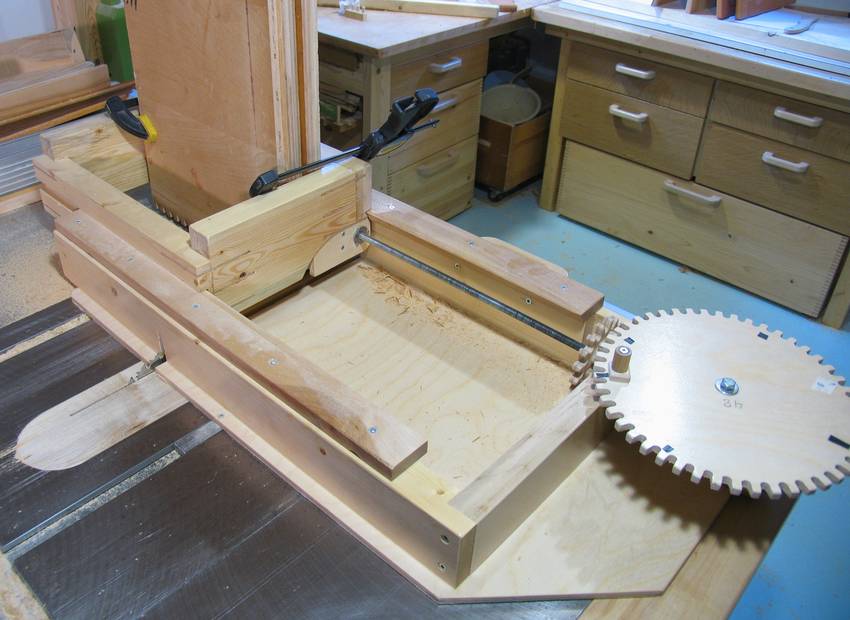 I joined the drawer sides with 3/8" box joints, using my
screw advance box joint jig.
I cut the 3/8" wide space between the fingers using just my regular saw blade.
I joined the drawer sides with 3/8" box joints, using my
screw advance box joint jig.
I cut the 3/8" wide space between the fingers using just my regular saw blade.
With the 48-tooth crank gear against the 12-tooth gear on the threaded rod, I'd get 1/4" (6 mm) of advance per turn, so I'd need a total of three crank turns to get the 3/4" advance to the next finger. To make a 3/8" wide cut (0.375"), I'd need my furthest cuts to be spaced just 0.275" apart because the saw blade's kerf of 0.100" would bring it up to 0.375". With each crank turn advancing the stock by 0.250", that meant I'd have to make cuts throughout one crank turn, and another cut 0.025" past the end of the first turn. 0.025" is one tenth of a turn, or about five teeth on the gear.
So I had to make cuts through one turn of the crank, then one more cut five teeth past that, and then turn the crank nearly two turns to get to the start of the next set of cuts. I had all my cut positions marked with bits of black tape on the gear.
It seemed like a sequence that would be easy to miss-count and screw up, but it turned out to be fairly easy and I didn't make any mistakes.
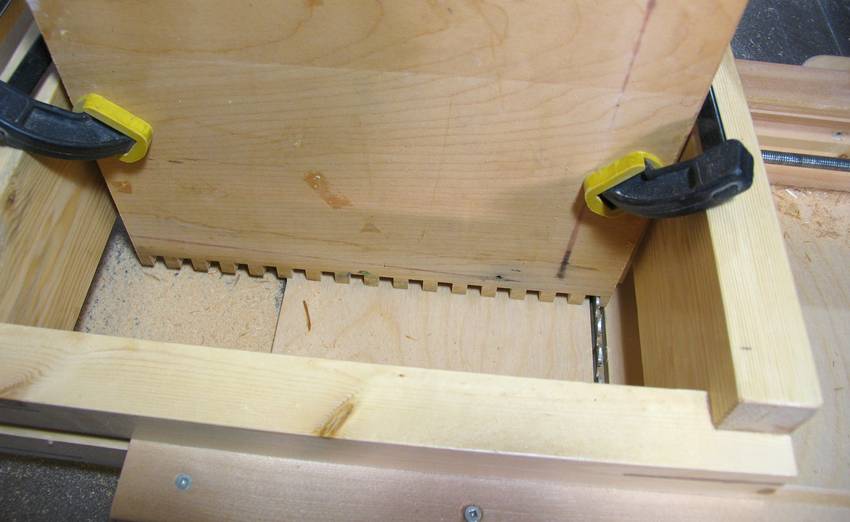 Here's looking in the jig after the last cut.
 The sides for one drawer, with the rabbets for the drawer bottom cut.
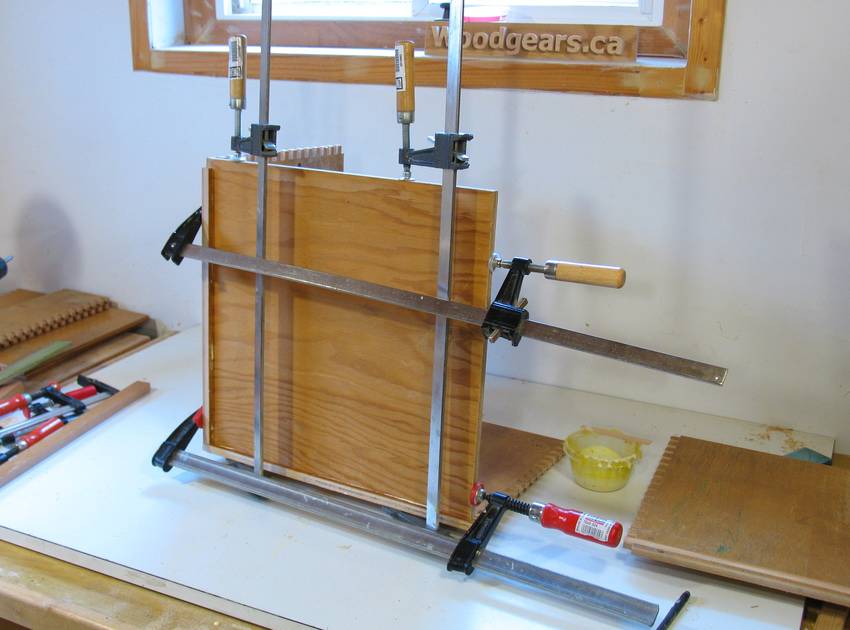 Gluing it together. I'm gluing the bottom in as I assemble the box. With the bottom
also made out of plywood, I don't have to worry about leaving slack for it to expand
and contract.
Gluing it together. I'm gluing the bottom in as I assemble the box. With the bottom
also made out of plywood, I don't have to worry about leaving slack for it to expand
and contract.
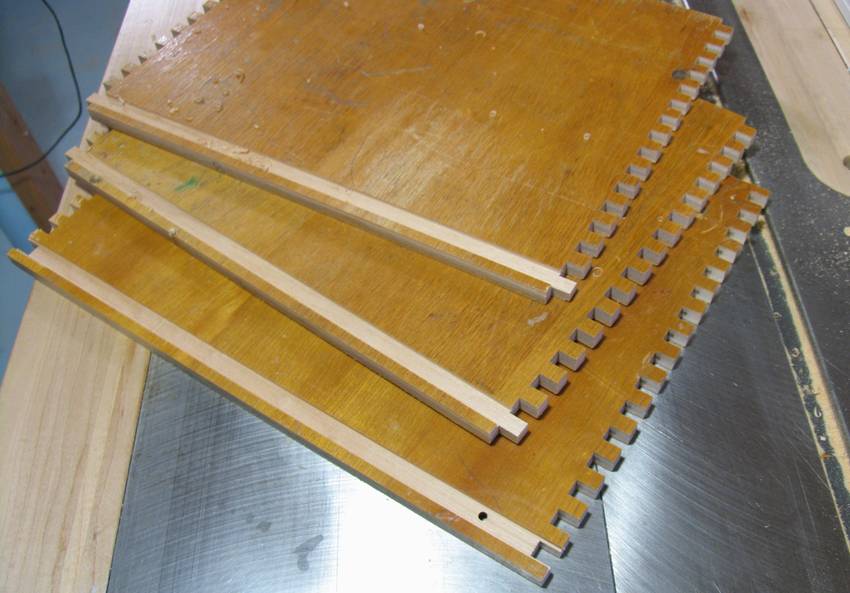
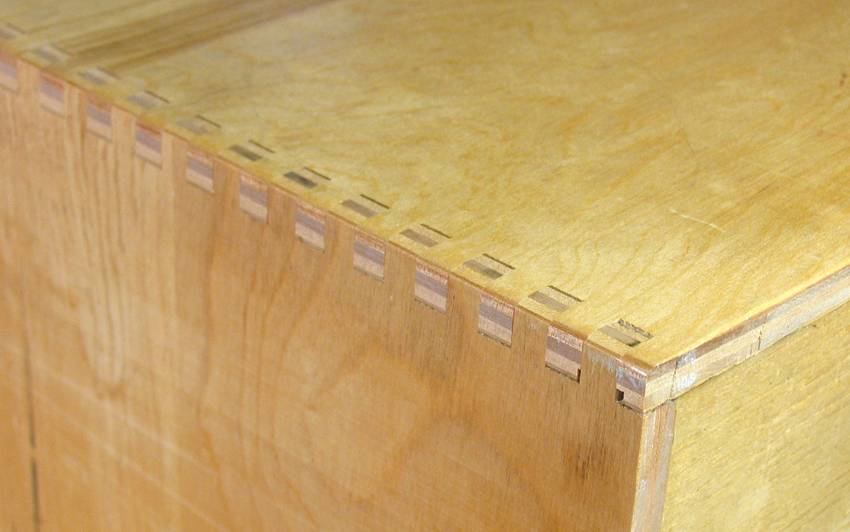 With a bit of sanding, the box joints looked quite nice, even though the drawers were
made from ugly bits of used plywood. An interesting aspect of the plywood I was using was that it
was made of layers of maple throughout. Very solid. I picked up that plywood near a church,
and it had evidently been the tops for some tables. The tops were very scuffed up and had
remains of bits of paint and glue on them - the remainders of kids art projects, I assume.
With a bit of sanding, the box joints looked quite nice, even though the drawers were
made from ugly bits of used plywood. An interesting aspect of the plywood I was using was that it
was made of layers of maple throughout. Very solid. I picked up that plywood near a church,
and it had evidently been the tops for some tables. The tops were very scuffed up and had
remains of bits of paint and glue on them - the remainders of kids art projects, I assume.
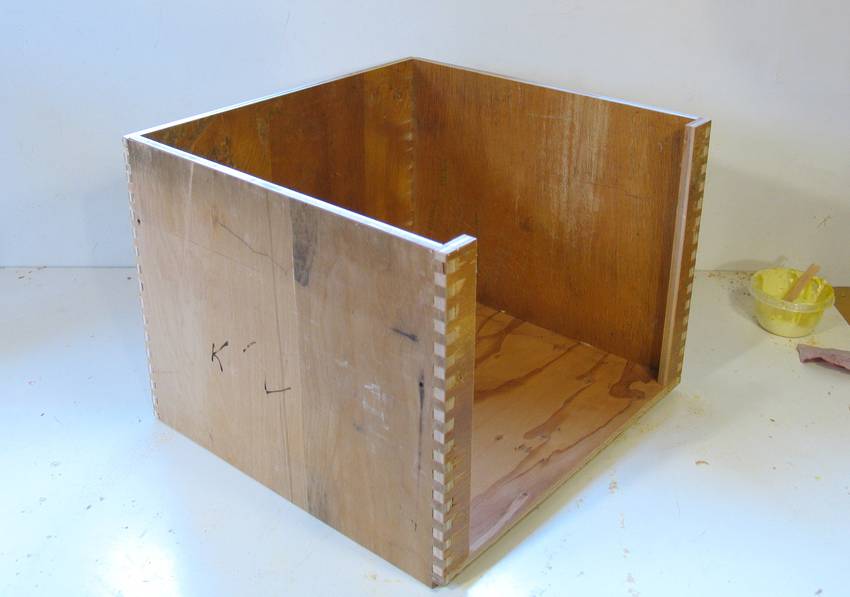 Instead of a closed front for my drawer box, I just box joined two narrow strips of plywood
on so that I could attach the drawer front.
That way, I'd have more space inside the drawer and also keep the drawer slightly lighter.
The solid maple plywood made the empty drawers pretty hefty as it was.
Instead of a closed front for my drawer box, I just box joined two narrow strips of plywood
on so that I could attach the drawer front.
That way, I'd have more space inside the drawer and also keep the drawer slightly lighter.
The solid maple plywood made the empty drawers pretty hefty as it was.
 Screwing on the drawer fronts.
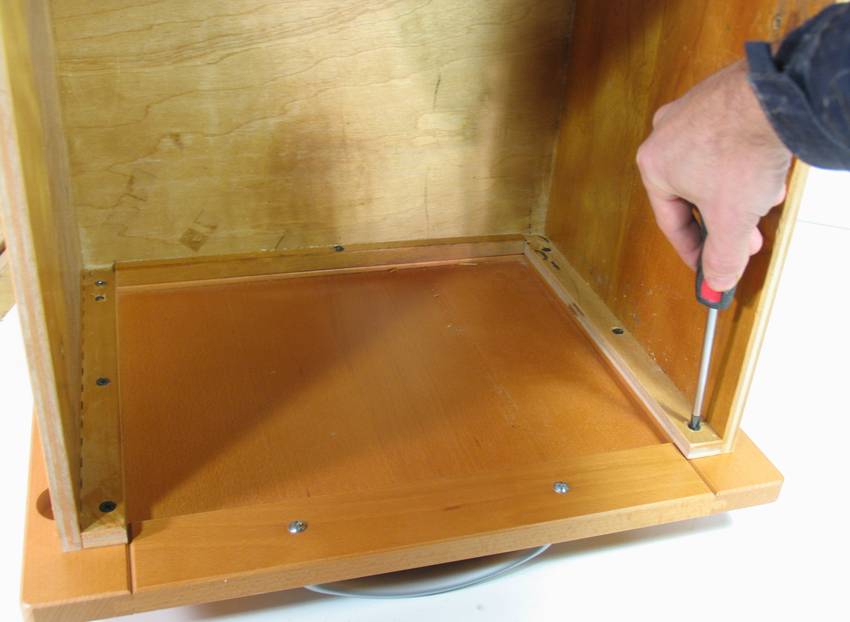
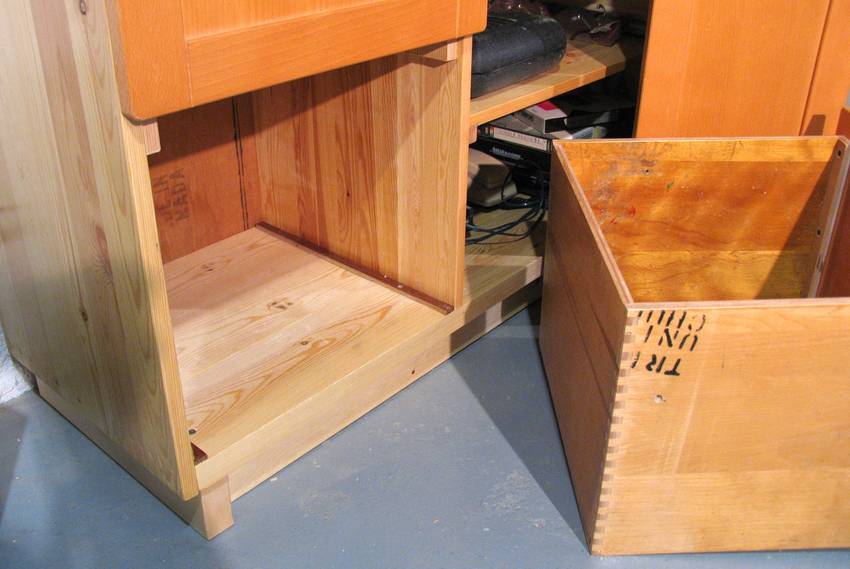 I screwed some strips cut from pre-finished hardwood flooring to the bottom edge of the
cabinet to give the bottom drawer more of a hard surface to glide on. The top drawer
glides on two strips of hardwood screwed to the sides. The back-most holes in these
strips are actually slots to allow for wood movement in the sides. I expect wood movement
to cause the depth of this cabinet to increase by 3-4 millimeters with the higher
humidity in my basement during summer.
I screwed some strips cut from pre-finished hardwood flooring to the bottom edge of the
cabinet to give the bottom drawer more of a hard surface to glide on. The top drawer
glides on two strips of hardwood screwed to the sides. The back-most holes in these
strips are actually slots to allow for wood movement in the sides. I expect wood movement
to cause the depth of this cabinet to increase by 3-4 millimeters with the higher
humidity in my basement during summer.
You can also see some lettering stamped to the side of the drawer - that was on the wood already, it's part of the words "Trinity United Church". Gives the furniture a bit of character as to where the materials came from. The entire storage cabinet is made from recycled bits of wood from many different sources.
More about Wooden drawers
Back to building a storage cabinet