Cutting tapers on a jointer (no jig required)
There's many taper jig plans out there for cutting tapers on a table saw. I never bothered to make such a jig myself. Primarily, because I never had a need for one. The thing is, cutting tapers on a jointer is fast an easy.
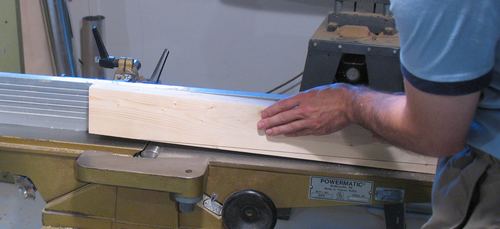
 The key is to start the cut part way into the wood. The shot at left shows me about to place
the work piece on the jointer. With the jointer running,just set the work piece down
on the jointer where the taper starts. With the piece past the head when set down
already, it doesn't give the cutter head much material to bite into, so it can't really
kick the material, even though its set down on the spinning head.
Then, using this method, just make a series of cuts
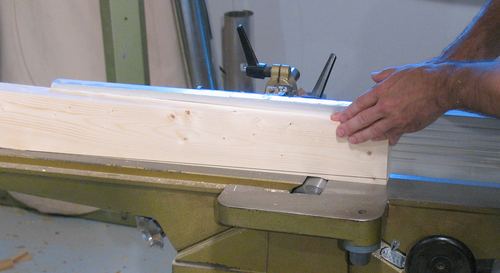
 This shot shows nearing completion of the cut. I normally cut thinner pieces off, but
made for a thicker cut to make it easier to see in the photograph.
For cuts where more than 1 cm of material is removed, its best to rough cut the taper on the bandsaw, and then just clean it up on the jointer.
For tapers that go all the way to the end of the piece of wood, just cut a taper that
is parallel to the taper that you want, but starting not quite at the end (as in the first
photo above). Then, after you have the taper at the right angle, just cut a few more passes
to extend the taper to the end.
Unlike table saw jigs, this jig can be used for cutting tapers in wide pieces of lumber, and also for cutting tapers on all sides of a piece of lumber, as I did when building this table
See also: Making conic dowels and spindles on a jointer
Back to the Shop tricks section