Rebecca Thornley's "workshop" and pantorouter
Rebecca Thornley writes about the challenges of woodworking with no workshop and a limited budget:
Matthias-
You sir, are a genius! I love your website, don't change it : ). It has an appeal to it that I just can't describe. I recently bought your plans for the 3D Pantograph for making signs, I built it but haven't got around to making any templates for it yet. Right after completing it, I became interested in your Pantorouter Plans, which I also bought. I am currently in the last stages of completing it as well. Your plans are excellent in the amount of detail and description they provide! I did create a spreadsheet to convert centimeters into eighths, sixteenths, and thirty-seconds of an inch to assist me with your plans. Having spent my whole life working with inches and feet, using the metric system is a hard pill to swallow. I remember they taught it to us in school, but it never really took off here in the U.S.
 Having been unemployed for close to three years now, I'm on a really
tight budget (emphasis on tight). I live in a condo in Arizona and don't
really have a garage or place to use as a workshop, so I have had to
settle on doing most of my work in the dining room LOL.
It's a daily pain of vacuuming and dusting at the end of the day but I
have no other choice.
Having been unemployed for close to three years now, I'm on a really
tight budget (emphasis on tight). I live in a condo in Arizona and don't
really have a garage or place to use as a workshop, so I have had to
settle on doing most of my work in the dining room LOL.
It's a daily pain of vacuuming and dusting at the end of the day but I
have no other choice.
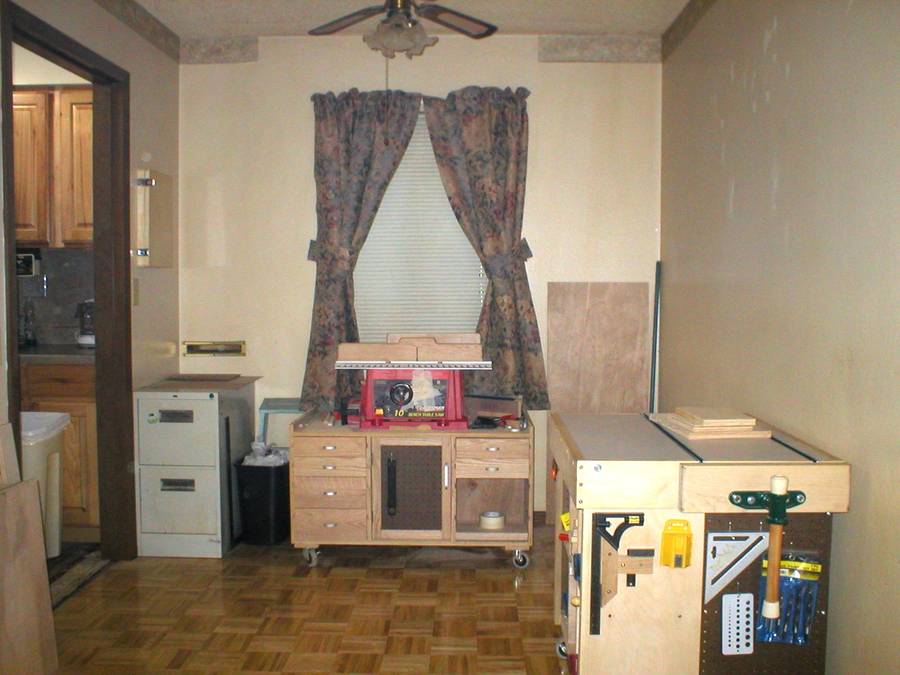
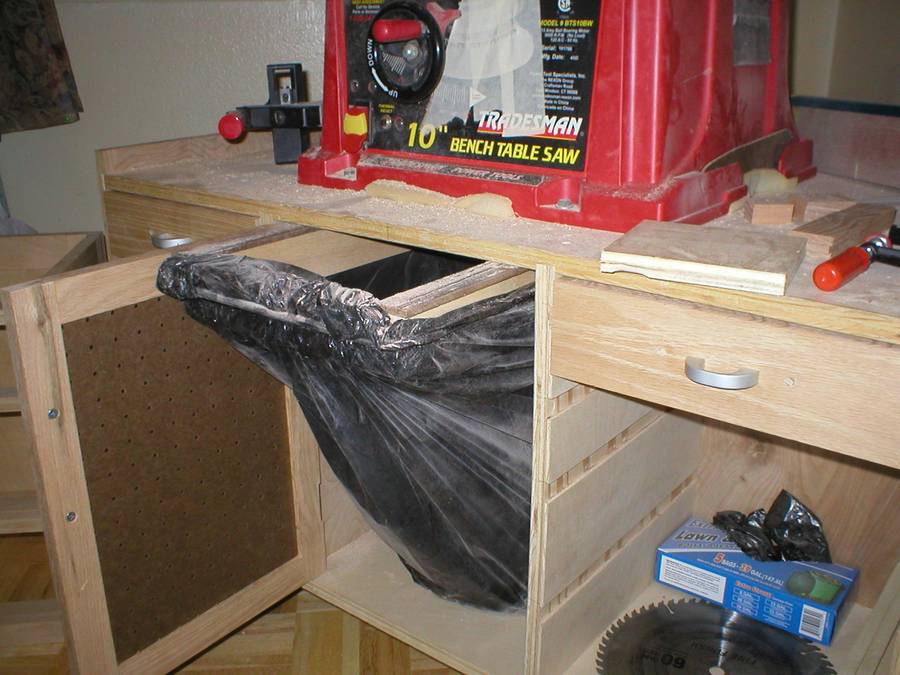 My table saw and drill press are bench top models
of which the table saw is mounted to a cabinet I built from a woodworker's
magazine. I still need to make a drill press cabinet when money permits.
I built a router table and fence that allows a vacuum hose to be
attached to it. I also built a small workbench with end-vise. Everything
is on casters for portability in such a confined space. I have no
bandsaw (maybe I could find plans to make one :) ) but have an old
Craftsman 16" scroll saw.
My table saw and drill press are bench top models
of which the table saw is mounted to a cabinet I built from a woodworker's
magazine. I still need to make a drill press cabinet when money permits.
I built a router table and fence that allows a vacuum hose to be
attached to it. I also built a small workbench with end-vise. Everything
is on casters for portability in such a confined space. I have no
bandsaw (maybe I could find plans to make one :) ) but have an old
Craftsman 16" scroll saw.
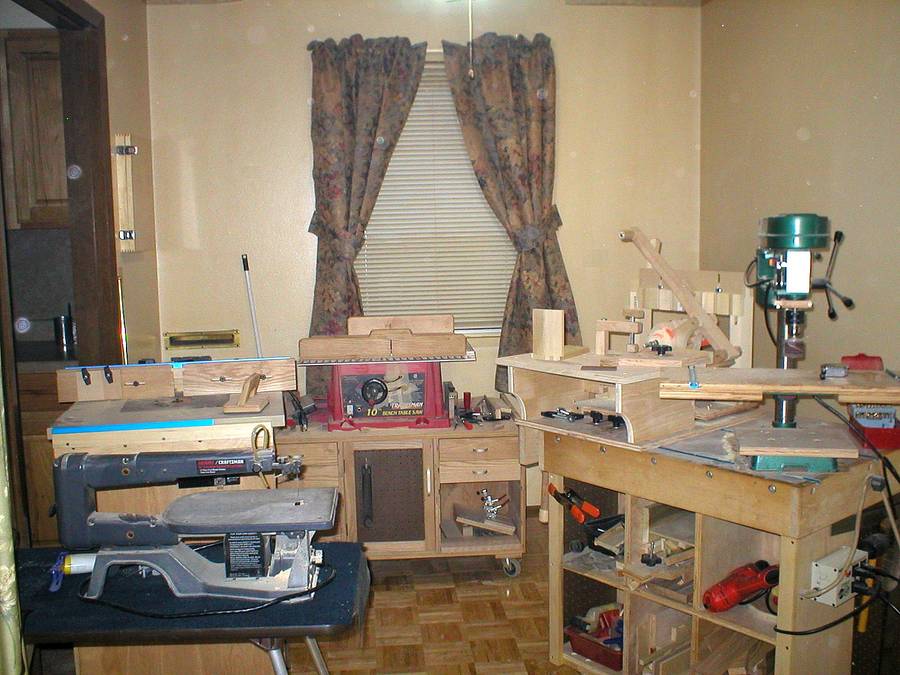 This dining room is 8'x10', off the living room, and leads into the small
kitchen. I just hung an old vertical blind on the ceiling yesterday that
closes across to separate it from the living room and help keep the dust
from getting to the rest of the house. You can see a small sliver of the
drape at the lower left corner of the pic. I'm thinking of hanging a
curtain in that doorway as well. I know it's not good breathing in dust
but I really don't have much choice. With the addition of the
Pantorouter, I definitely need to make a stand for it as well as for the
drill press in order to get them off of my roll-around vise bench.
This dining room is 8'x10', off the living room, and leads into the small
kitchen. I just hung an old vertical blind on the ceiling yesterday that
closes across to separate it from the living room and help keep the dust
from getting to the rest of the house. You can see a small sliver of the
drape at the lower left corner of the pic. I'm thinking of hanging a
curtain in that doorway as well. I know it's not good breathing in dust
but I really don't have much choice. With the addition of the
Pantorouter, I definitely need to make a stand for it as well as for the
drill press in order to get them off of my roll-around vise bench.
Pantorouter
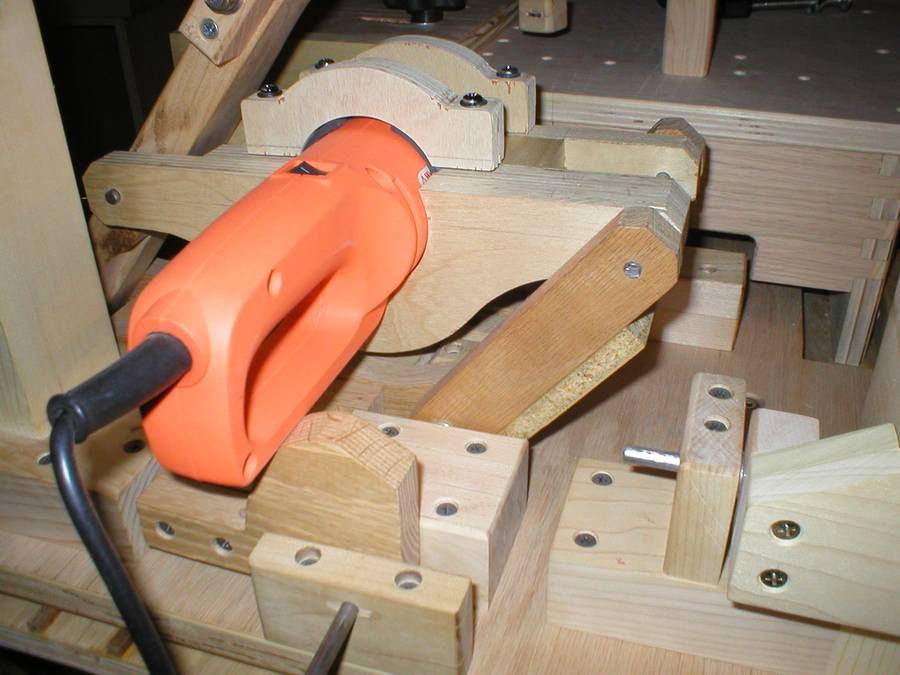
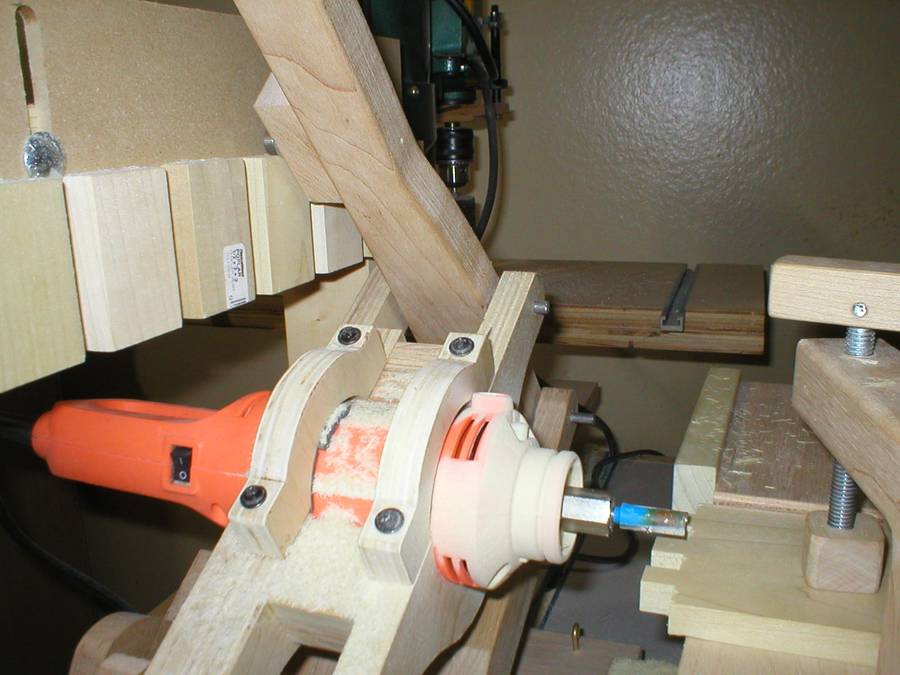
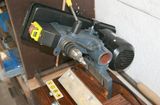
 I decided to see how much of the Pantorouter I could build using just
scrap wood I have had laying around for a few years and a Chicago
Electric cut-out tool-AC Item # 42831 that someone gave me a while back.
The chuck only accepts 1/4 inch bits but all my router bits are 1/4
inch anyway. I'm not too sure about how well it will hold the bits as the
chuck is kind of cheesy. It has one of those buttons you press in to
lock it while tightening the chuck. So far I haven't had to purchase
anything but the slides and a quarter sheet of plywood for the sled and
base. Everything else is from scrap. Sometimes a glue-up is necessary to
achieve the thickness of some parts but it's great to be using up all
that scrap.
I decided to see how much of the Pantorouter I could build using just
scrap wood I have had laying around for a few years and a Chicago
Electric cut-out tool-AC Item # 42831 that someone gave me a while back.
The chuck only accepts 1/4 inch bits but all my router bits are 1/4
inch anyway. I'm not too sure about how well it will hold the bits as the
chuck is kind of cheesy. It has one of those buttons you press in to
lock it while tightening the chuck. So far I haven't had to purchase
anything but the slides and a quarter sheet of plywood for the sled and
base. Everything else is from scrap. Sometimes a glue-up is necessary to
achieve the thickness of some parts but it's great to be using up all
that scrap.
 I had to make some modifications to your plans to accept it but after
all the links were made, everything was spot-on and square on the first
trial assembly!! I didn't have 1.5" thick wood for the table sides so I
used 3/4" stock and didn't trust being able to do 1/4" finger joints so I
opted for 1/2" box joints. One error I made while setting up to rip the
sides of the table was misreading my tape measure and they ended up 1"
narrower than called for, that has now revealed an operational problem in
that the bit will not completely clear the underside of the workpiece.
With my tight budget I don't want to invest in more wood so I think for
the time being I will have to use some 1" thick scraps under the sides
to achieve the needed height. Later on I will just have to remake the
sides again.
I had to make some modifications to your plans to accept it but after
all the links were made, everything was spot-on and square on the first
trial assembly!! I didn't have 1.5" thick wood for the table sides so I
used 3/4" stock and didn't trust being able to do 1/4" finger joints so I
opted for 1/2" box joints. One error I made while setting up to rip the
sides of the table was misreading my tape measure and they ended up 1"
narrower than called for, that has now revealed an operational problem in
that the bit will not completely clear the underside of the workpiece.
With my tight budget I don't want to invest in more wood so I think for
the time being I will have to use some 1" thick scraps under the sides
to achieve the needed height. Later on I will just have to remake the
sides again.
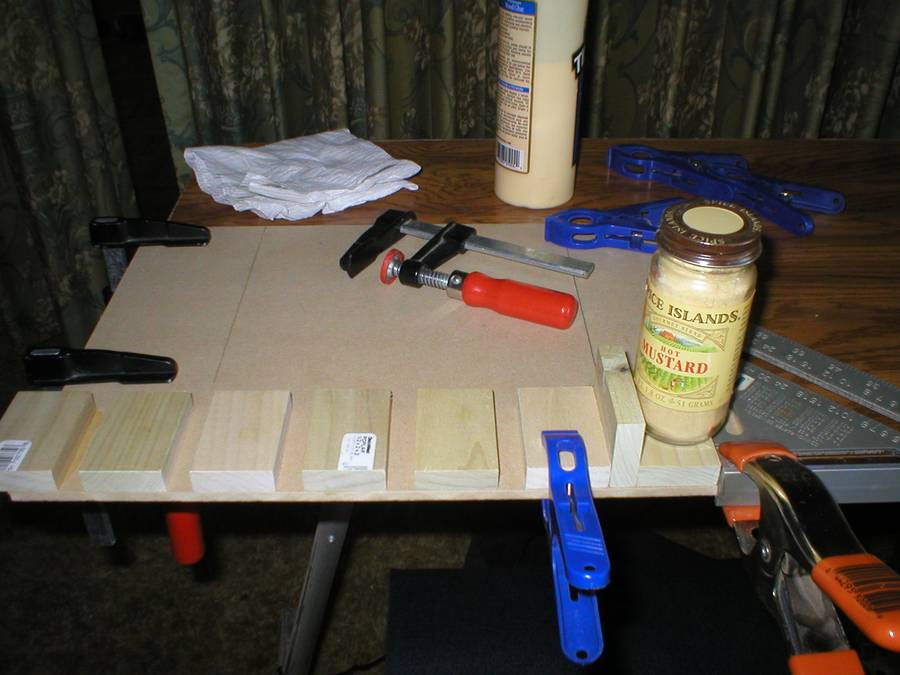 My first template: I was anxious to try out the Pantorouter for the
first time so I glued up a half-inch box joint template to use a 1/2"
bearing and a 1/2" cutter. The template pieces are 1-1/2" wide.
My first template: I was anxious to try out the Pantorouter for the
first time so I glued up a half-inch box joint template to use a 1/2"
bearing and a 1/2" cutter. The template pieces are 1-1/2" wide.
 And my first trial run: I just grabbed some 1/2" scrap popular for a
test. Setup is so fast and easy, and a lot faster to cut a set of box
joints than what it takes on my router table with an index-pin type box
joint jig.
And my first trial run: I just grabbed some 1/2" scrap popular for a
test. Setup is so fast and easy, and a lot faster to cut a set of box
joints than what it takes on my router table with an index-pin type box
joint jig.
 All in all I am very happy with how the project turned out! Keep up the
good work and I will look forward to exploring your site, as well as any
new articles you put up. Thanks again!
All in all I am very happy with how the project turned out! Keep up the
good work and I will look forward to exploring your site, as well as any
new articles you put up. Thanks again!
-Rebecca Thornley
Sun City, Arizona
See also:
David Z. Júnior and Jean P. Lana's tool chests |
Tamá s Petõ's workbench and sharpening station |
Beri Bracun's homemade lathe |
Ron King's queen size bed built with minimal tools in an apartment. |
Neal Weeks's belt sander |
More Reader projects on woodgears.ca