Jens Larsen's sawblade sharpener
 Jens Larsen writes:
Hallo Matthias
I saw your experiment with a saw blade grinder set-up some weeks ago, and it inspired me to have a go at it too. Machines for that purpose available here are either too expensive or too “hobbyist”, and having blades redone professionally just doesn’t pay, so I’ve ended up with a number of worn-out and/or spoiled blades.
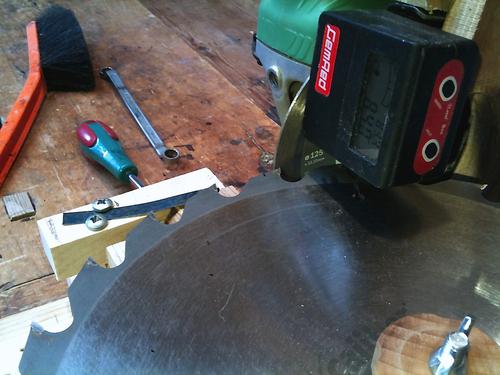
I didn't have a suitable motor available, and didn't want to invest in one, so using the angle grinder with fine ceramic cutting disk was the best I could think of for the “business end”. And it works very well, except that the disk I used is a bit too coarse, leaving slight “scratch marks”.
 Some of the blades I wanted done had the “front” ground at an angle, and
all needed sharpening on the crown as well as on the front, so the setup
needed to be able to handle all of that to be of any use.
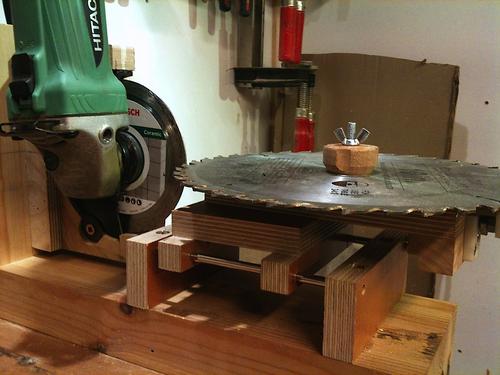
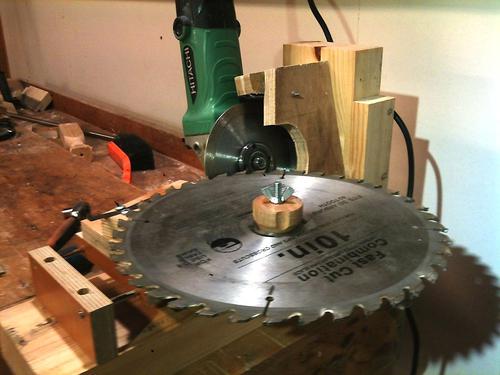
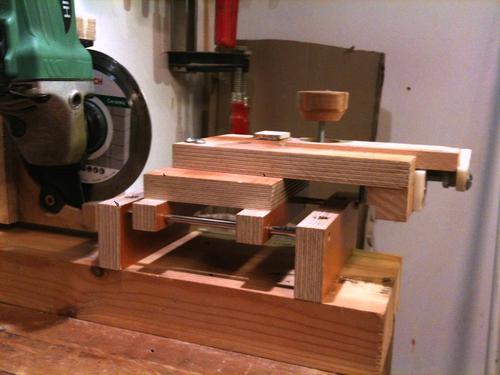
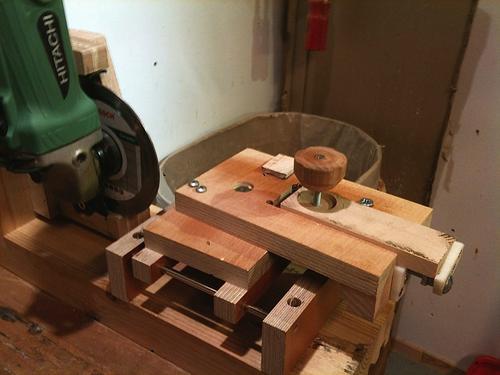
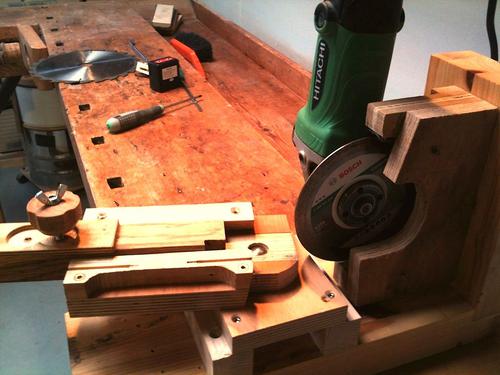
To handle this I made an arrangement where the angle grinder can tilt. On my grinder the guard is held very firmly on a dovetailed rim, so I used this as a simple way to hold the grinder in the holder. The holder is held to the frame by a bolt positioned in line with the cutting disk and the horizontal plane of the axle. This allows tilting of the grinder.
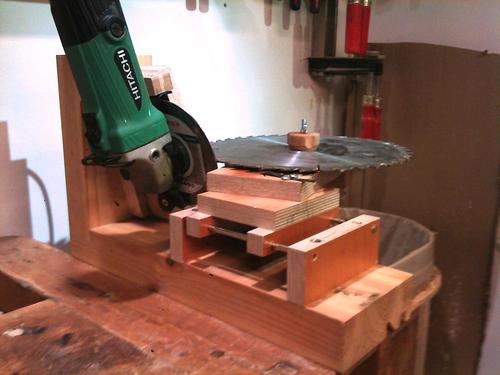 For the blade holder I tried out two different set-ups, one with a
sled running parallel with the cutting blade and one with the sled
placed on the arm of the holder. Meaning it can be set to run either
parallel to the front of the teeth, or to the angle of the crown.
On the first set-up there are in fact two sleds, one formed by the two steel rods, for moving the blade to an from the cutting disk, and one, a block of wood running in a slot in the arm for adjusting for blade size and position re the cutting disk.
It worked very well, but the pivot point for the arm wasn’t quite right, and as it was all an experiment, I decided to try the other way.
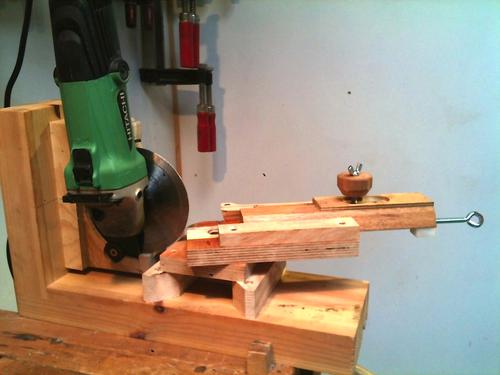
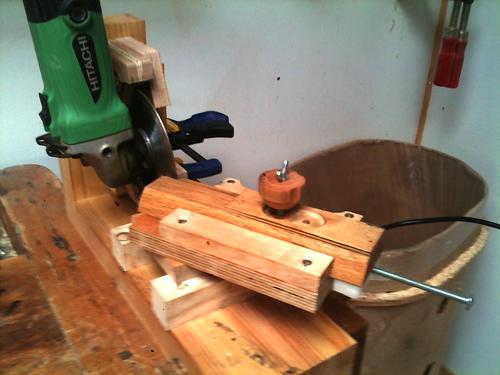 In this setup there is only one sled and it serves both to adjust for
blade size and fine adjustment re the cutting disk, and for moving the
blade in and out of the grinding position.
Adjustment for blade size, and fine adjustment re the cutting disk, is by the bolt at the end of the sled (sits in a threat in a nylon block to avoid “slip”, and stops against the end of the arm).
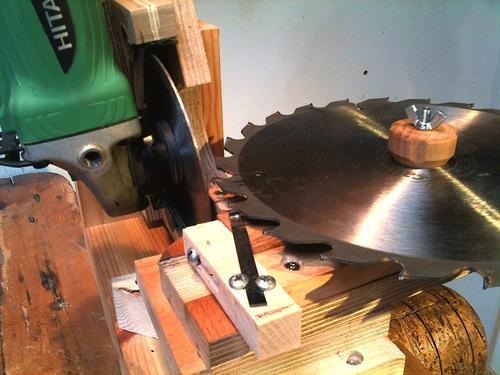 When grinding the front of the teeth the blade is “turned into” the disk
"free-hand”, and when grinding the crowns the blade is held in position
by the spring (pressed down when moving to the next teeth).
The set-up works very well, though the sled doesn’t move as smoothly as hoped. It's possible and quite easy to grind very accurately.
So I’ll leave it, hope you like it and thanks again for the inspiration.
Best regards
Jens Larsen
Matthias comments:
I tried sharpening a router bit with a diamond tile saw once. But for router bits, and free hand, I found the tile saw was much too coarse. Disks for sharpening are much finer, but it's hard to find one that fits on an angle grinder.
Jens adds:
Being concerned with the scratches after my first grind, I decided to try to “de-nip” the wheel by putting a worn-out router bit to it very aggressively, and that did improve the surface on the subsequent grinds. But it still does not leave as smooth a surface on the teeth as I would like.
I don’t think the roughness/scratches makes much difference to the “cut” of the blades, but it might result in a faster build-up of residue on the teeth.
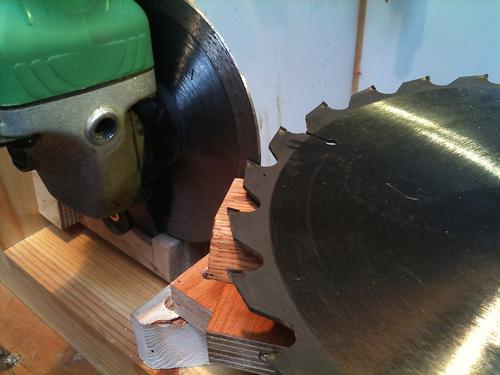 Diamond disks for grinding saw blades like the one you used for
your experiment
are available here, but they are for a 20 mm arbor, and I
haven’t yet figured how to fit that on my angle grinder.
An alternative to the angle grinder could be to use a drill, but none of mine run accurately enough for the purpose.
So I’ll stick with my setup for now. Will let you know if/when I find finer disk.
Best regards
Jens Larsen
Jens later emailed:
Further to my recent mail, I can inform that I’ve just sawn a bunch of
1” pine boards with one of the blade I sharpened with my set-up with the
ceramic cutting disk. The blade performed very well, and though the pine
was quite resin rich, there didn’t seem more build-up on the teeth than
usual with a fresh blade.
See also:
 Jens Larsen's dust
collector Thien-baffle mod


 Saw blade sharpening jig