 If your bearing is not exactly twice the diameter of your router bit,
you can calculate the required thickness of
the tenon template using this formula:
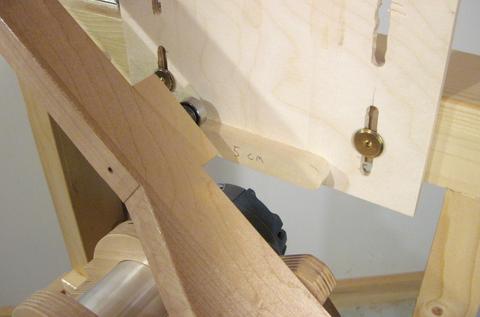 The pantograph reduces 2:1 from the template to the router bit, so using a guide bearing that is
exactly twice the diameter of your router bit will reproduce the shape of the template exactly.
Mostly, I use a 3/4" outside diameter bearing and a 3/8" router bit. Larger bits are better for cutting tenons, but the 3/8" bit is also useable for cutting mortises or cutting between double tenons.
Unfortunately, getting a bearing that is twice the size of your router bit is not always possible. Ball bearings are mostly in metric units. Even bearings with hole sizes in inches tend to have metric outer diameters. But router bits in Canada and the US are all sized in inches.
 If your bearing is not exactly twice the diameter of your router bit,
you can calculate the required thickness of
the tenon template using this formula:
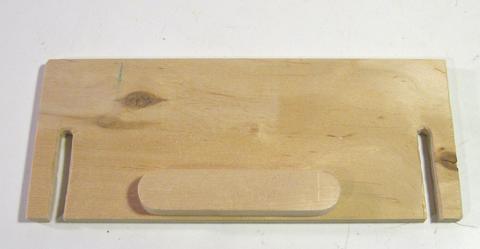
Ttemplate = 2 * Ttenon + ( 2 * Dcutter - Dbearing)
For example, if you want to cut a 3/8" tenon with a 1/2" bit and a 26 mm bearing:
Ttenon = 3/8" = 9.53 mm
Dcutter = 1/2" = 12.7 mm
Dbearing = 26 mm
Ttemplate = 2 * 9.53 + (2 * 12.7 - 26) = 18.4 mm
 The same formula can also be applied to work out the width of the template:
Ltemplate = 2 * Ltenon + (2 * Dcutter - Dbearing)
Note that the two terms in brackets on the right stay the same as the previous formula. for any
combination of router bit and bearing that you use, you only need to work this adjustment factor out once.
Also see: Template setup, without algebra.
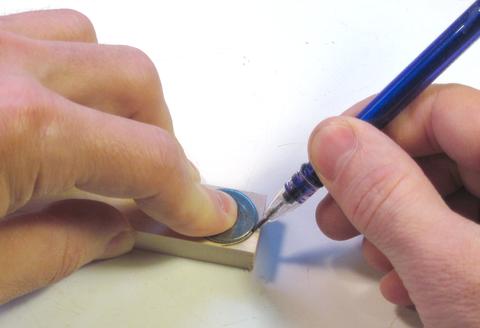
I found it easiest to use a round object such as a washer to mark the round part on the end of the tenon template, then cut that out approximately with a bandsaw, and then use a sander to smooth out the curve and bring it up to the line.
With the tenons half the size of the template, any inaccuracies in the template will also be cut in half.
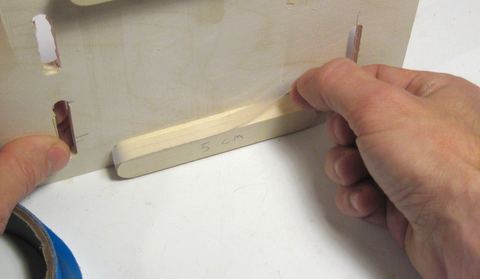 Of course, getting it completely right may require some experimentation. If you only need to
make a small adjustment to a template, you might try shaving it down a little bit with a shoulder
plane if the fit is too tight, or adding some tape to the template to increase it's size. I
like to use UHMW tape to shim things up with, as it's fairly thick and rigid. The tape
is a milky transparent, so it doesn't show up very well in the photo at left (click the photo to enlarge).
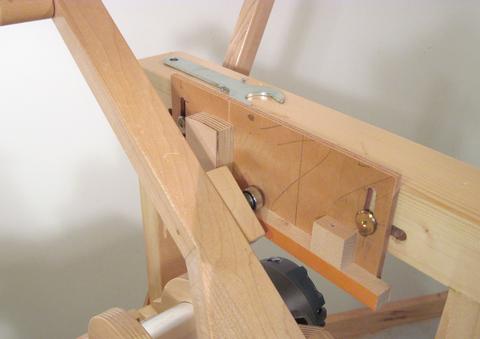 Making a template for a mortise is much more straightforward. It's just a matter
of making a straight track that the bearing can roll in. With the springs under-compensating
for the weight of the router, the bearing has a natural tendency to stay in the track, especially
if one rests one's hand on the operating lever.
On the template at left, the block on the near end of the track is screwed on, while the other block is held on with a small C clamp (obscured by the operating lever in the photo). This way, I can make adjustments to how long a mortise I want to cut with the machine.
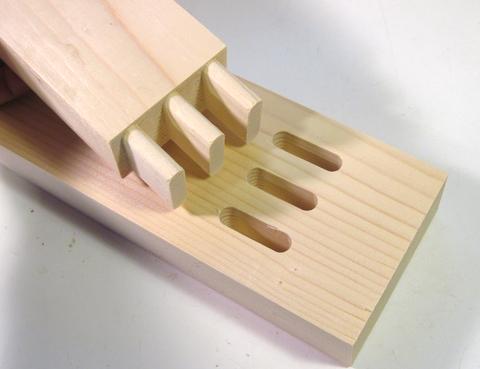 Where the machine really shines is when making more complex joints, especially multiple
mortise and tenon joints. Getting a double tenon joint to fit just right
can be tedious. But with a machine like this, once you make a set of templates for a joint,
it's easy to reproduce it perfectly time and time again.
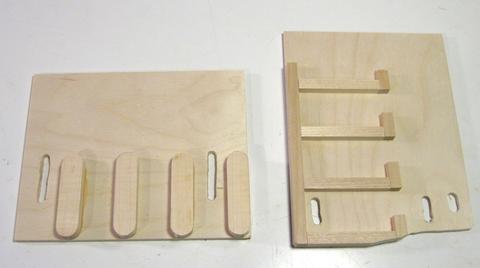 Here are my quadruple mortise and tenon templates.
I measured the placement of each piece of wood with calipers from the edge as I glued it. With the templates twice the size of the final joint, I get some leeway in terms of accuracy, but I still make it as precisely as I can.
The multiple mortise template on the right is mounted so that the mortises are horizontal, so that the mortises will be parallel to the grain of a piece of wood clamped horizontally onto the table. Each track in the mortise template has an opening so that the bearing can be pulled out of the track and then put into the next track.
The vertical range of motion of the machine is just barely enough for the quadruple mortise template, although I had to cut a corner off the template as the router motor hit the bottom edge of the template while I was cutting the topmost mortise.
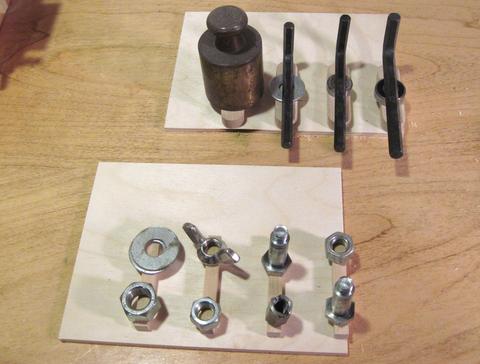 Gluing the templates is tricky. Wet wood glue acts as a lubricant, and clamping the pieces down has a
tendency to move them. So instead of clamping, I weighed down each piece of wood with something heavy.
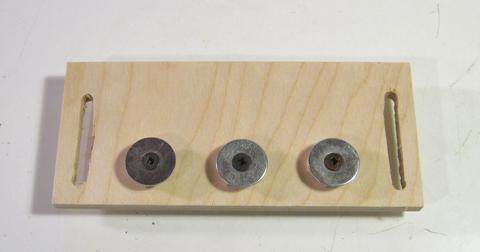 I also made a multiple dowel template. Making a template perfectly round is tedious. I had some 1 1/4"
washers, which were perfect for a template for 5/8" dowels. And if I use a 1/2" bit instead of a
3/8" bit on my router, this template makes 1/2" dowel ends.
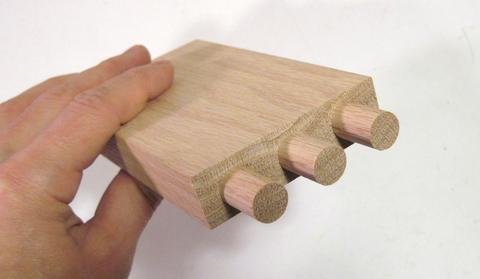 Here's the integral dowels produced by that template. Though it looks like three dowels sticking
out, those are actually part of the piece of wood.
A key to getting a clean cut (click image to enlarge), especially around the edges, is to always do a "climb cut" with the router. Climb cuts are normally considered "unsafe" because the router has a tendency to pull itself into the stock. But the pantograph mechanism gives me a lot of mechanical advantage from the handle to the router bit, so I haven't had any issues.
With a climb cut, the cutter edge is always cutting into, as opposed to out of the stock. This prevents any tearout at the edges. I also found that I get a cleaner cut on my final dowel with a climb cut.
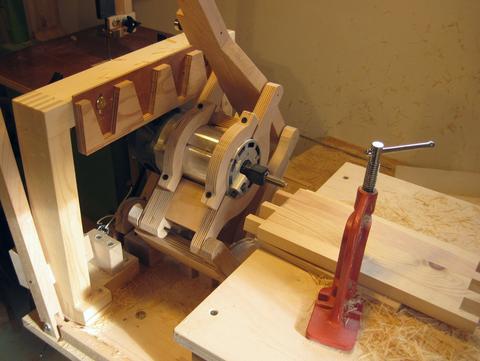 Here's experimenting with a template for cutting the pins of a dovetail joint.
Unlike conventional dovetails jigs, I don't have to have my router bit sticking through a guide bushing. This means I can use bigger, longer bits with 1/2" shanks, so that I can cut joints that are larger and deeper than with a conventional dovetail jig.
My pantograph is limited to an 8" range of motion side to side, so anything wider than that would require cutting as multiple sections by repositioning the stock. There isn't anything to get in the way on either side so there's no limit to how large the stock may be. The main difficulty with very large stock would be in clamping and aligning.
The other advantage of not relying on guide bushings is that I can also cut dovetail joints much finer than what is possible with a conventional dovetail jig, again, because I'm not constrained by the need for a guide bushing large enough to fit around the router bit's shank.
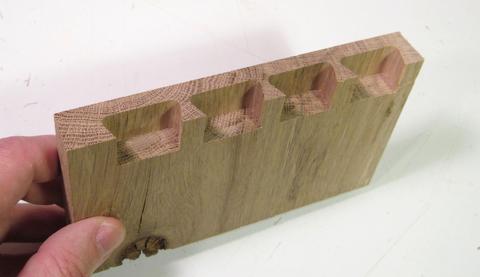 Hand tool enthusiasts like to make dovetail joints with geometries that can't be cut
with a dovetail jig, which serves to prove that the joint was hand cut.
But some of these joints can be cut with the pantorouter. The "pins" side of this joint
was cut with a 1/4" router bit on the pantorouter.
This leaves the corners of my tail cavities round, so some hand tool work is still needed
to make it look like one of those joints that was "hand cut". Except that this method
is less work and more accurate.
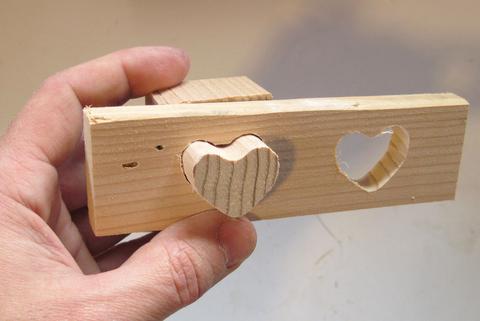 The possibilities are nearly endless, it's all a matter of what templates one makes.
At left is an experiment with a heart shaped through tenon. It was only a quick experiment and not very accurate. But you get the idea.