Building the dump-o-matic
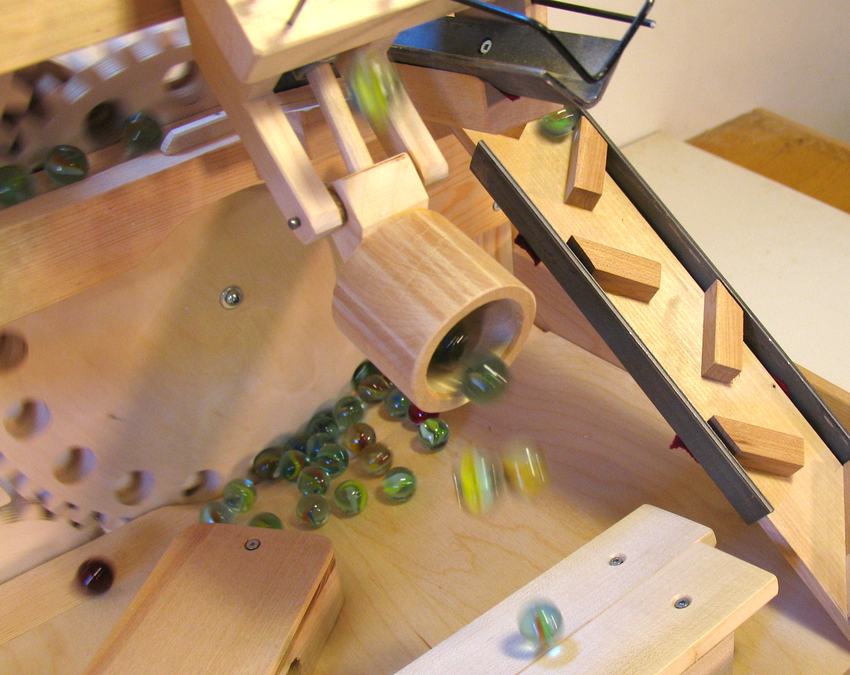 The dump-o-matic is a cup on a counterweighted pivot that tips over once
it's full of marbles. The tricky part is counterweighting it just right so
that it won't dump the marbles until it's full and will
dump it's entire contents before tipping back up.
The dump-o-matic is a cup on a counterweighted pivot that tips over once
it's full of marbles. The tricky part is counterweighting it just right so
that it won't dump the marbles until it's full and will
dump it's entire contents before tipping back up.
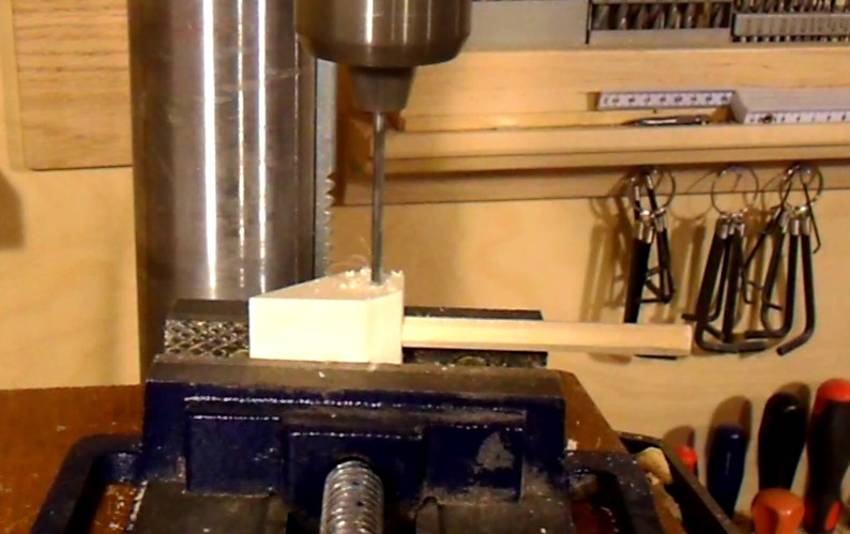
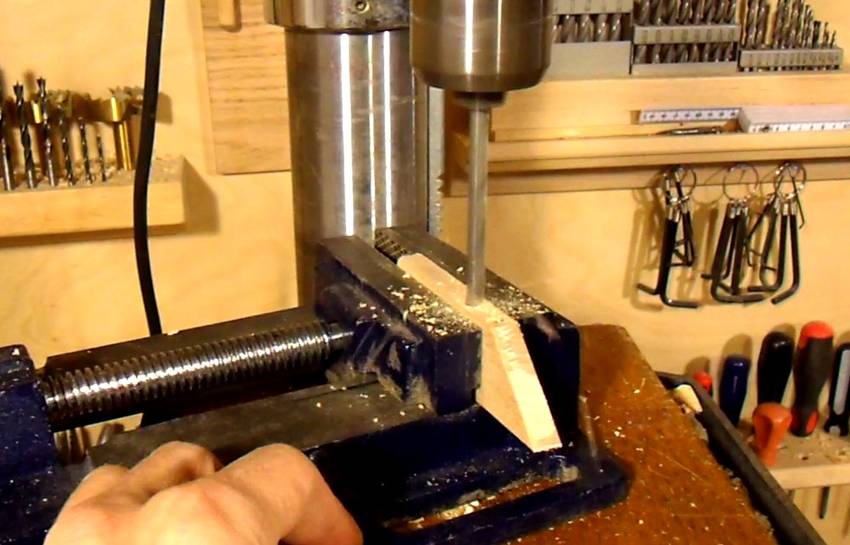
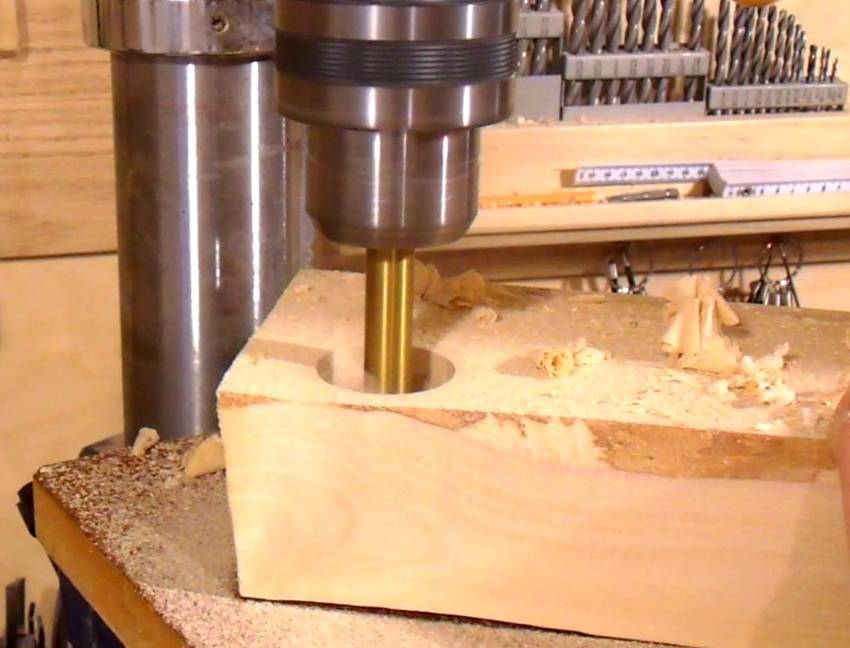 The inside of the dump-o-matic is made by drilling a 1 3/8" (35 mm) hole in a piece of wood
39 mm thick. The hole is drilled before cutting the outside shape of the cup.
You could also make the cup on a lathe, but this method is quicker.
The inside of the dump-o-matic is made by drilling a 1 3/8" (35 mm) hole in a piece of wood
39 mm thick. The hole is drilled before cutting the outside shape of the cup.
You could also make the cup on a lathe, but this method is quicker.
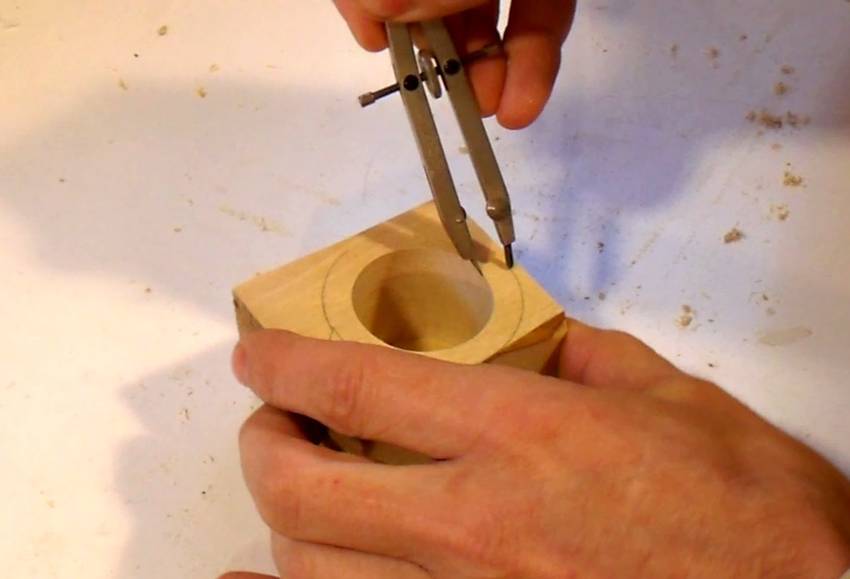 The walls of the dump-o-matic are 7 mm thick. It's easiest to just mark that
as an offset from the edges of the hole with a compass...
The walls of the dump-o-matic are 7 mm thick. It's easiest to just mark that
as an offset from the edges of the hole with a compass...
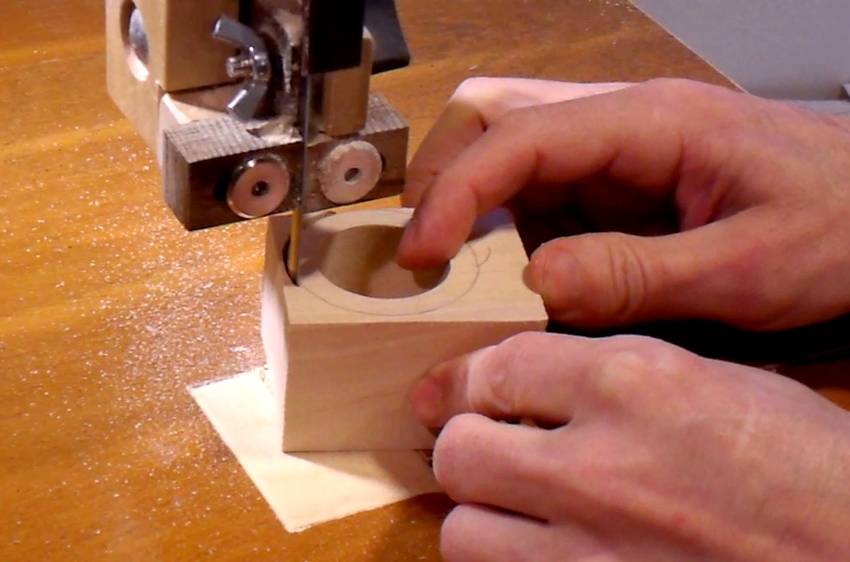 ... and then cut it out with a bandsaw.
 Next we need to make the block that gets glued to the bottom of the cup. This block
has the pivot and counterweights attached to it.
Next we need to make the block that gets glued to the bottom of the cup. This block
has the pivot and counterweights attached to it.
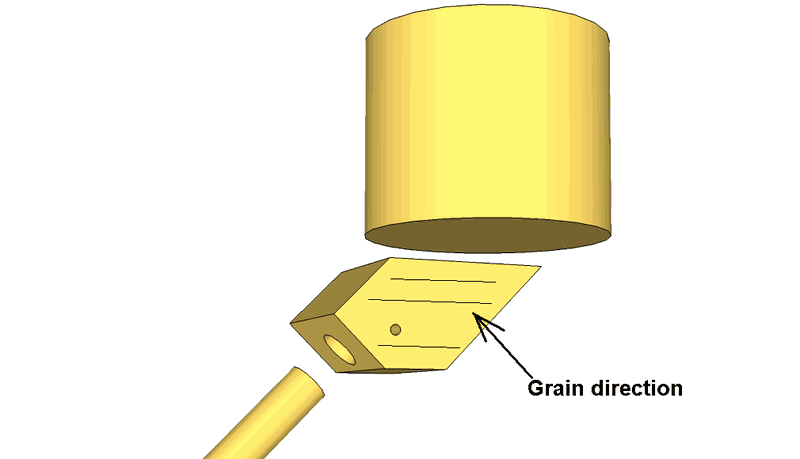 The grain of this block should run parallel to the grain of the cup.
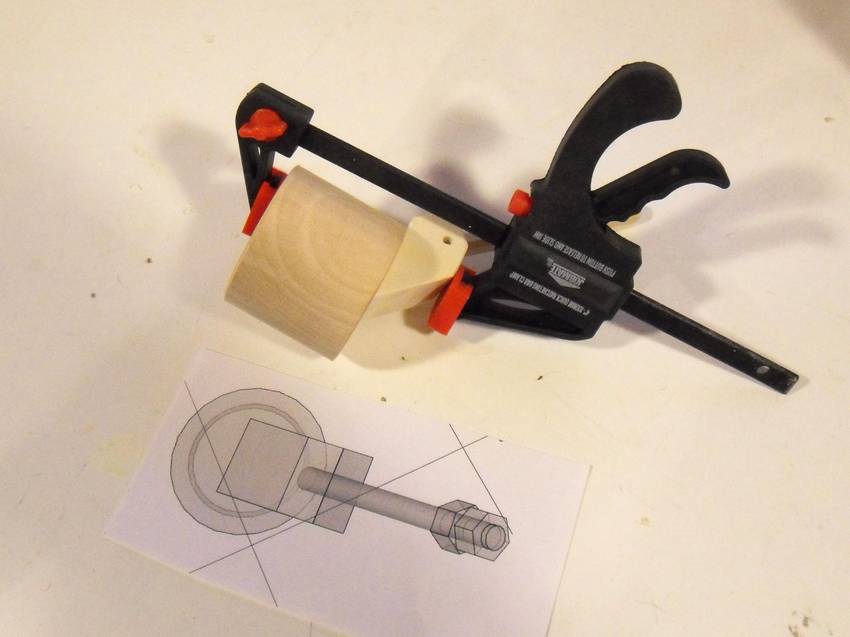
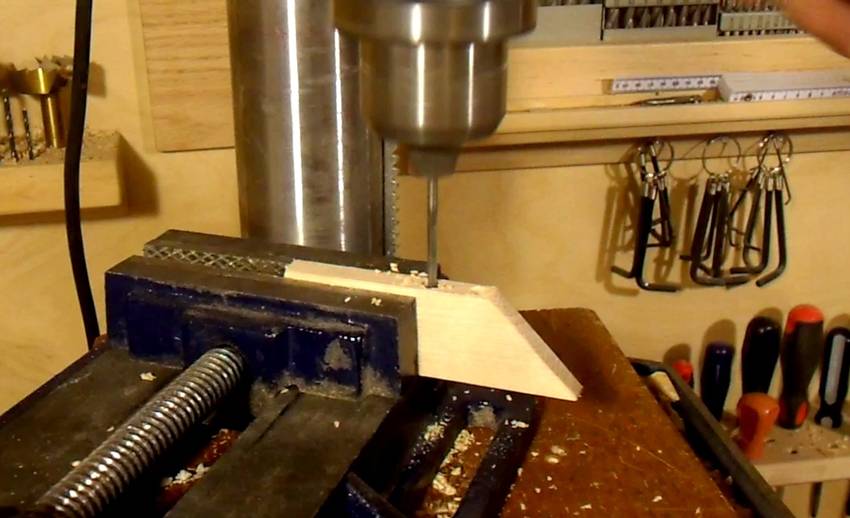
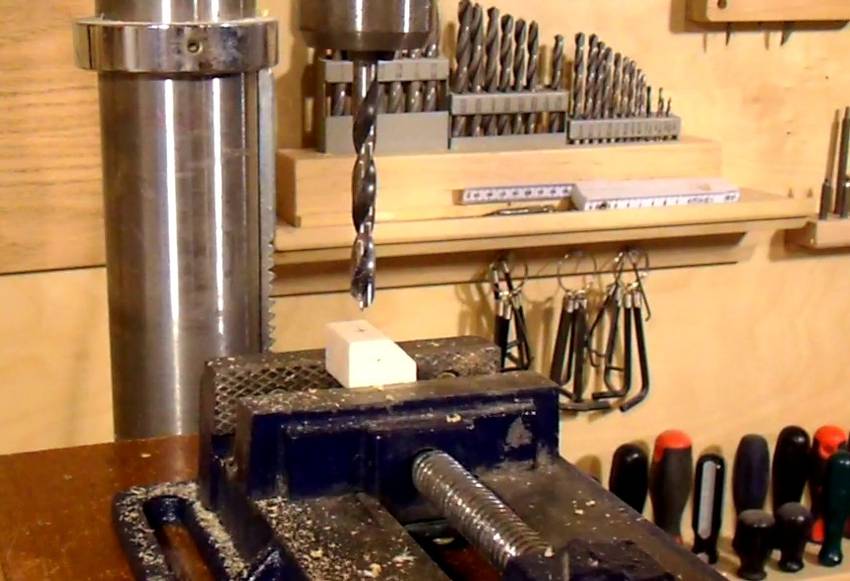 The block, clamped with the grain running at 45 degrees from horizontal, ready for
drilling the 5/16" (8 mm) hole for counterweight rod.
The block, clamped with the grain running at 45 degrees from horizontal, ready for
drilling the 5/16" (8 mm) hole for counterweight rod.
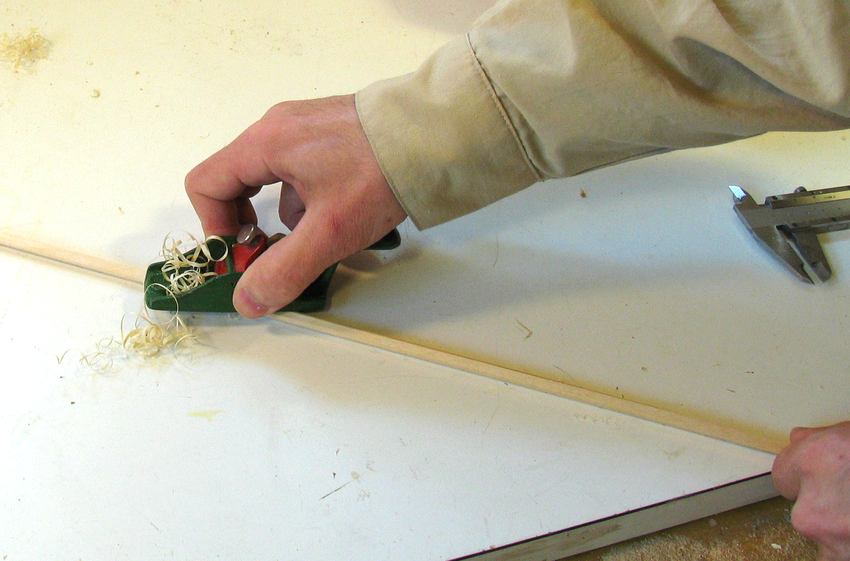 I don't have much luck finding accurate dowels at hardware stores, so I made an
approximately round dowel by whittling down a 8x8 mm piece of wood, to a round
profile with a small hand plane.
I don't have much luck finding accurate dowels at hardware stores, so I made an
approximately round dowel by whittling down a 8x8 mm piece of wood, to a round
profile with a small hand plane.
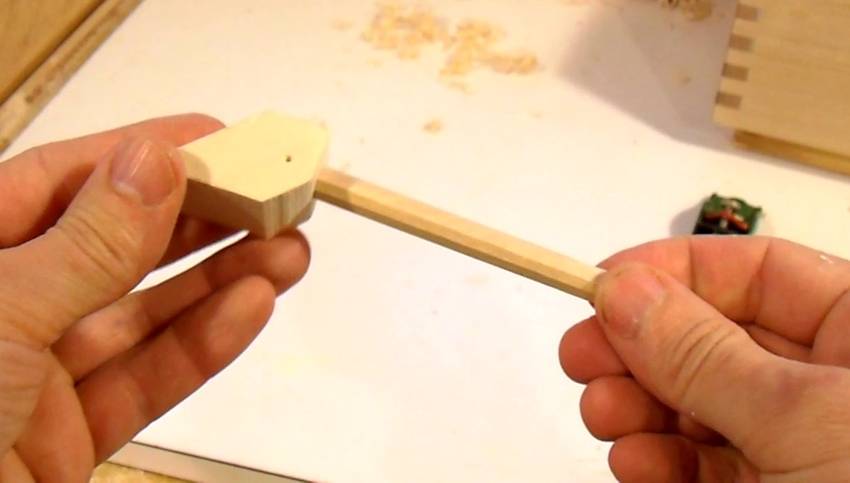 Now inserting an 8.5 cm long piece of that dowel into the hole.
 With the dowel inserted, it's time to drill the hole that the dump-o-matic
will pivot on.
This hole goes through the block as well as the dowel, so it has to be
drilled after the dowel is inserted. The hole should be just larger than
the nail that will be used for the shaft.
With the dowel inserted, it's time to drill the hole that the dump-o-matic
will pivot on.
This hole goes through the block as well as the dowel, so it has to be
drilled after the dowel is inserted. The hole should be just larger than
the nail that will be used for the shaft.
 Now gluing the block onto the cup. I was looking at a printout from the plans
to make sure I got the position right (just eyeballing it).
Now gluing the block onto the cup. I was looking at a printout from the plans
to make sure I got the position right (just eyeballing it).
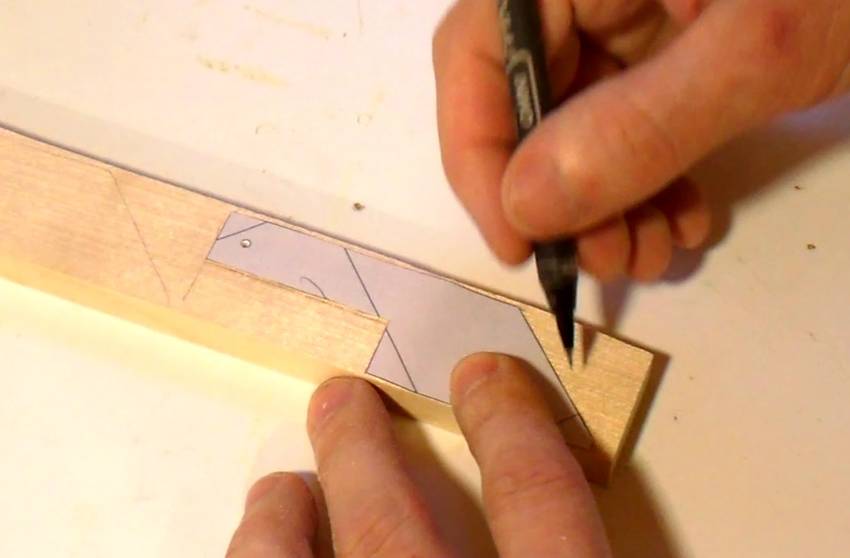 Next making the mounts for the dump-o-matic. I'm tracing around the outline
of the paper template onto a 1 cm thick piece of wood. I didn't bother gluing
this template on - just tracing around the edge. I also punched a
divot where the pivot is to make that location on the wood.
As with most other parts, I cut the mounts out on the bandsaw.
Next making the mounts for the dump-o-matic. I'm tracing around the outline
of the paper template onto a 1 cm thick piece of wood. I didn't bother gluing
this template on - just tracing around the edge. I also punched a
divot where the pivot is to make that location on the wood.
As with most other parts, I cut the mounts out on the bandsaw.
 Drilling the mounting holes. First I'm drilling a 1/4" (6 mm) hole
about 12 mm deep. This hole will allow the screw head of a #4 1" (25 mm) countersink
screw to sit below the surface so that the 1" screw will be long enough.
Drilling the mounting holes. First I'm drilling a 1/4" (6 mm) hole
about 12 mm deep. This hole will allow the screw head of a #4 1" (25 mm) countersink
screw to sit below the surface so that the 1" screw will be long enough.
 Next drilling 1/8" holes for the screws, all the way through.
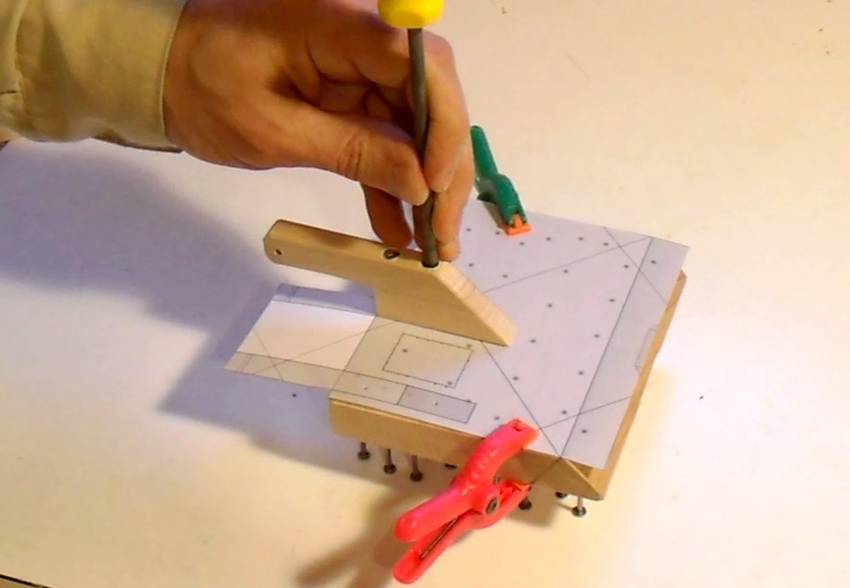 Now marking the screw hole locations on the back of the pin board. I clamped a back-view
template onto the pin board to guide me in positioning the mount. Then, with a #4 screw in
the hole, I'm tapping the back of the screwdriver with a hammer to transfer a divot
into the back of the pin board for where I need to drill the pilot hole.
Now marking the screw hole locations on the back of the pin board. I clamped a back-view
template onto the pin board to guide me in positioning the mount. Then, with a #4 screw in
the hole, I'm tapping the back of the screwdriver with a hammer to transfer a divot
into the back of the pin board for where I need to drill the pilot hole.
I have the hole locations marked on the paper template, but marking them from my actual pieces ensures that the mounts will be aligned correctly even if my mounting holes aren't.
 With the two mounting brackets screwed onto the back of the pin board, insert
a nail as a pivot. The nail sits firmly in the holes of the mounts, with the dump-o-matic
rotating about the nail.
With the two mounting brackets screwed onto the back of the pin board, insert
a nail as a pivot. The nail sits firmly in the holes of the mounts, with the dump-o-matic
rotating about the nail.
 The assembled and mounted dump-o-matic, as seen from the back/bottom side of the pin board.
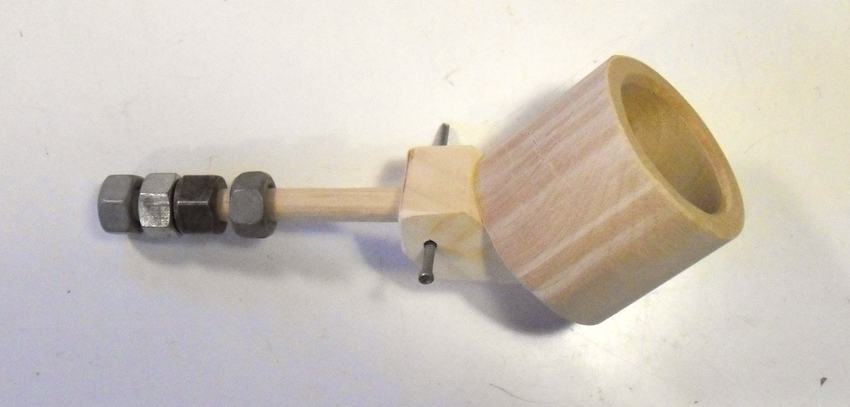
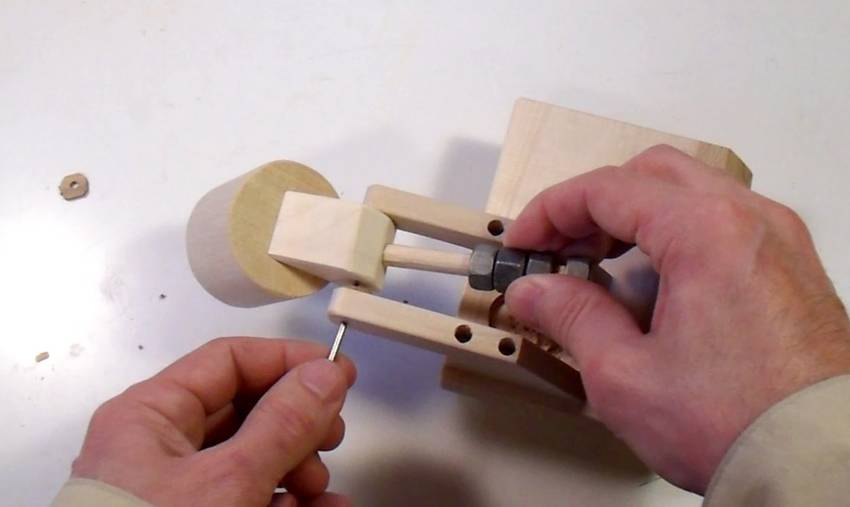
 Different nuts slipped onto the end of the dowel. The first and last nut on the shaft
are 3/8" 16 TPI nuts that fit just barely tightly on the shafts, while the middle two
nuts are 3/8" 24 TPI (fine thread) nuts. The finer 24 TPI threads are shallower
than the 16 TPI threads, so the minor diameter is slightly larger and the nuts slide
on the same dowel that the other nuts bind on. This allows for some adjustment. By moving the top
nut closer to the pivot, the middle nuts can slide. This can be useful, as the
nuts will slide towards
the pivot while the cup is dumping. That in turn reduces the amount of leverage
they apply, so the counterweight can be adjusted to ensure that all the marbles dump out
of the cup before it rights itself again.
Different nuts slipped onto the end of the dowel. The first and last nut on the shaft
are 3/8" 16 TPI nuts that fit just barely tightly on the shafts, while the middle two
nuts are 3/8" 24 TPI (fine thread) nuts. The finer 24 TPI threads are shallower
than the 16 TPI threads, so the minor diameter is slightly larger and the nuts slide
on the same dowel that the other nuts bind on. This allows for some adjustment. By moving the top
nut closer to the pivot, the middle nuts can slide. This can be useful, as the
nuts will slide towards
the pivot while the cup is dumping. That in turn reduces the amount of leverage
they apply, so the counterweight can be adjusted to ensure that all the marbles dump out
of the cup before it rights itself again.
 Its best to test this outside the machine. Here I have my pin board clamped to a box to
hold it up, and I am manually dropping marbles into the cup to check the dumping function.
Its best to test this outside the machine. Here I have my pin board clamped to a box to
hold it up, and I am manually dropping marbles into the cup to check the dumping function.
Next: Clanking iron
Back to Marble machine 2.1