Making a paper towel holder
 This page is about making a paper towel holder for a spot in my brother's
kitchen. Or maybe it's about using some of my fancy tools —
I had some ideas for techniques I wanted to try on this project,
which inspired me to do it.
This page is about making a paper towel holder for a spot in my brother's
kitchen. Or maybe it's about using some of my fancy tools —
I had some ideas for techniques I wanted to try on this project,
which inspired me to do it.
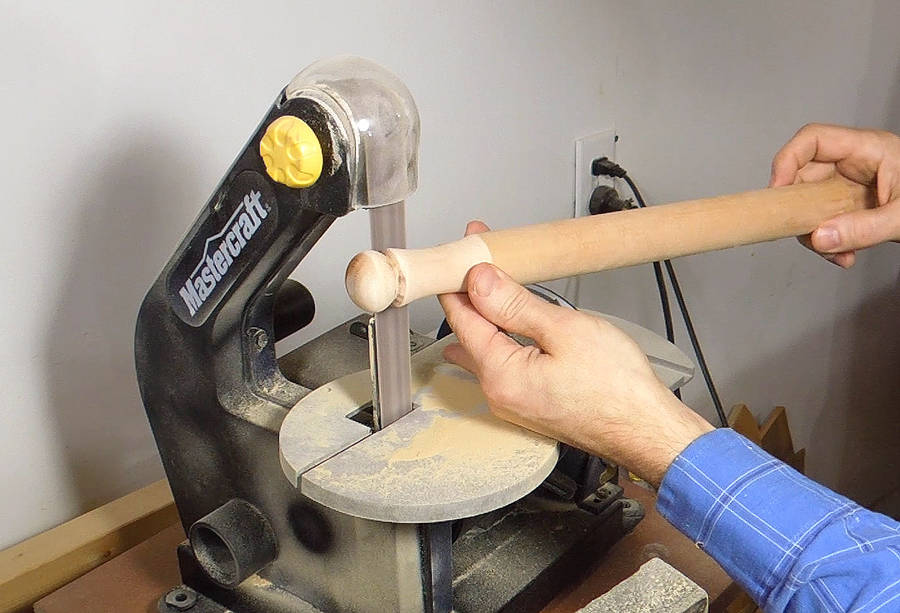
 I used a 1 1/4" (32 mm) dowel for the shaft of this paper towel holder.
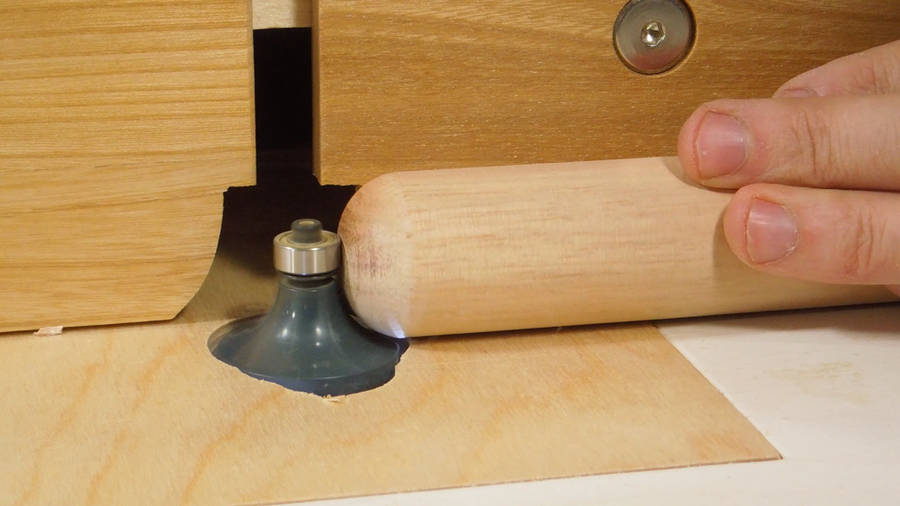
To make a small knob on the end, I first rounded the top of it with a 1/2" round over bit.
 I then tilted my router lift to 45 degrees
so that I could cut more of the knob shape with the cutter.
I then tilted my router lift to 45 degrees
so that I could cut more of the knob shape with the cutter.
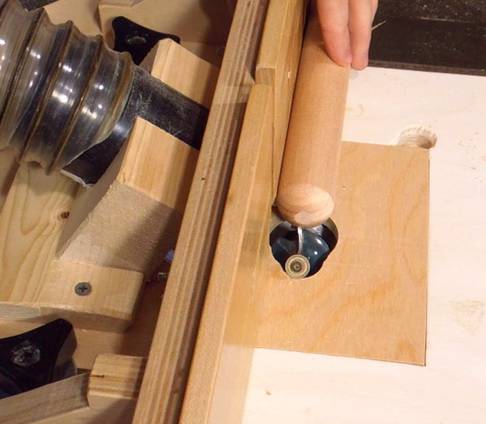
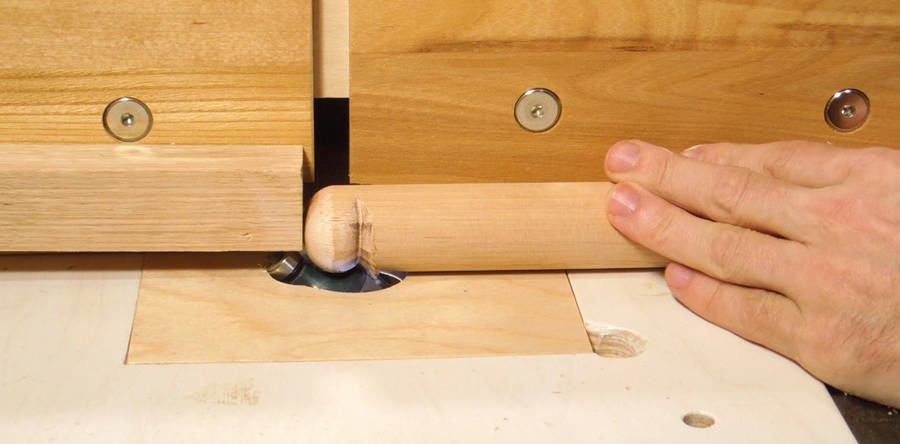 I positioned the fence so that the middle of the dowel was just over the bit,
and clamped a piece of wood as a side stop above the router bit guide bearing,
then slowly rotated the dowel over the router.
I positioned the fence so that the middle of the dowel was just over the bit,
and clamped a piece of wood as a side stop above the router bit guide bearing,
then slowly rotated the dowel over the router.
 Knob cut. Unfortunately, it looked small compared to the rest of the dowel.
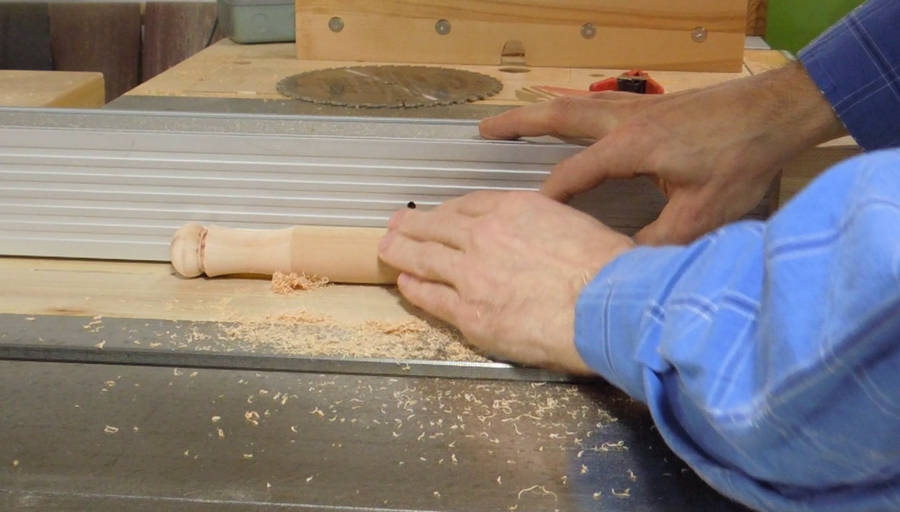
 So I cut a cove into the dowel near the knob on the table saw, with the blade
just slightly above the table. This made the knob look
more in proportion to the rest of the dowel.
So I cut a cove into the dowel near the knob on the table saw, with the blade
just slightly above the table. This made the knob look
more in proportion to the rest of the dowel.
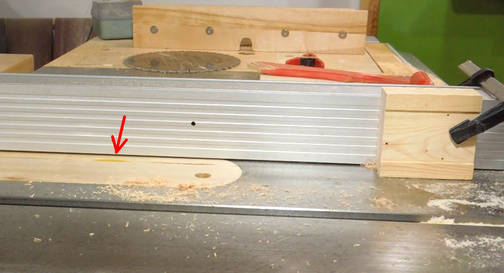
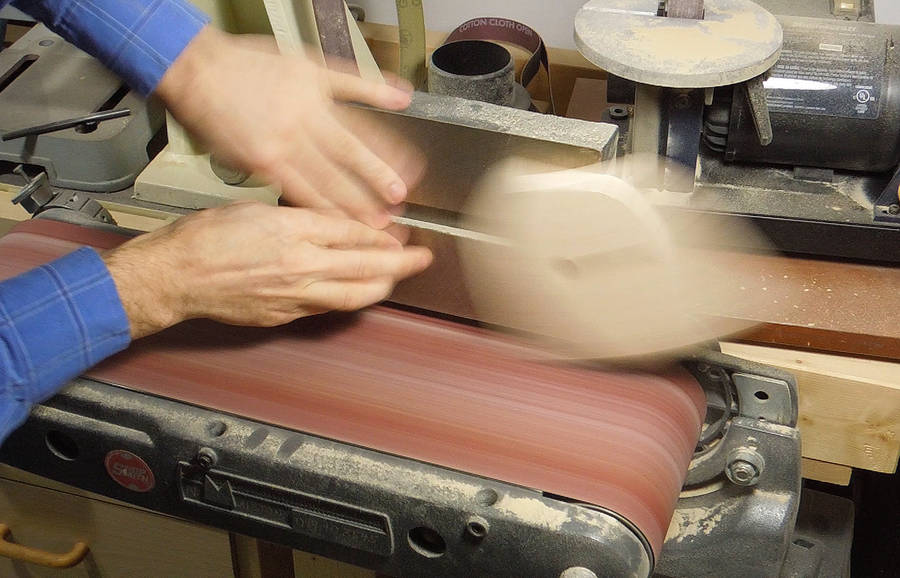
 A bit of sanding on the strip sander to clean it up.
I'm using the part of the belt that has no metal behind it so it flexes with
the wood.
A bit of sanding on the strip sander to clean it up.
I'm using the part of the belt that has no metal behind it so it flexes with
the wood.
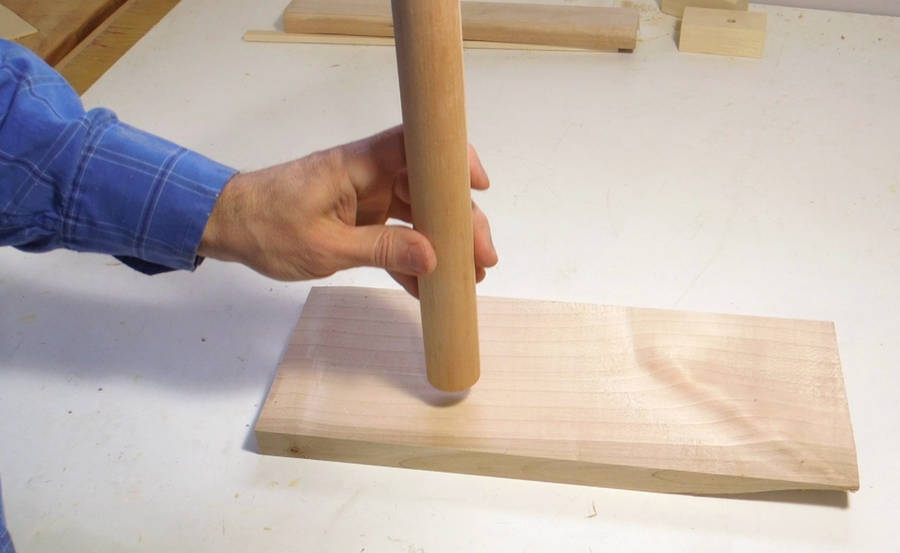 Next I need to mount the dowel on a board. A good way to do that is to
cut a tenon into the end of the dowel.
Next I need to mount the dowel on a board. A good way to do that is to
cut a tenon into the end of the dowel.
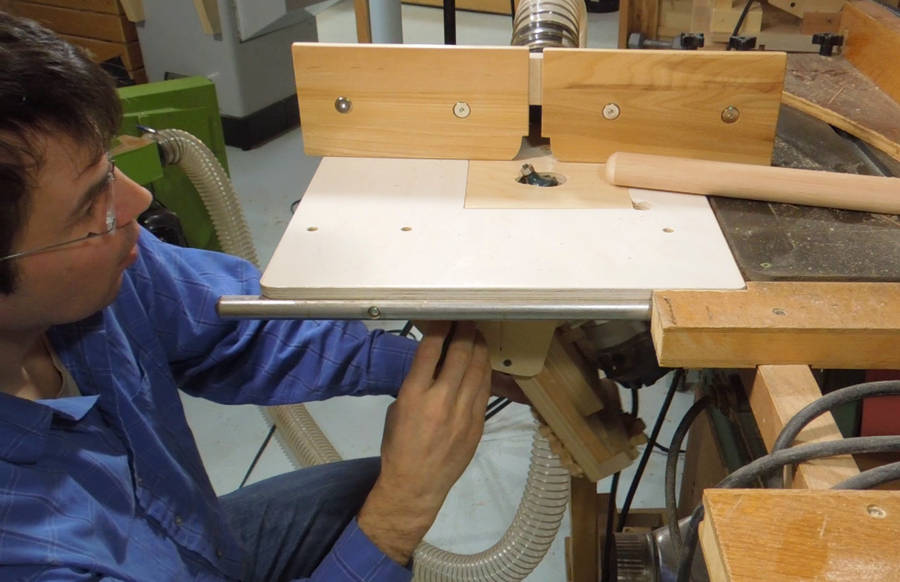
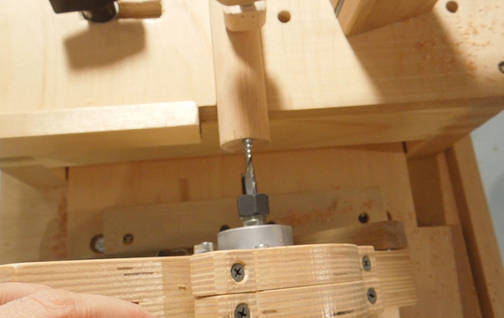
There are tricks for cutting a tenon into the end of a dowel, but all the conventional tricks amplify any error in roundness of the dowel onto the tenon, and this dowel wasn't very round to begin with.
Whatever the problem... The Pantorouter is often
the answer!
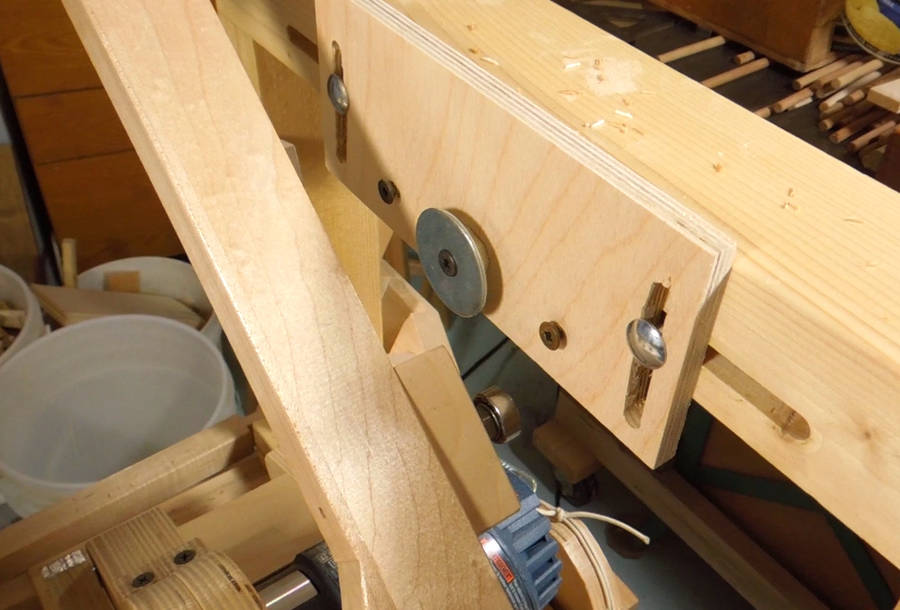 I mounted a 1½" fender washer as a template, and installed a ¾" guide bearing.
With a ¼" bit on the router, that makes for a ⅞" tenon. Referring to the formula
for template size from this page:
I mounted a 1½" fender washer as a template, and installed a ¾" guide bearing.
With a ¼" bit on the router, that makes for a ⅞" tenon. Referring to the formula
for template size from this page:
Ttemplate = 2 * Ttenon + ( 2 * Dcutter - Dbearing)
Plugging in my numbers:
1½ = 2 * ⅞ + ( 2 * ¼ - ¾)
I can see that it works out. Though I have to admit, I didn't actually use that formula :)
I started with a ¼" bit and a ½" guide bearing, so I knew it would reproduce the template at half scale. The 1½" washer would make a ¾" tenon. I wanted to make the tenon bigger, but not having any washers larger than 1½", I switched to a ¾" bearing. That adds ¼" to the template, or ⅛" to the tenon, for ⅞".
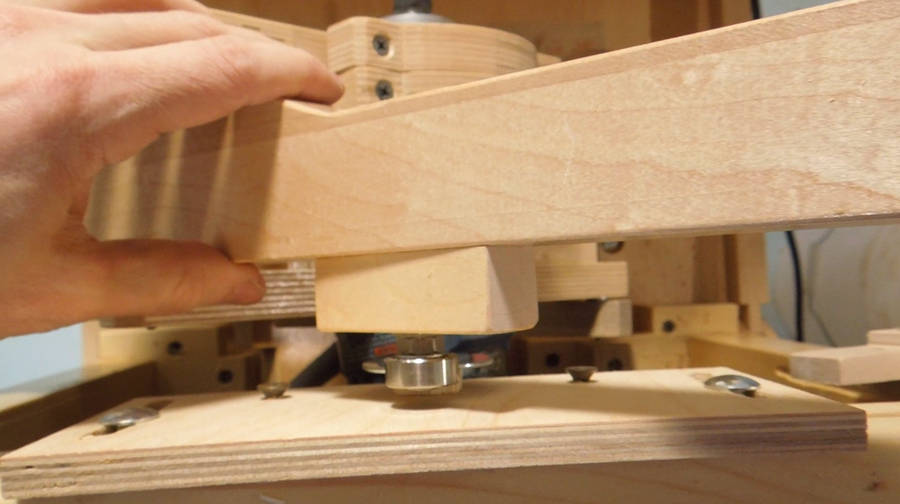
 Next doing the alignment. I wanted to cut the tenon in the center of the dowel (though the
exact position was not that critical).
With the guide bearing directly above the template, the router bit should
be directly above the dowel. This ensures side-to-side alignment.
Next doing the alignment. I wanted to cut the tenon in the center of the dowel (though the
exact position was not that critical).
With the guide bearing directly above the template, the router bit should
be directly above the dowel. This ensures side-to-side alignment.

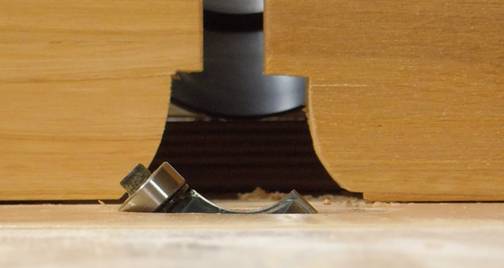
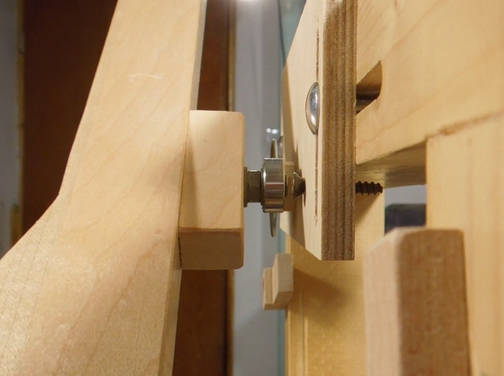 Then, with the guide bearing at the same height as the middle of the template, the bit should be
the same height as the center of the dowel for vertical alignment.
Then, with the guide bearing at the same height as the middle of the template, the bit should be
the same height as the center of the dowel for vertical alignment.

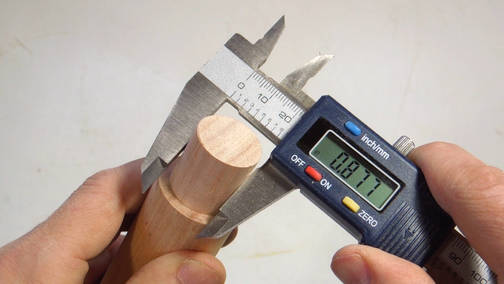 Now cutting. It came out slightly large. It should have been 7/8", or 0.875", but the caliper
read 0.877", and a few thou more in some spots. So the tenon was large by at least .002" (.05 mm)
Now cutting. It came out slightly large. It should have been 7/8", or 0.875", but the caliper
read 0.877", and a few thou more in some spots. So the tenon was large by at least .002" (.05 mm)
Close enough.
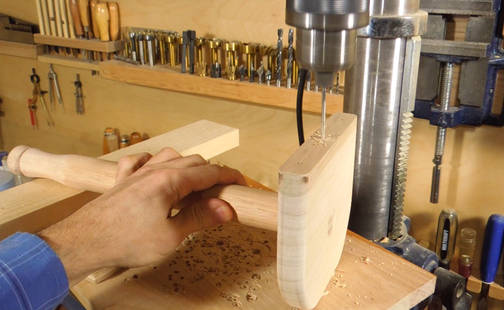
 Now drilling the hole in the base.
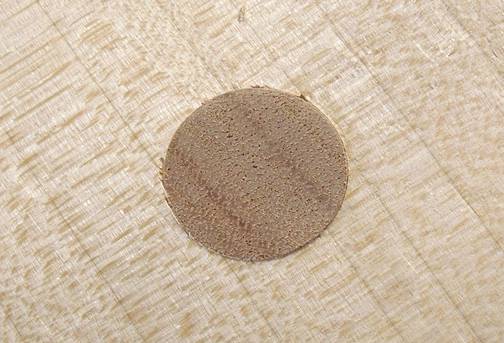 It was a tight fit, but I could still push it in by hand.
It would have been the perfect fit for a joint not to be glued.
It was a tight fit, but I could still push it in by hand.
It would have been the perfect fit for a joint not to be glued.
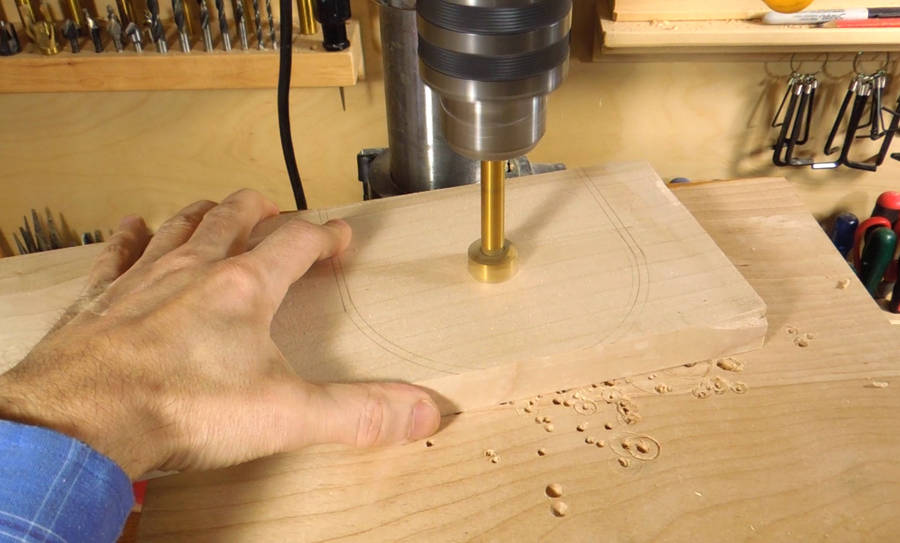
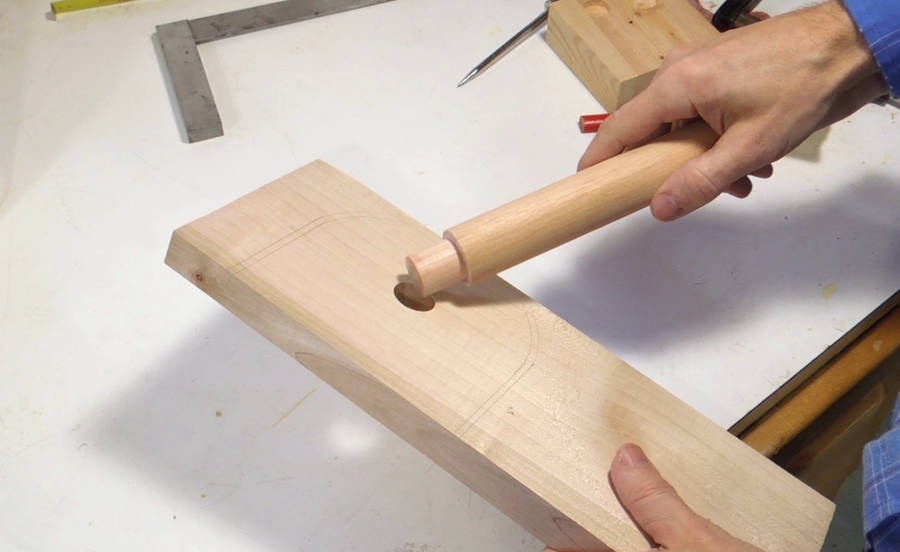
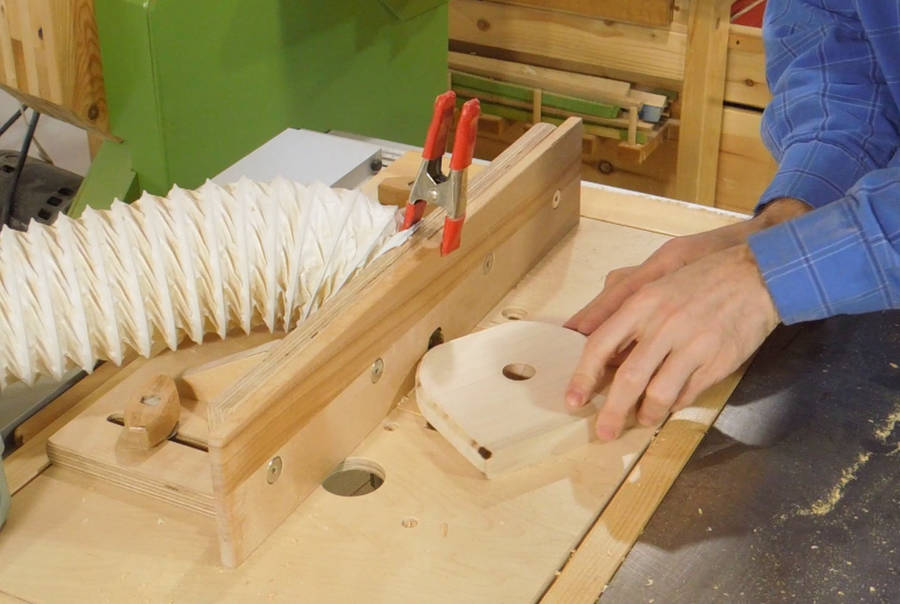
 Next I cut the base out on the bandsaw...
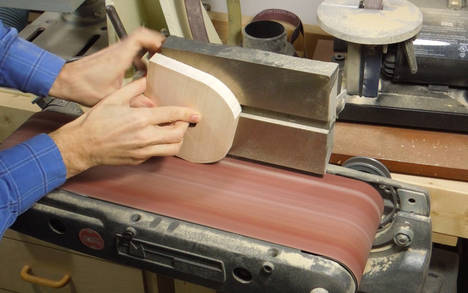 ... then sanded the edges smooth.
While sanding, the piece got away on me. I'm really not very careful with the belt sander, because the prospect of injury is so slim. When smaller objects get away on me, I usually scuff the tips of my fingers a little bit. With this one, I didn't make contact with the sandpaper. Looking at the video, it took five video frames (166 milliseconds) to start pulling my hands back after the piece got caught.
 Rounding the edges with a ¼" round over bit on my
other (older) router lift. I usually leave the round over bit in this router.
Rounding the edges with a ¼" round over bit on my
other (older) router lift. I usually leave the round over bit in this router.
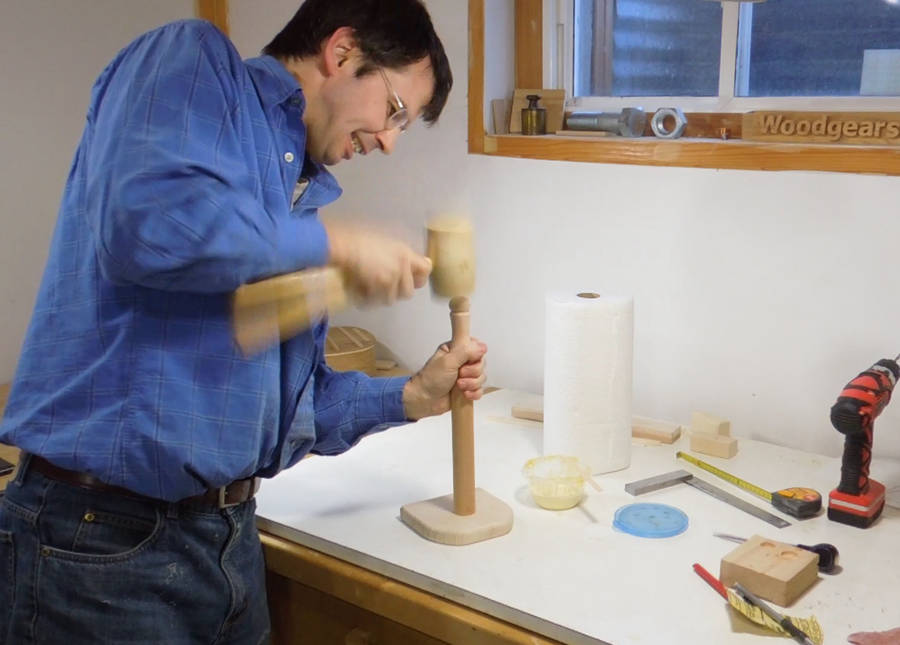 Gluing it together. The glue made the pieces swell up a bit, so I was only able
to press it in two thirds of the way with my hands.
Always keep a rubber mallet within reach when doing glue-ups. Time is of the essence.
Gluing it together. The glue made the pieces swell up a bit, so I was only able
to press it in two thirds of the way with my hands.
Always keep a rubber mallet within reach when doing glue-ups. Time is of the essence.
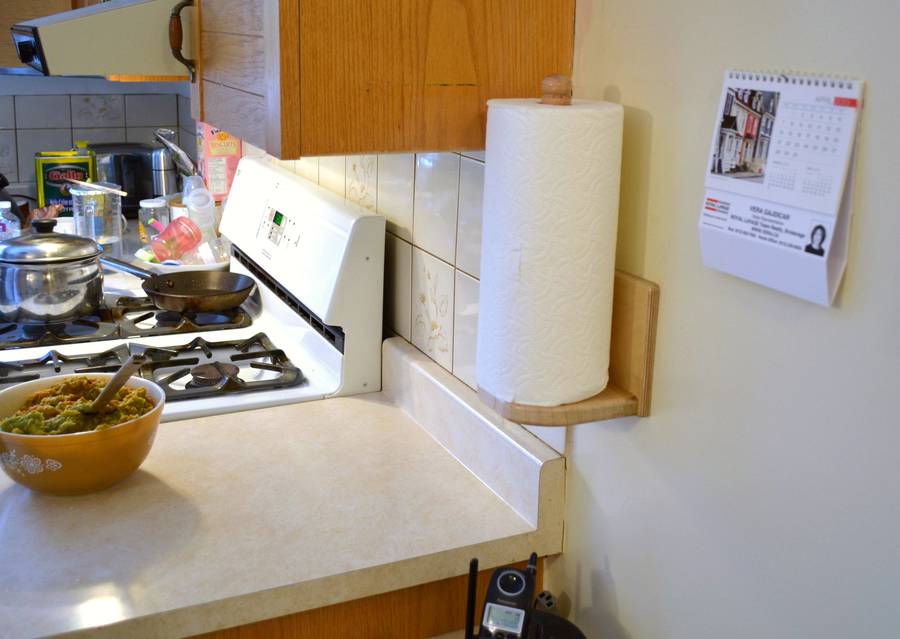
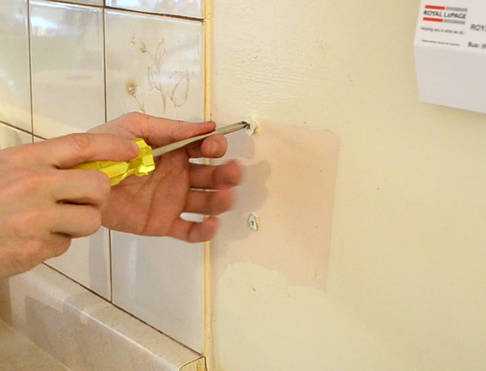
 The paper towel holder is for a spot on the wall in my brother's kitchen, where a phone
used to be attached. By making it the same size as the phone, the spot can cover up
the different colour paint in that spot.
The paper towel holder is for a spot on the wall in my brother's kitchen, where a phone
used to be attached. By making it the same size as the phone, the spot can cover up
the different colour paint in that spot.
We took a photo of the spot with a ruler held against the wall as a scale reference
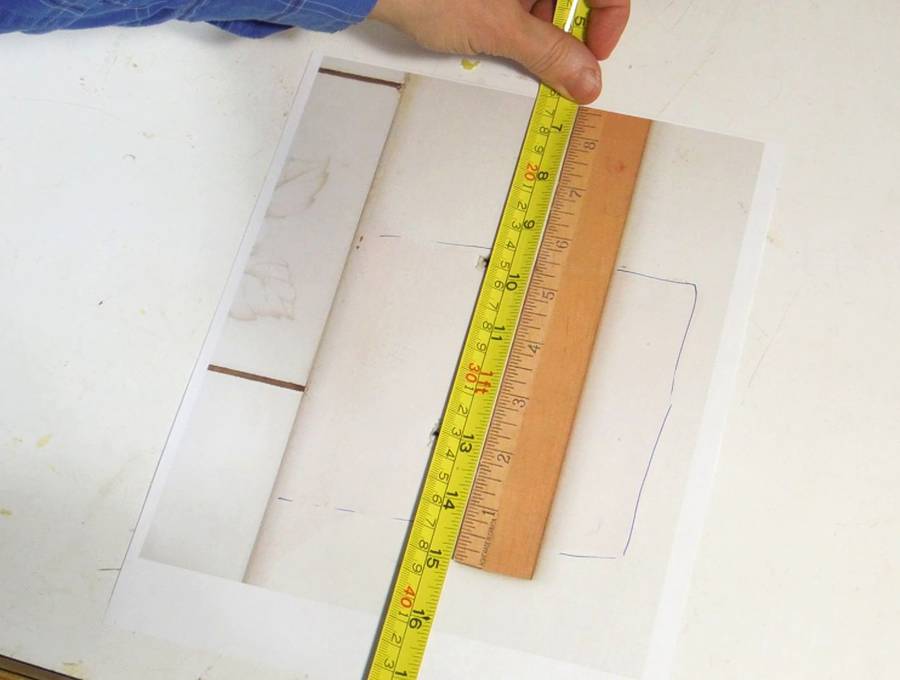 Using my BigPrint program, I used "calibrate by
scale" to scale the ruler on the printout exactly 1:1
Here, I'm checking the printed ruler's scale against a tape measure.
Using my BigPrint program, I used "calibrate by
scale" to scale the ruler on the printout exactly 1:1
Here, I'm checking the printed ruler's scale against a tape measure.
You can see the outline of where the holder needs to go. It's hard to see in the printout because I printed it light to save ink. So I outlined the edge with a pen.
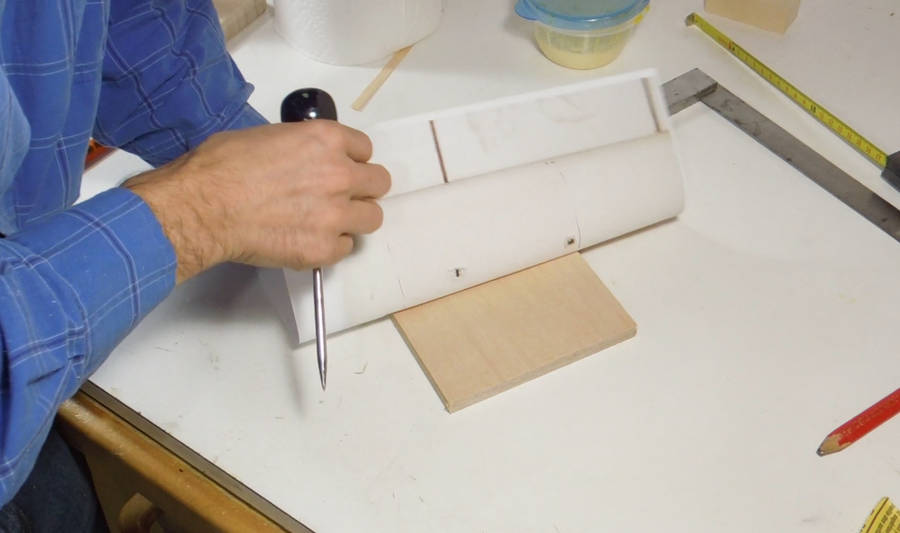 I cut a piece of plywood the size of the area that needs covering, placed it on the
outlined area, then flipped the piece of wood and paper over.
I cut a piece of plywood the size of the area that needs covering, placed it on the
outlined area, then flipped the piece of wood and paper over.
I could see the existing black anchor holes through the back of the paper. I used an awl to punch those locations into the plywood.
I then drilled holes in the plywood to exactly match the anchor hole positions.
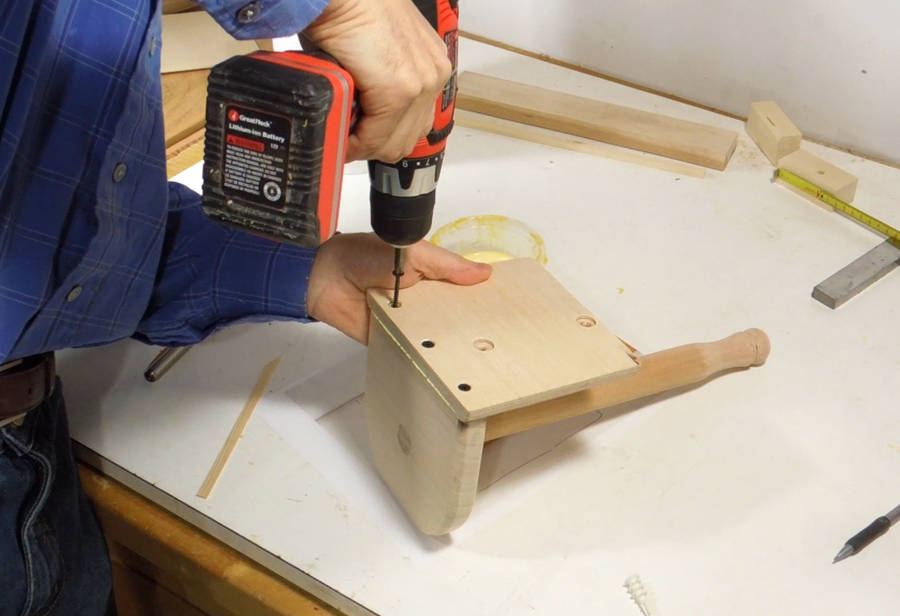
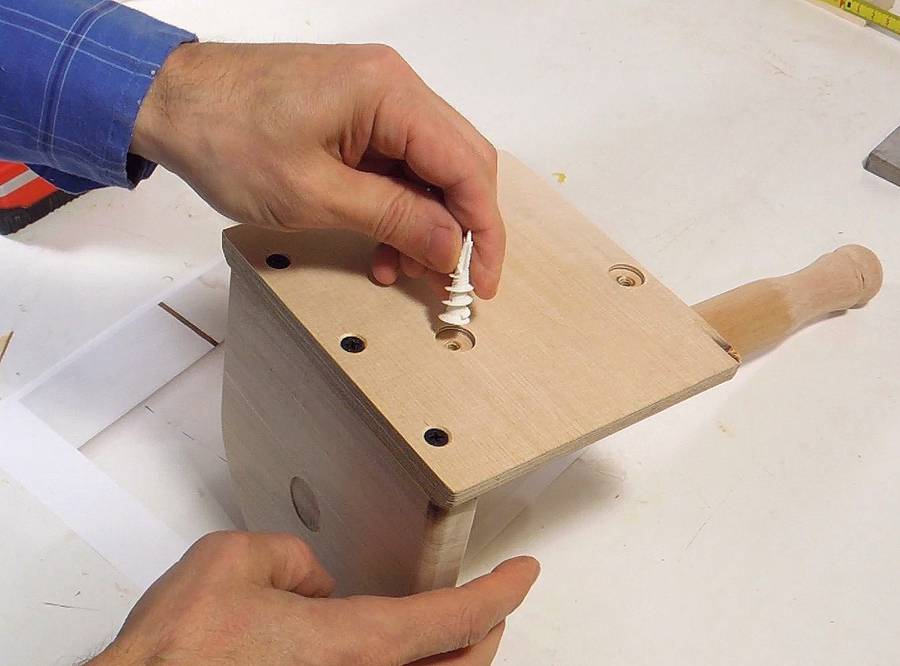
 Finally, drilling pilot holes in the base of the holder
and screwing it together.
Finally, drilling pilot holes in the base of the holder
and screwing it together.
 I drilled a recess on the back side of the screw holes to make room
for drywall anchors, which may potentially protrude slightly from the wall,
especially as the screws are tightened.
I drilled a recess on the back side of the screw holes to make room
for drywall anchors, which may potentially protrude slightly from the wall,
especially as the screws are tightened.
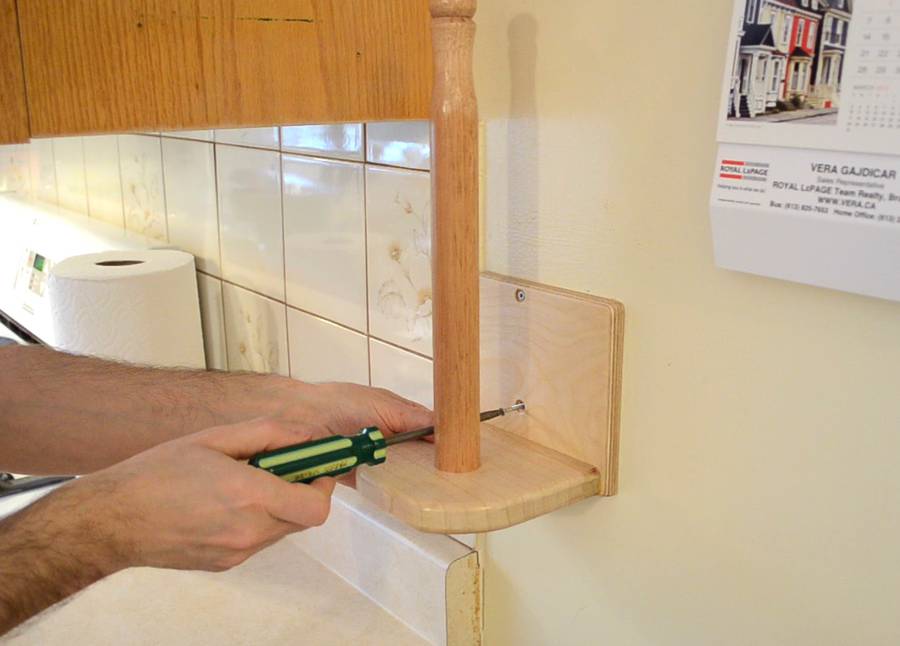
 I had to add some drywall anchors to the holes in the wall. The paper
towel holder fit nicely onto them. It ended up only about 0.5 mm
off vertical along it's height. I was pretty happy with that, considering
the inaccuracy of dealing with existing holes in drywall.
I had to add some drywall anchors to the holes in the wall. The paper
towel holder fit nicely onto them. It ended up only about 0.5 mm
off vertical along it's height. I was pretty happy with that, considering
the inaccuracy of dealing with existing holes in drywall.
All done.
Sometimes it's fun to do a simple project with minimal tools. But this wasn't that kind of project. This one was more about finding creative uses for fancy tools.
See also:
 Small corner shelf
 Flip handle ramekin tray
 Making curtain rods
 Warp-free cutting board
 Kitchen cabinet
 Pantry closet shelves
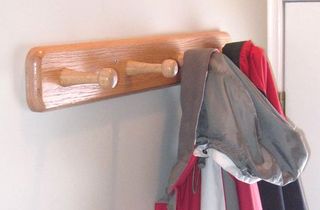 Making coat hooks
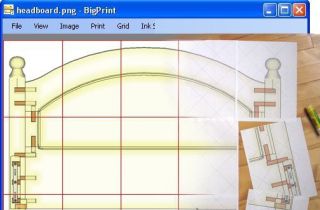 BigPrint program
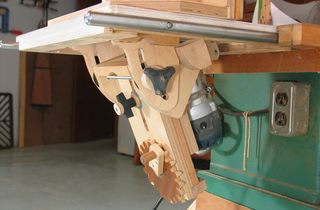 Tilting router lift
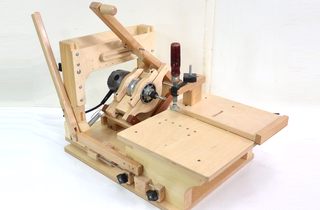 Pantorouter machine