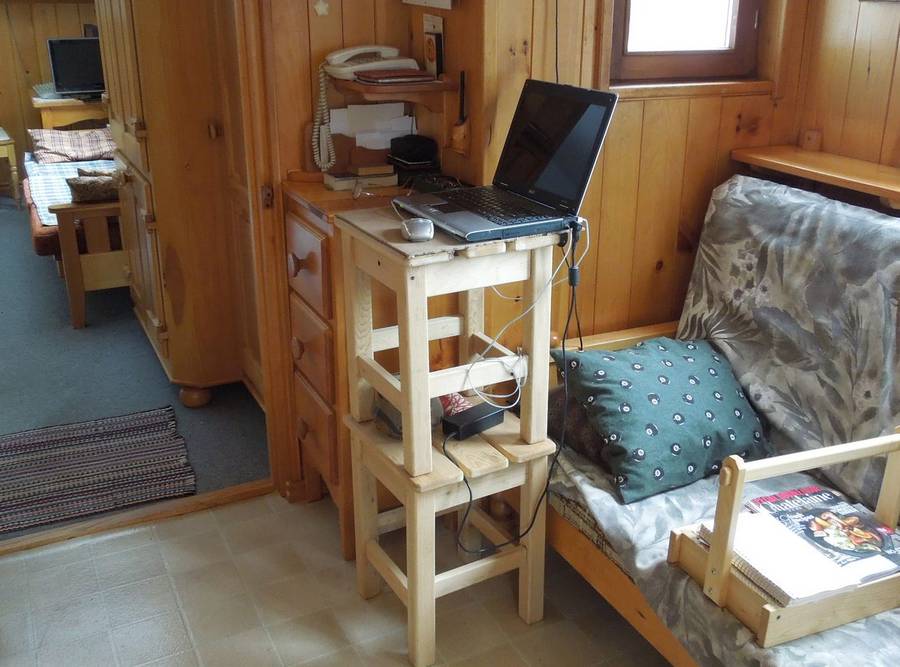
 This slightly odd piece of furniture started with my mom needing a place to put
the laptop computer. Stacking two stools on top of each
other turned out to be just the right size and height.
This slightly odd piece of furniture started with my mom needing a place to put
the laptop computer. Stacking two stools on top of each
other turned out to be just the right size and height.
This slightly odd piece of furniture started with my mom needing a place to put
the laptop computer. Stacking two stools on top of each
other turned out to be just the right size and height.
She asked me if I could built something more furniture-like to serve that same purpose.
 I took some pine boards from my dad's shop
and proceeded to build. You can see from the curved sawmill marks that these were originally
cut on my dad's sawmill
I took some pine boards from my dad's shop
and proceeded to build. You can see from the curved sawmill marks that these were originally
cut on my dad's sawmill
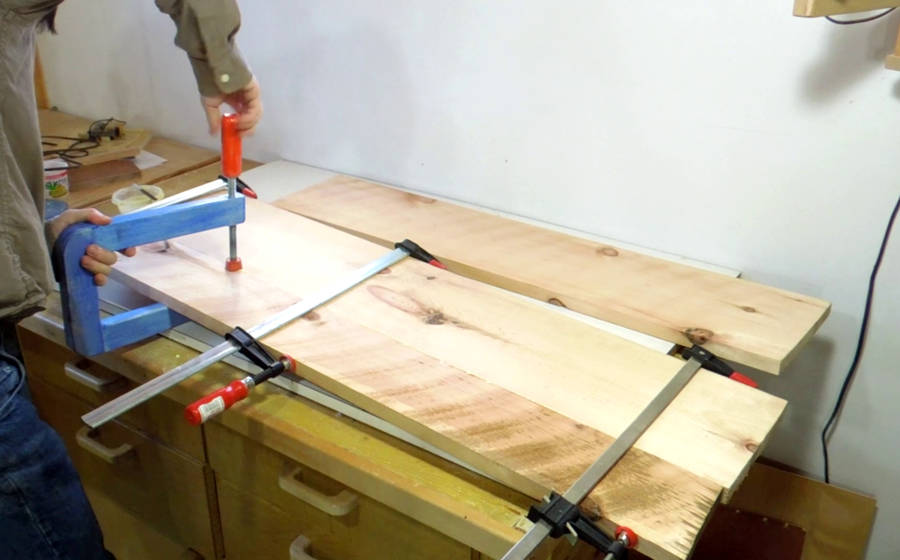
I glued two boards side by side to get the width I needed. I used my blue long reach C-clamps to force the boards into alignment near the middle.
 Once the glue dried, I ripped it to the width I needed, which was also a width
that just barely fit through my thickness planer.
Once the glue dried, I ripped it to the width I needed, which was also a width
that just barely fit through my thickness planer.
I'm using my small dust collector to catch the shavings. The 5-gallon bucket fills up fast when planing wide boards. I'm using slightly translucent buckets with the dust collector, and am watching it fill up. Fortunately, it only takes a few seconds to swap in another bucket.
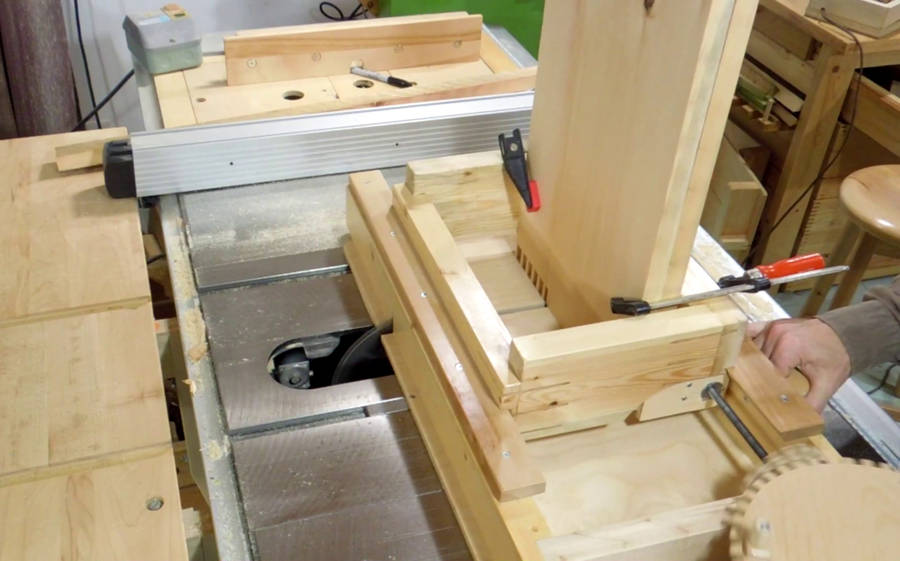 I joined the top and sides with a sort of box joint, and I'm using
my screw advance box joint jig.
I joined the top and sides with a sort of box joint, and I'm using
my screw advance box joint jig.
I can't be bothered to put a dado blade in my saw these days, so I just make several cuts to clear out each slot. I stick bits of electrical tape onto the big crank gear to indicate which crank positions I need to make cuts at.
I often take the insert out of the saw when using the box joint jig to get more airflow at the top to pull in more dust.
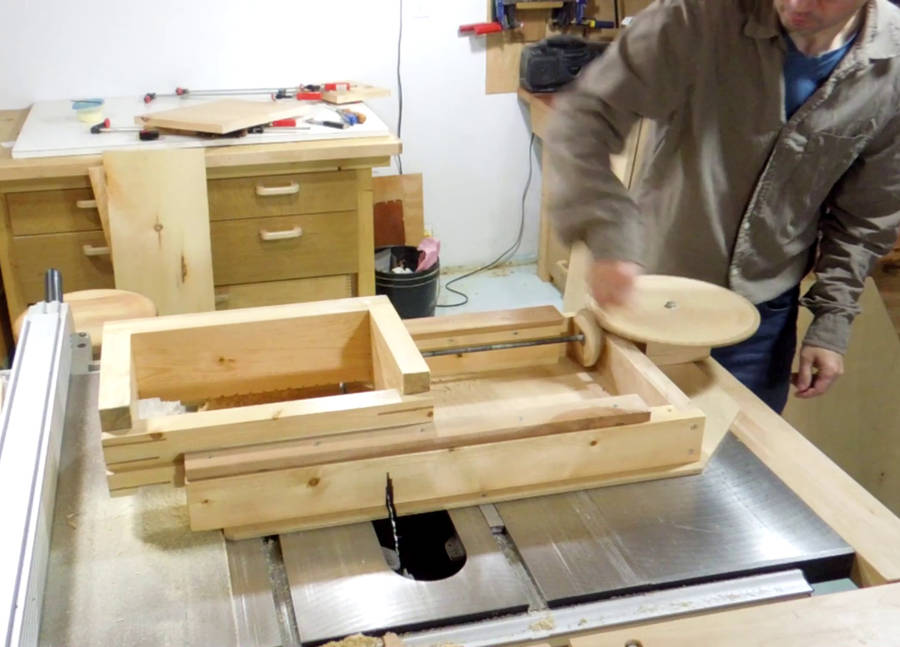 The carriage ends up all the way to the right after finishing a joint. It takes
about fifteen seconds (48 crank turns) to wind it back to the starting position.
Why do I mention this? Because some have suggested that I add some sort of quick-release
to disengage the screw thread to pull the carriage straight home.
But if building such a mechanism took only an extra hour and never caused any
problems, I would still have to cut 240 full-width box joints before that time
would be amortized. Just not worth the trouble.
The carriage ends up all the way to the right after finishing a joint. It takes
about fifteen seconds (48 crank turns) to wind it back to the starting position.
Why do I mention this? Because some have suggested that I add some sort of quick-release
to disengage the screw thread to pull the carriage straight home.
But if building such a mechanism took only an extra hour and never caused any
problems, I would still have to cut 240 full-width box joints before that time
would be amortized. Just not worth the trouble.
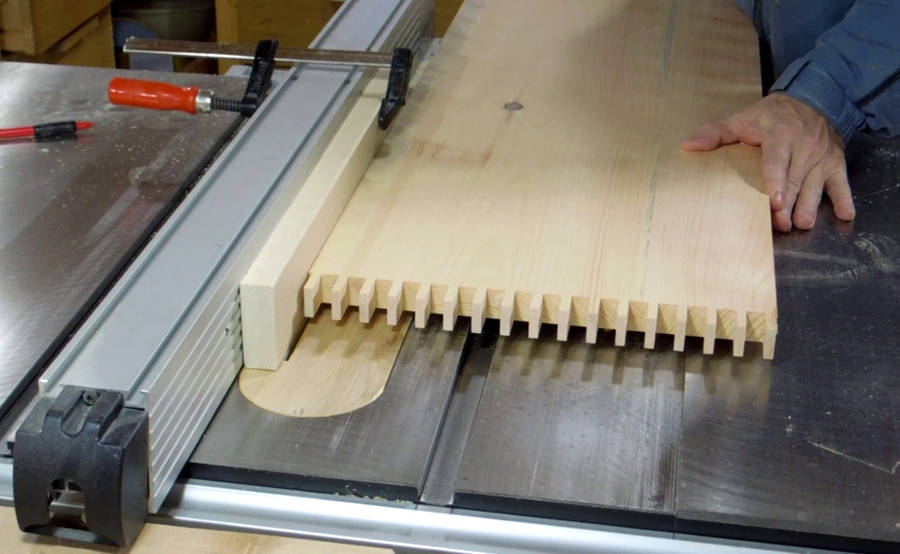
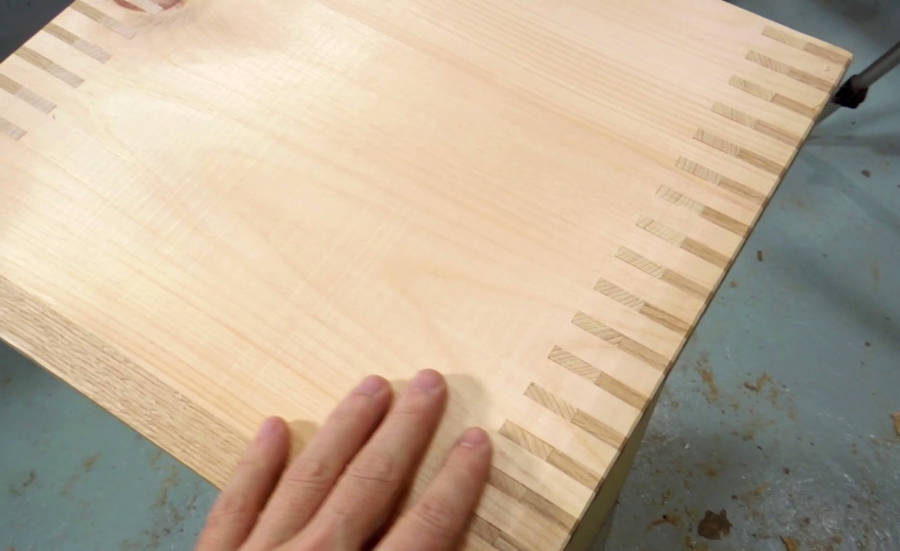
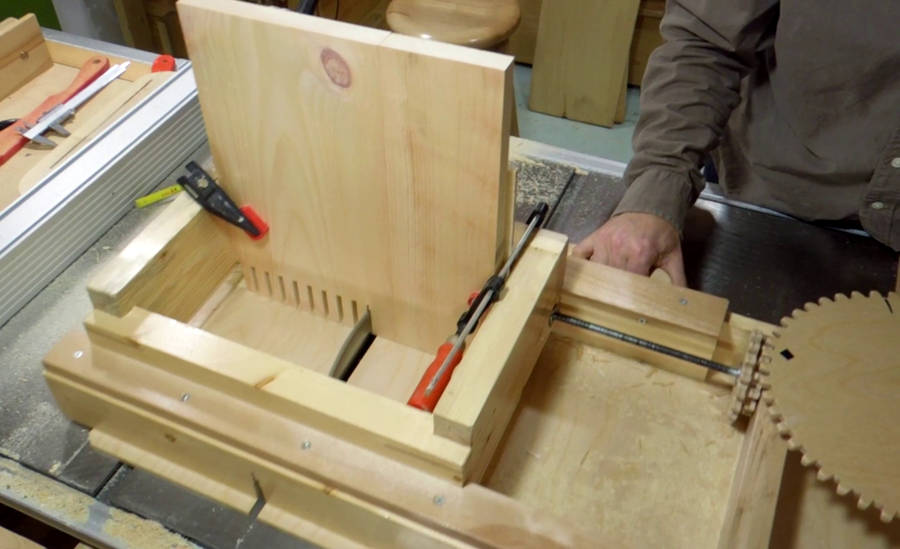 Next, cutting 1/4" wide slots every 3/4" into the top. These cut are fairly deep,
over 1.5" (4 cm) deep.
Next, cutting 1/4" wide slots every 3/4" into the top. These cut are fairly deep,
over 1.5" (4 cm) deep.
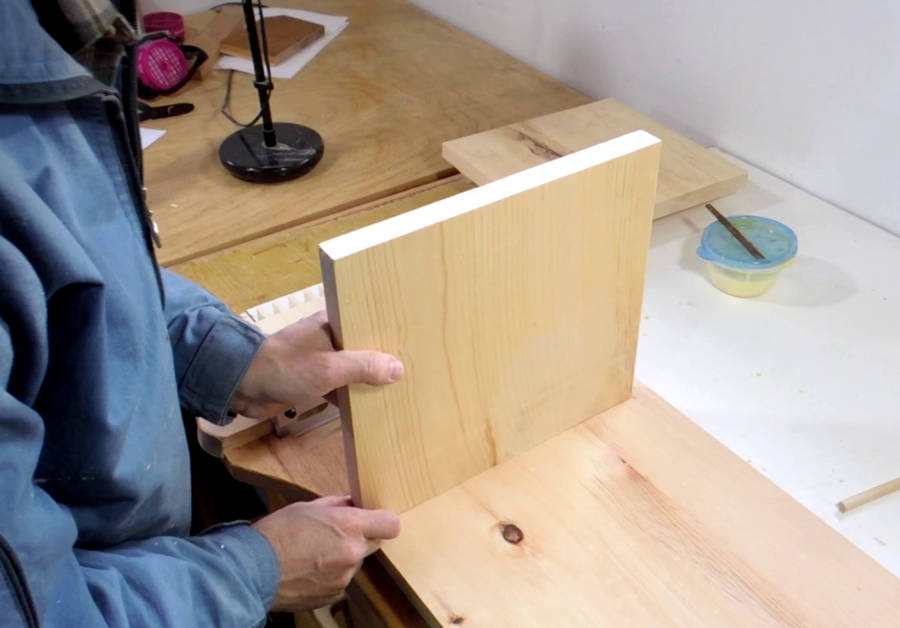
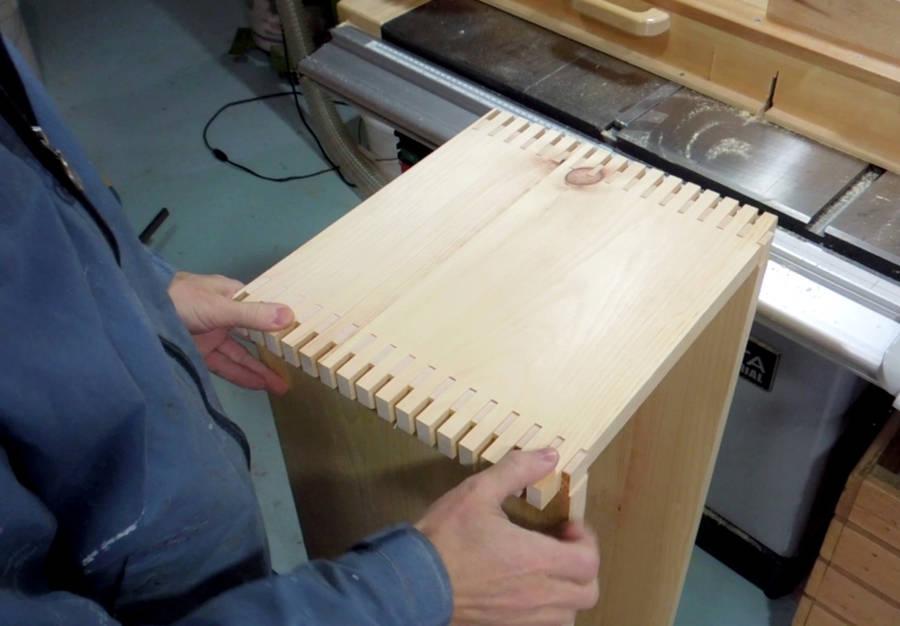 Test fitting the sides and top. So far so good.
But before I mount the top, I need to add the shelves.
Test fitting the sides and top. So far so good.
But before I mount the top, I need to add the shelves.
The way the top goes on is very similar to how I attached the from of my box joined drawers a few years ago.
 The shelves form a T-joint with the sides. I could cut a dado into the sides
to mount the shelves, but I'm not such a fan of dado joints -
they aren't a very strong joint and really weaken the wood.
The shelves form a T-joint with the sides. I could cut a dado into the sides
to mount the shelves, but I'm not such a fan of dado joints -
they aren't a very strong joint and really weaken the wood.
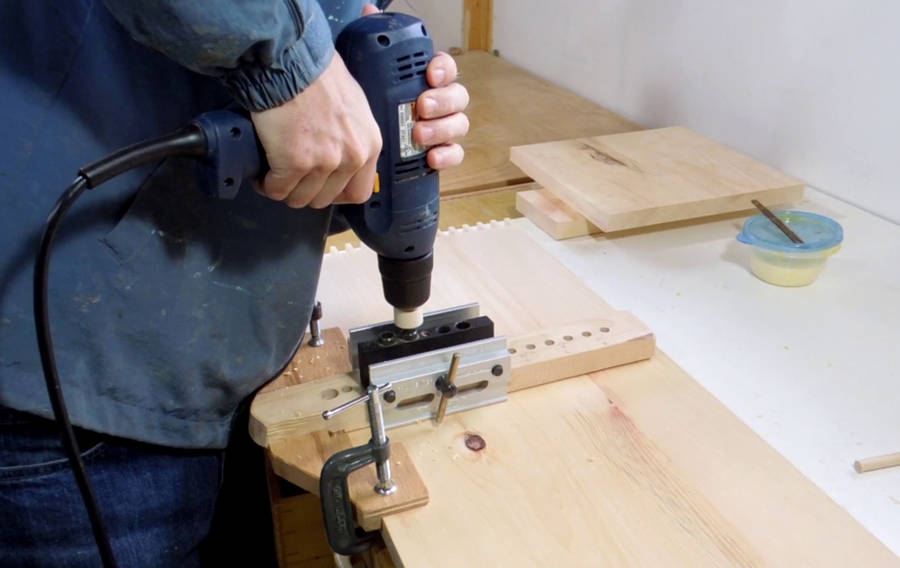 Instead, I'm doweling the shelves in. I'm using my
doweling T-square
to make an accurately aligned set of holes across the board.
Instead, I'm doweling the shelves in. I'm using my
doweling T-square
to make an accurately aligned set of holes across the board.
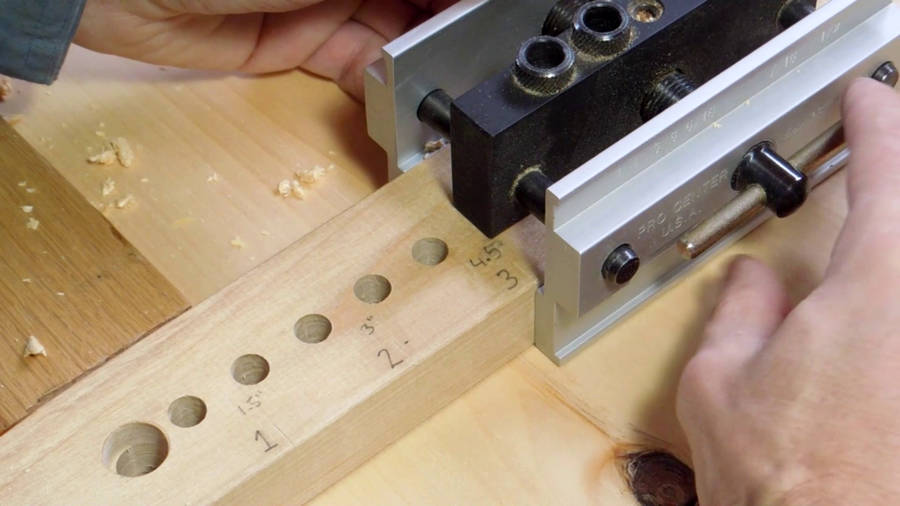 The jig works with the two 3/8" (10 mm) bushings in
my self centering dowel jig.
The bushings are exactly 3/4" apart. By aligning the jig to marks on
the T-square, holes with spacing every 3/4" can be made.
The jig works with the two 3/8" (10 mm) bushings in
my self centering dowel jig.
The bushings are exactly 3/4" apart. By aligning the jig to marks on
the T-square, holes with spacing every 3/4" can be made.
 I didn't drill a hole in every possible position. I figured this was strong
enough already.
I didn't drill a hole in every possible position. I figured this was strong
enough already.
 Next, drilling the same set of holes in the ends of the shelves.
I clamped the T-square to the end of the board to use it as a ruler for positioning the jig.
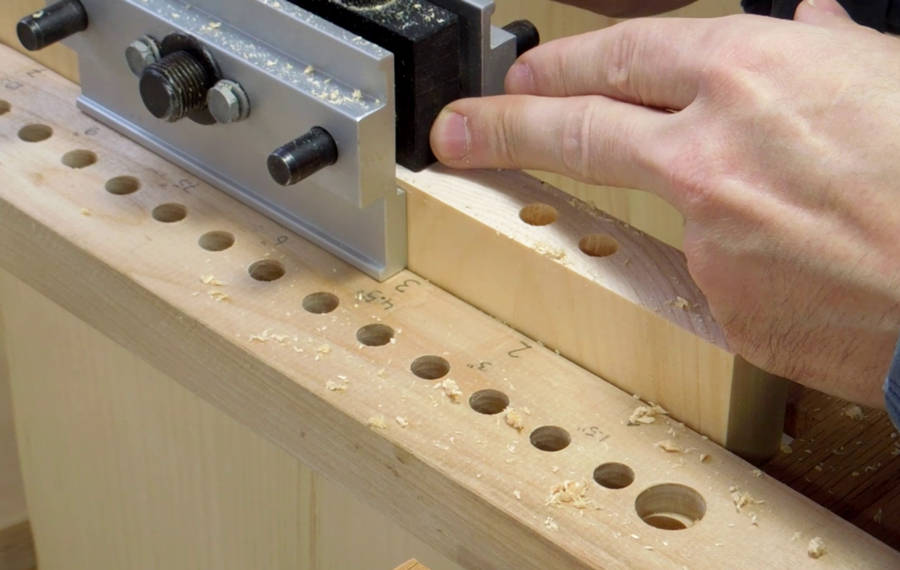 That way, I know my holes will be consistently spaced. It's not that hard
to line things up to 0.1 mm accuracy by eye, and that is close enough for
a dowel joint.
That way, I know my holes will be consistently spaced. It's not that hard
to line things up to 0.1 mm accuracy by eye, and that is close enough for
a dowel joint.
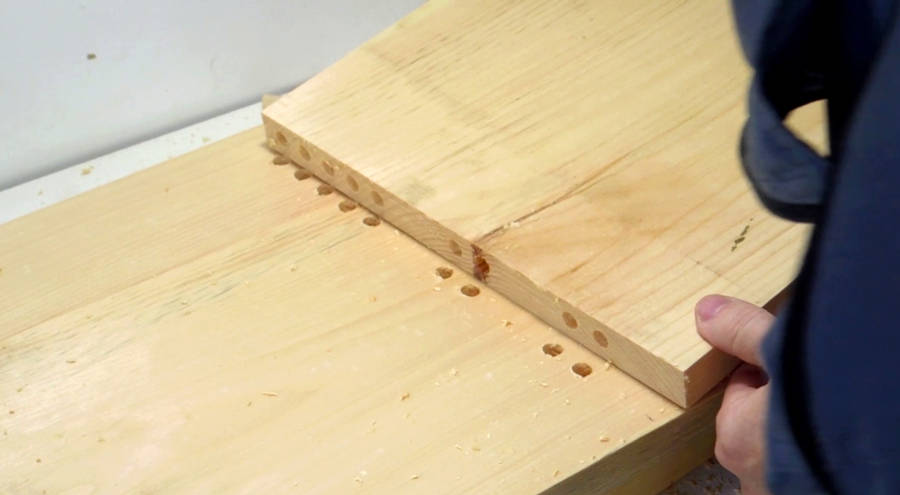 A quick visual check to ensure I didn't mess up the hole alignment.
 But before I can assemble the sides and shelves, I need to cut a rabbet in the
back edge of the sides to take the plywood back. I'm making a plunge-cut
on my table saw to cut this rabbet.
But before I can assemble the sides and shelves, I need to cut a rabbet in the
back edge of the sides to take the plywood back. I'm making a plunge-cut
on my table saw to cut this rabbet.
I also cut the same amount off the back of the shelves.
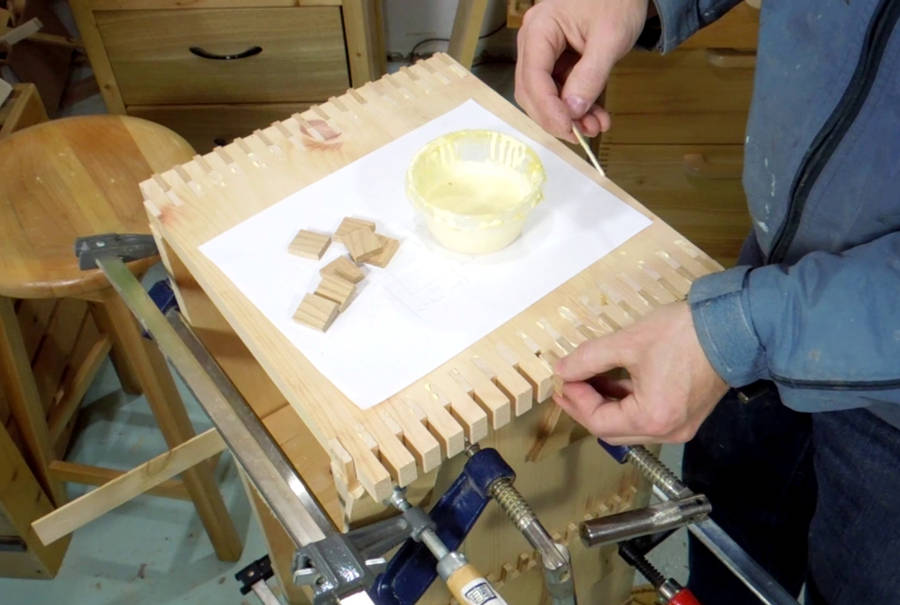
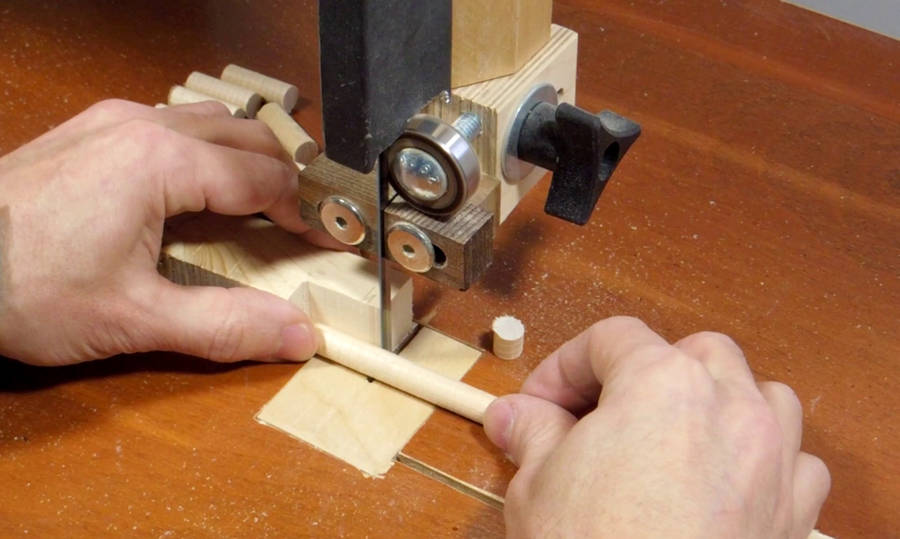 Also cutting out the dowels. Based on how deep I drilled the holes, these
needed to be 28 mm long. I cut a notch out of a piece of scrap wood
to use as a length guide when cutting these out on the bandsaw.
Also cutting out the dowels. Based on how deep I drilled the holes, these
needed to be 28 mm long. I cut a notch out of a piece of scrap wood
to use as a length guide when cutting these out on the bandsaw.
I slightly chamfered the ends of the dowels on the belt sander to make it easier to line them up with the holes.
 The dowels fit very tightly in the holes. I
made them myself, so they are within a few thou of 3/8".
The dowels fit very tightly in the holes. I
made them myself, so they are within a few thou of 3/8".
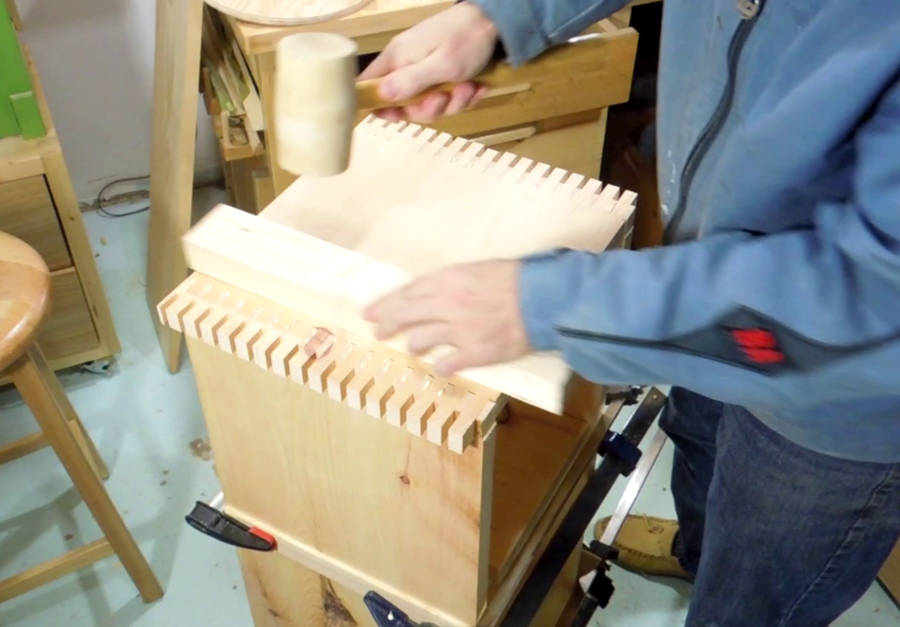
 Putting the first shelf on.
With even the individual dowels requiring a bit of pounding to get them in, getting the nine in at once required more pounding with the rubber mallet.
 Pressing the joint closed, then letting the glue dry. I also checked
that the shelf was in square.
Pressing the joint closed, then letting the glue dry. I also checked
that the shelf was in square.
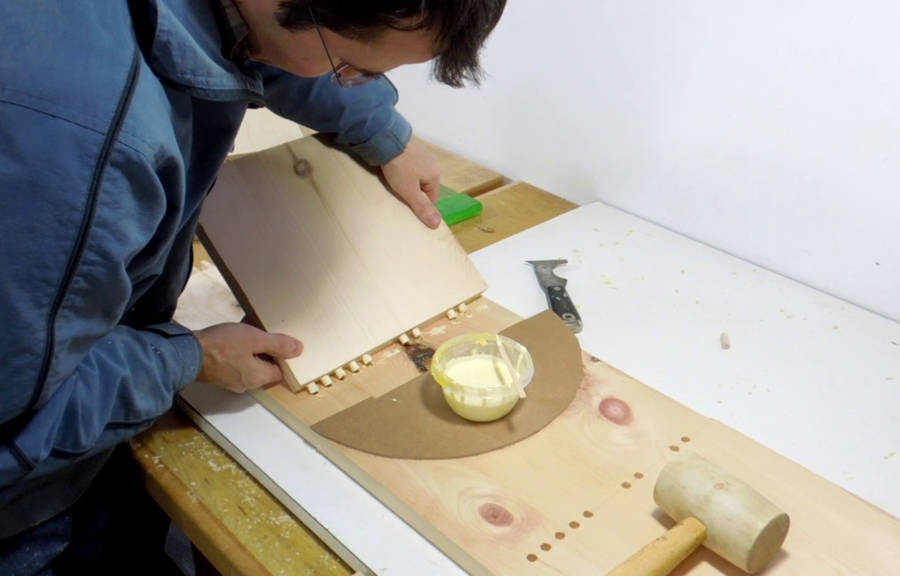
 Now, mating the side and two shelves with the other side. 18 dowels need to line up
together. Fortunately, it all fit, though it took a bit of pounding to get all the
dowels into the holes.
Now, mating the side and two shelves with the other side. 18 dowels need to line up
together. Fortunately, it all fit, though it took a bit of pounding to get all the
dowels into the holes.
Commercially made dowel pins have much more of a taper at the end, which makes inserting them much easier. But that taper also cuts down on glue area.
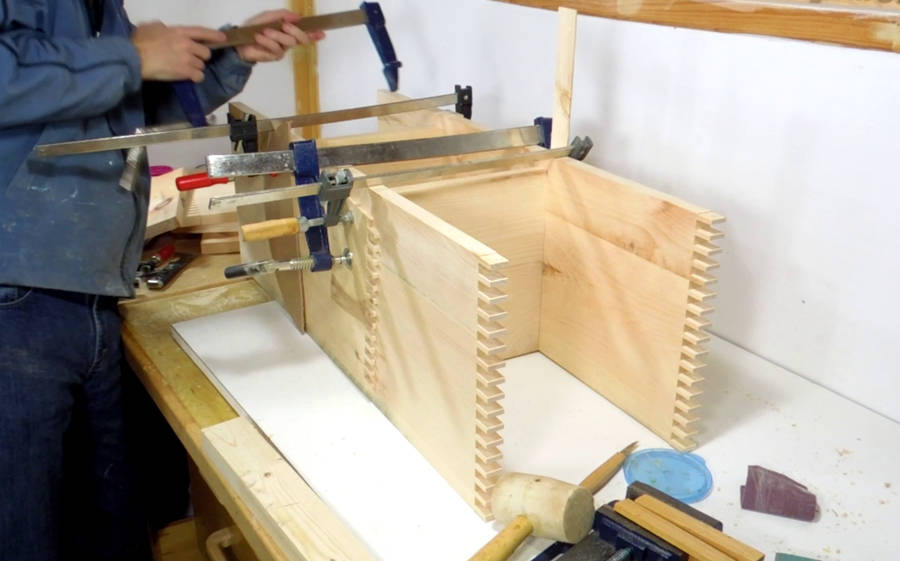 Now clamping all the joints fully closed and letting them dry.
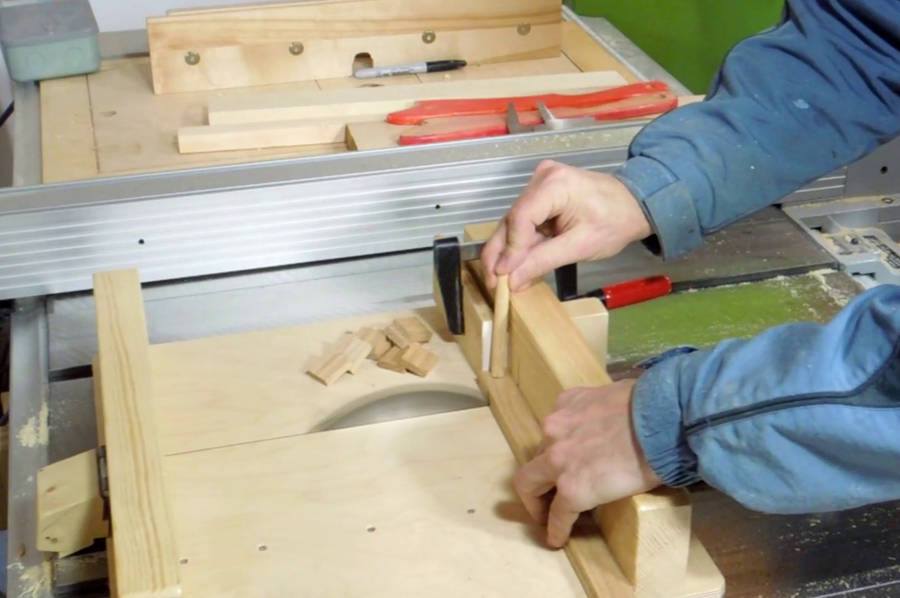 Before gluing the top on, I cut some pieces of oak to fill the rest
of the slots in the top. I'm using my
small table saw sled for this.
Before gluing the top on, I cut some pieces of oak to fill the rest
of the slots in the top. I'm using my
small table saw sled for this.
 Top glued on, and tapping it fully down with a rubber mallet.
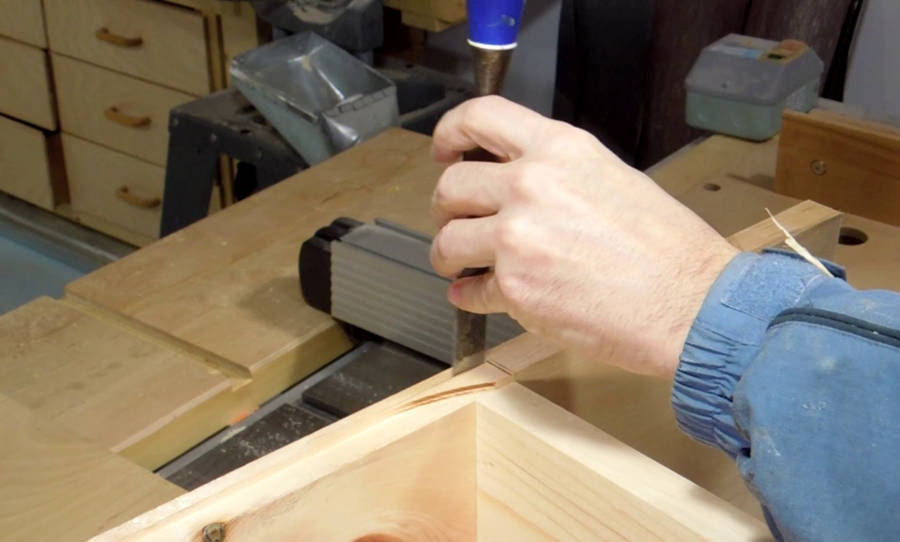
 With the glue still wet, adding the pieces of oak to fill the rest of the slots.
I deliberately used a contrasting wood for these.
 The top needed a bit of flattening. And what better tool for flattening than
a 12" jointer!
The top needed a bit of flattening. And what better tool for flattening than
a 12" jointer!
 Next, cutting the ends flush. I just put the whole thing on my
table saw sled
Next, cutting the ends flush. I just put the whole thing on my
table saw sled
 I like how the top came out.
I also added strip of oak to the front edge to extend the top a bit past the vertical parts.
 On close inspection, A few of the fingers had some slight gaps in them.
I usually "fill" gaps like that by doing a bit of hand-sanding. The fine sawdust from the sandpaper gets pushed into the slots from the sanding action. Then, right after sanding, I apply a coat of varnish, which, together with the sawdust in the gaps makes for a filler.
The important thing is to only wipe the excess sawdust off with your hand. If you blow it off, you might blow it out of the gaps.
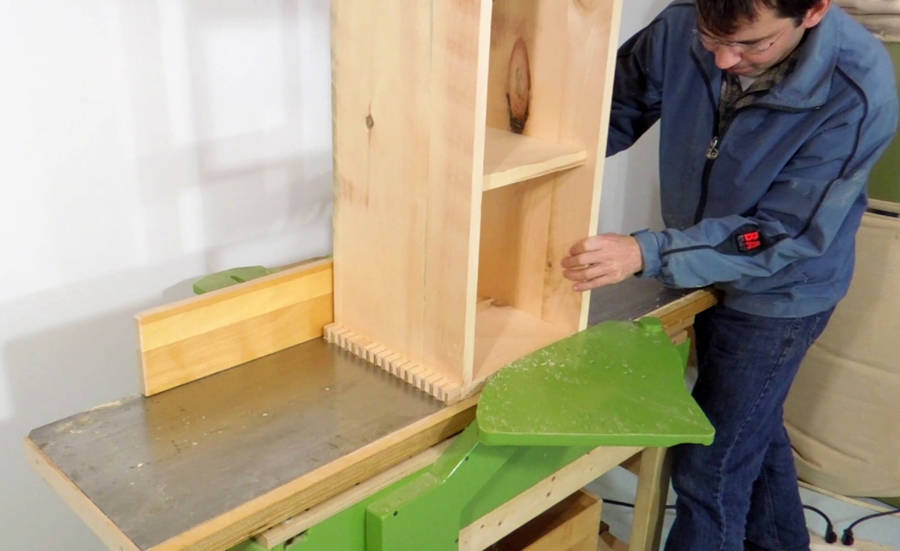
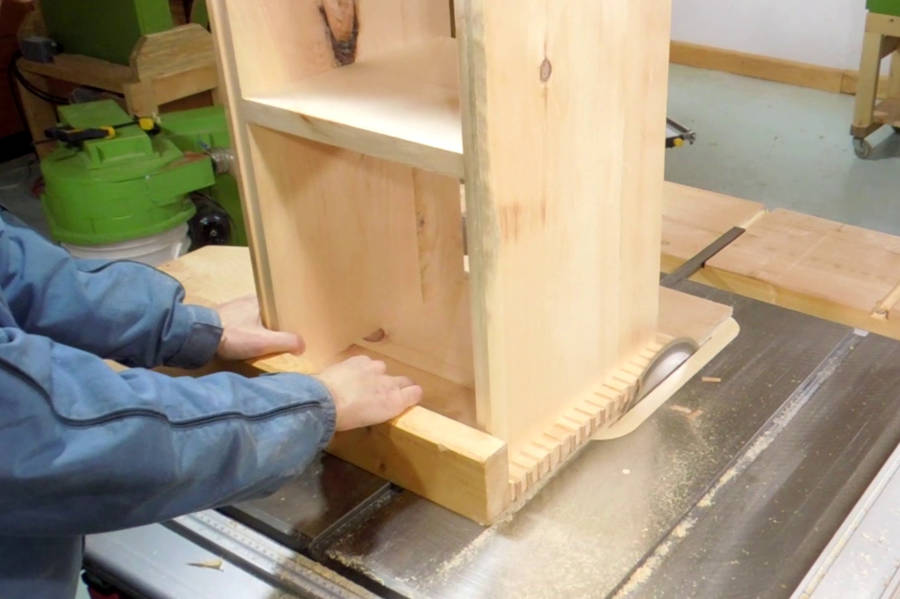
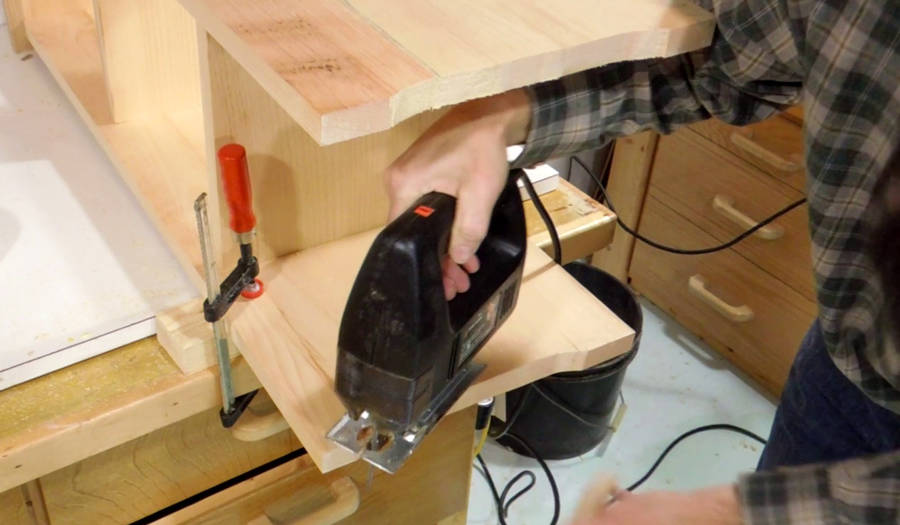 Cutting away a little bit on the bottom to form legs.
Otherwise, if the floor is slightly convex where the stand goes, it would rock back and forth.
If I had thought of that before I put the stand together, I wouldn't have needed to do this with a jigsaw, but I was too keen on seeing how it would all fit together to think of it.
I cut them from the inside-side. That way, the edge with potential tear-out is on the inside and the clean edge on the outside.
 Before installing the back, I squared out the ends of the rabbet that I had cut on
the sides before assembly.
Before installing the back, I squared out the ends of the rabbet that I had cut on
the sides before assembly.
I could have just rounded the corners of the back to fit the rabbet, but I think it looks much better if the corners are square.
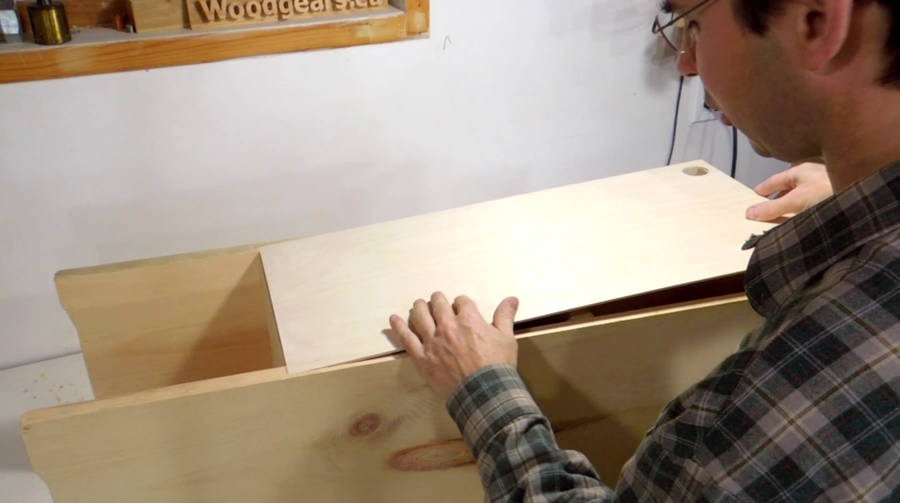 Inserting the back. I drilled some holes in the top of the back so that the
laptop computer power adapter could potentially be placed inside the stand.
Inserting the back. I drilled some holes in the top of the back so that the
laptop computer power adapter could potentially be placed inside the stand.
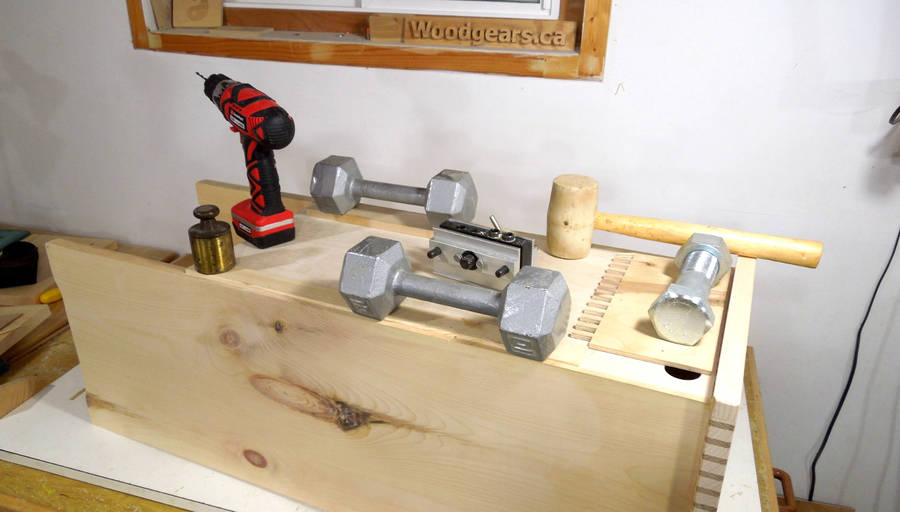 I hadn't used any metal fasteners so far, and didn't feel like adding nails,
so the back is just glued in. A few weights press the joints together while
the glue dries.
I hadn't used any metal fasteners so far, and didn't feel like adding nails,
so the back is just glued in. A few weights press the joints together while
the glue dries.
 Finished laptop stand.
I also made another piece of plywood to put on top of it, so there's enough room to use a mouse next to the computer. Not sure if my mom will use that part, but she's definitely not a fan of those laptop computer touch pads.
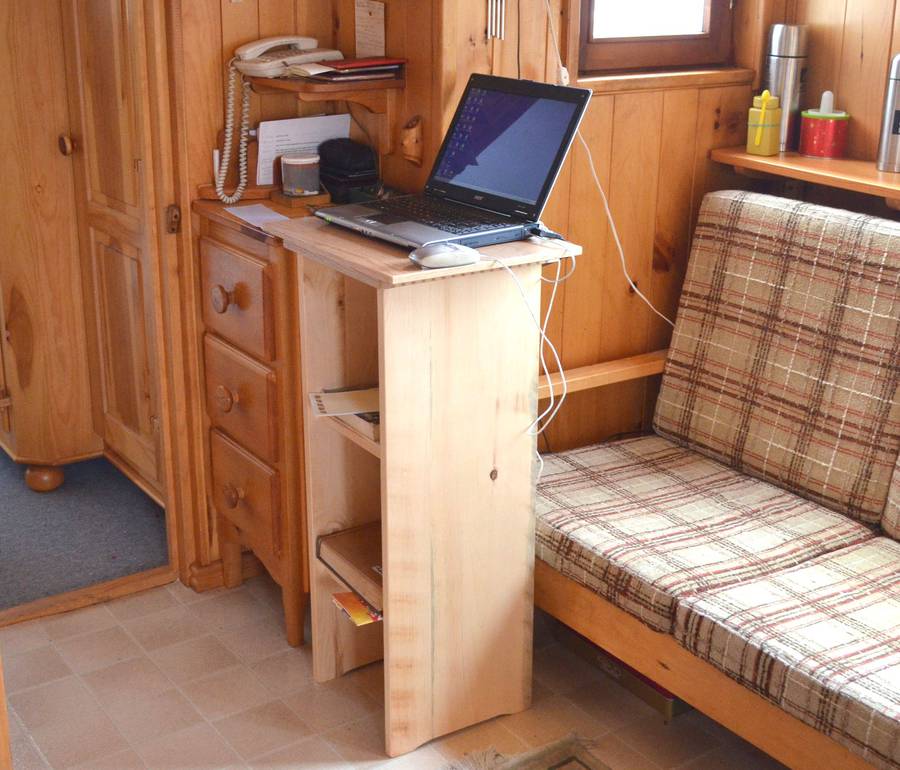 Turns out, Mom definitely prefers the mouse next to the computer. I fixed the
larger top onto the stand with four screws from the bottom to keep it from
sliding around.
Turns out, Mom definitely prefers the mouse next to the computer. I fixed the
larger top onto the stand with four screws from the bottom to keep it from
sliding around.
 More about Building tables
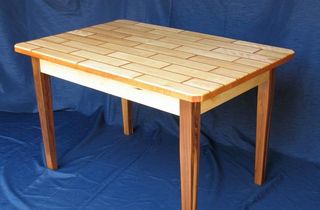
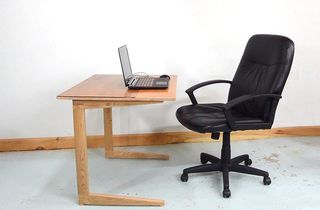 Small work table / desk
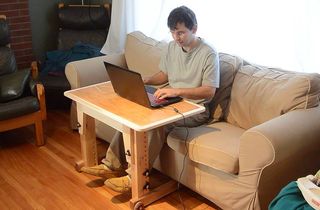 Knock down laptop
 Another skinny tall table build
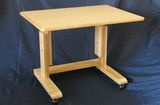 Older laptop table
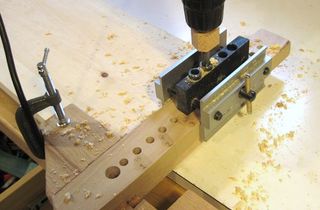 Doweling T-square
 Shoe rack
 Long-reach C-clamps
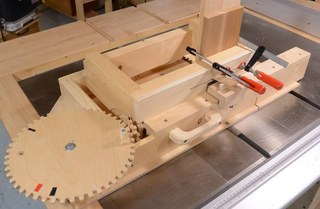 Screw advance
 Knock down student desk
 Wooden computer case