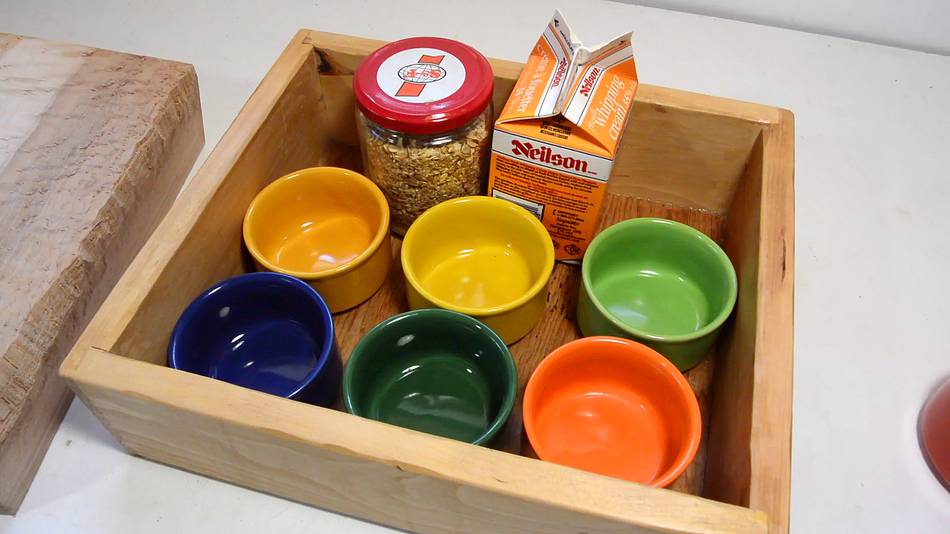
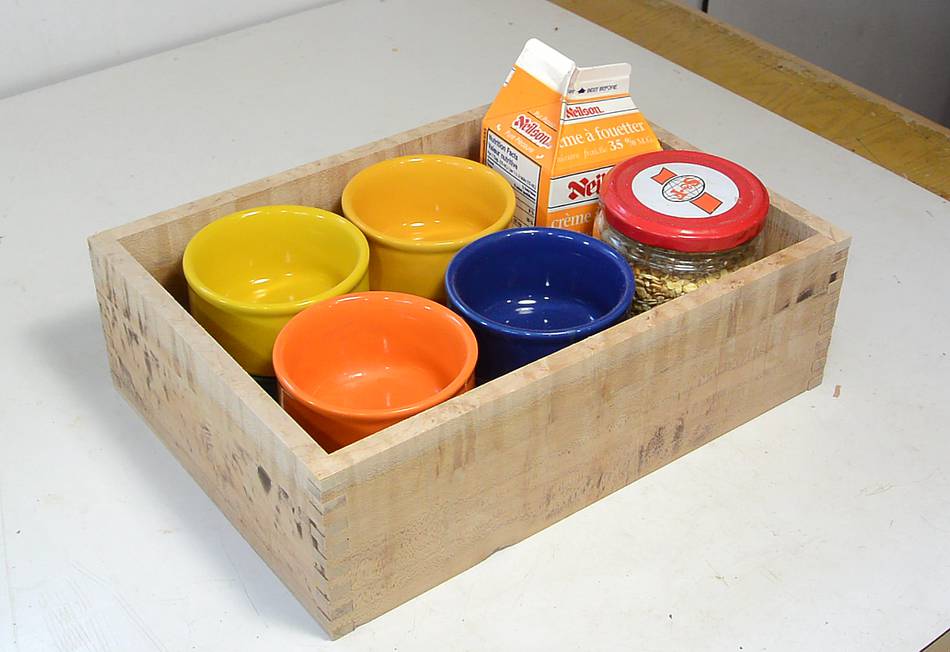
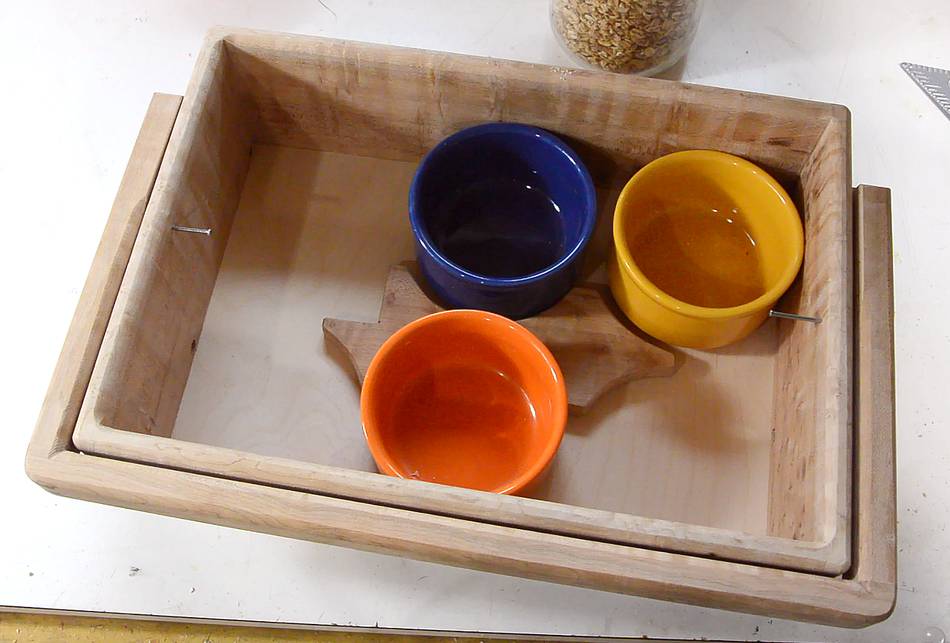
 I often bring ramekins with a dessert in them to dinner invites.
I usually put them in an old wooden box, along with some cream and
granola to add to the dessert.
I often bring ramekins with a dessert in them to dinner invites.
I usually put them in an old wooden box, along with some cream and
granola to add to the dessert.
I often bring ramekins with a dessert in them to dinner invites.
I usually put them in an old wooden box, along with some cream and
granola to add to the dessert.
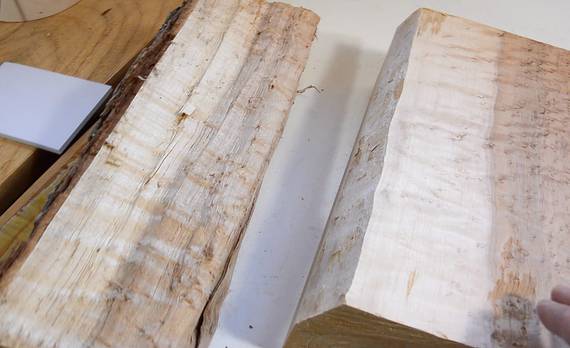
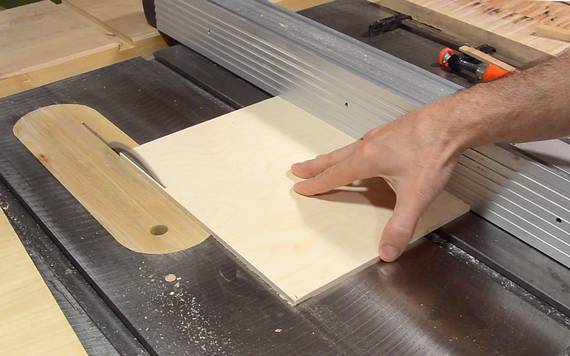
I had some figured maple that was given to me as firewood and used that as the material.
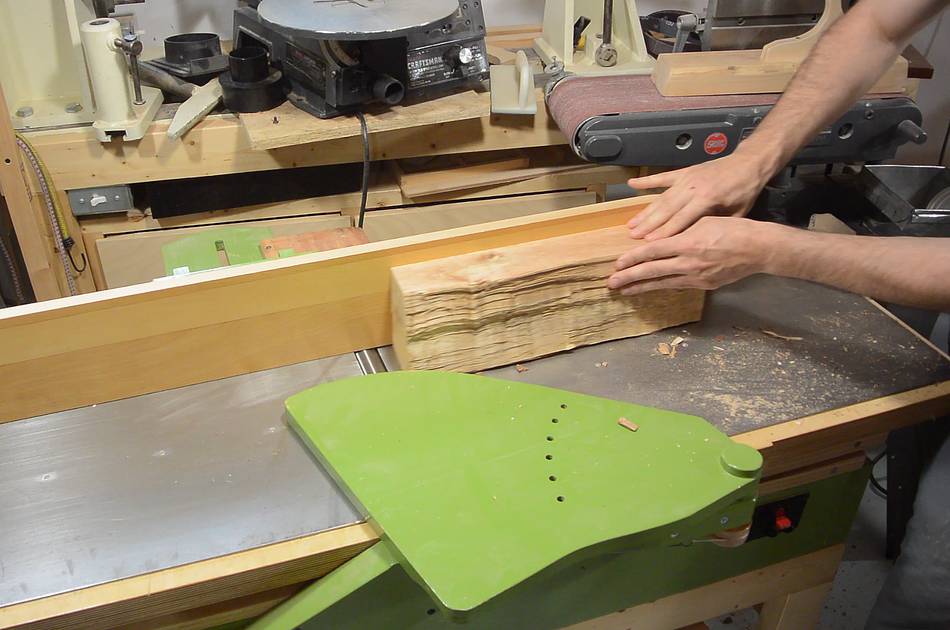
 I started by squaring it up on the jointer, then resawed it to boards
on the table saw. The table saw makes a relatively smooth surface
without tearing out the figured grain.
I started by squaring it up on the jointer, then resawed it to boards
on the table saw. The table saw makes a relatively smooth surface
without tearing out the figured grain.
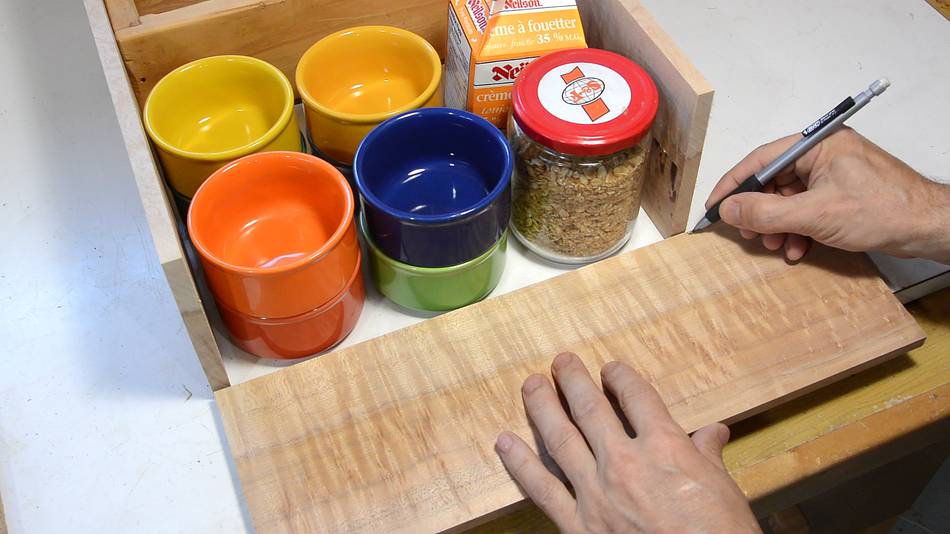
 A good size would be for four ramekins, with room
to stack four more on top of those for larger dinner parties.
A good size would be for four ramekins, with room
to stack four more on top of those for larger dinner parties.
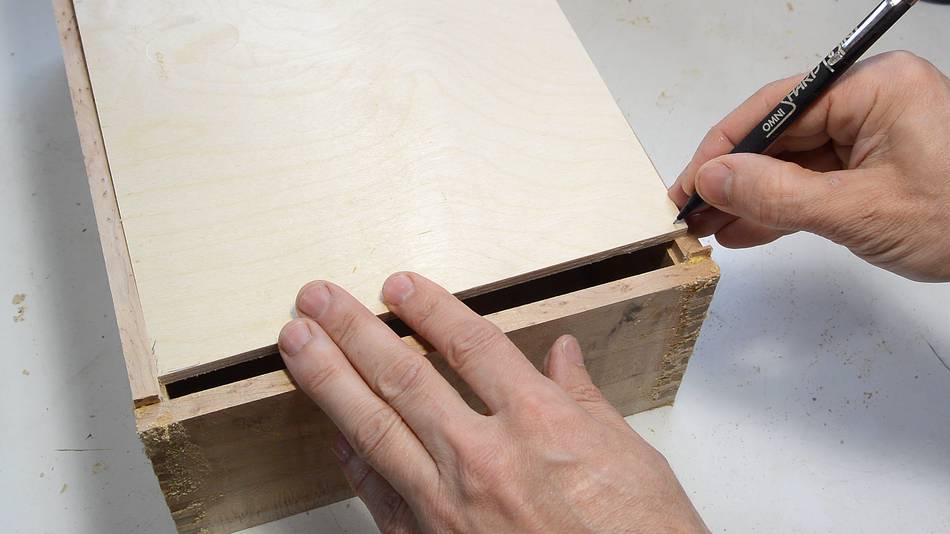
I marked the size I needed straight off this arrangement without taking measurements.
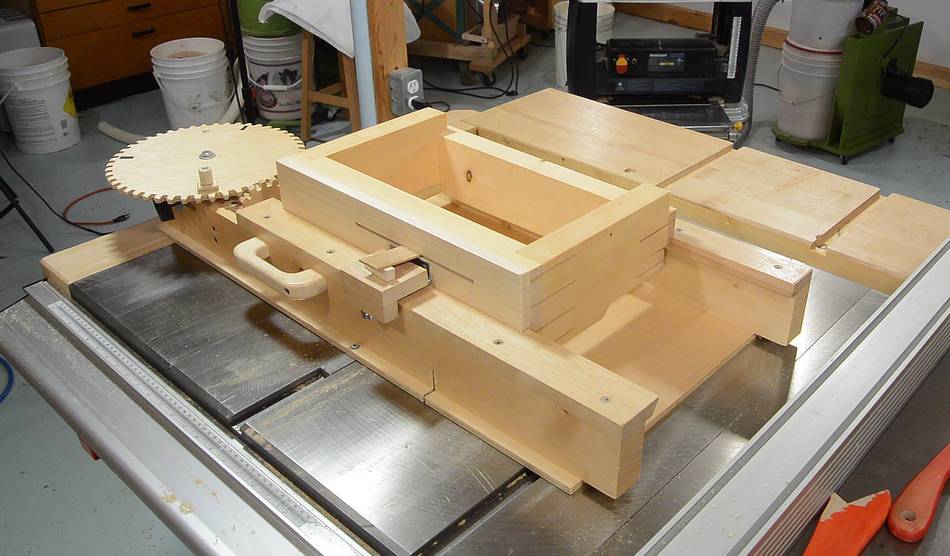 I joined the corners with my
screw advance box joint jig.
I joined the corners with my
screw advance box joint jig.
 As I often do, I made 1/4" box joints without
using a dado blade. I have a separate article on
setting up
box joints like this.
As I often do, I made 1/4" box joints without
using a dado blade. I have a separate article on
setting up
box joints like this.
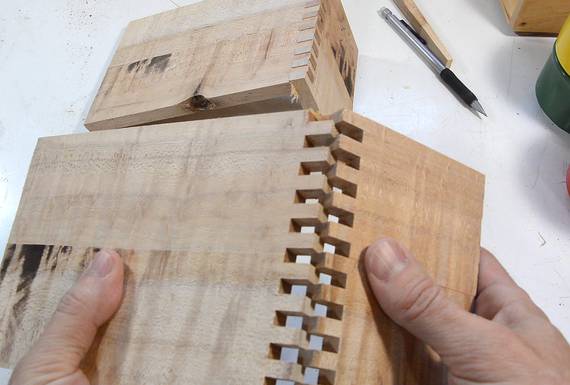
I first made a test joint with some cut-offs to make sure the fit was good.
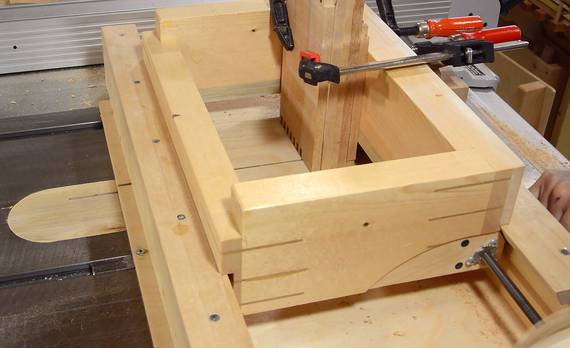
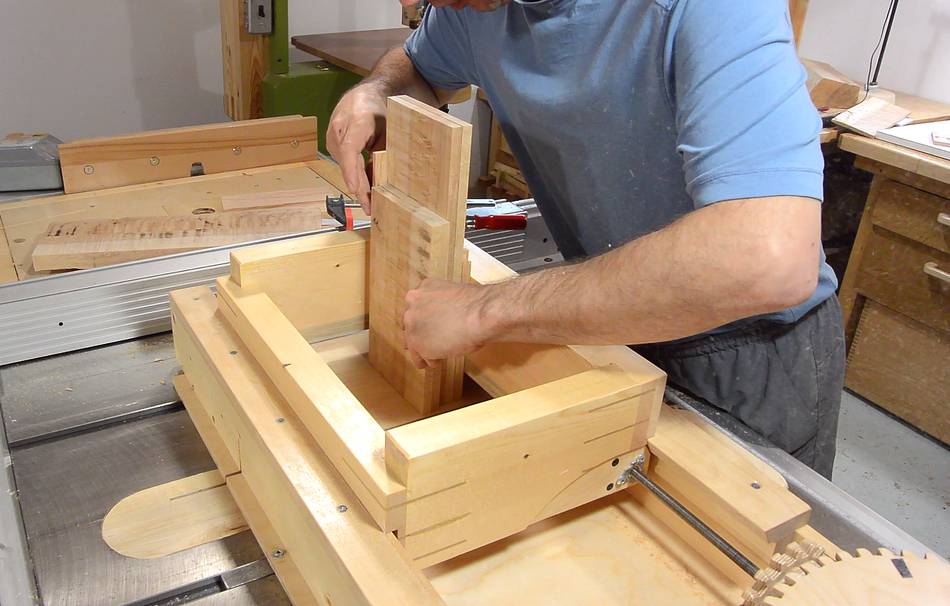 Now loading the four pieces in the jig at once, plus a piece of scrap
behind to prevent tear-out. I'm offsetting
the two shorter pieces by 1/4" so that the fingers in one piece will line
up with slots in the other.
Now loading the four pieces in the jig at once, plus a piece of scrap
behind to prevent tear-out. I'm offsetting
the two shorter pieces by 1/4" so that the fingers in one piece will line
up with slots in the other.
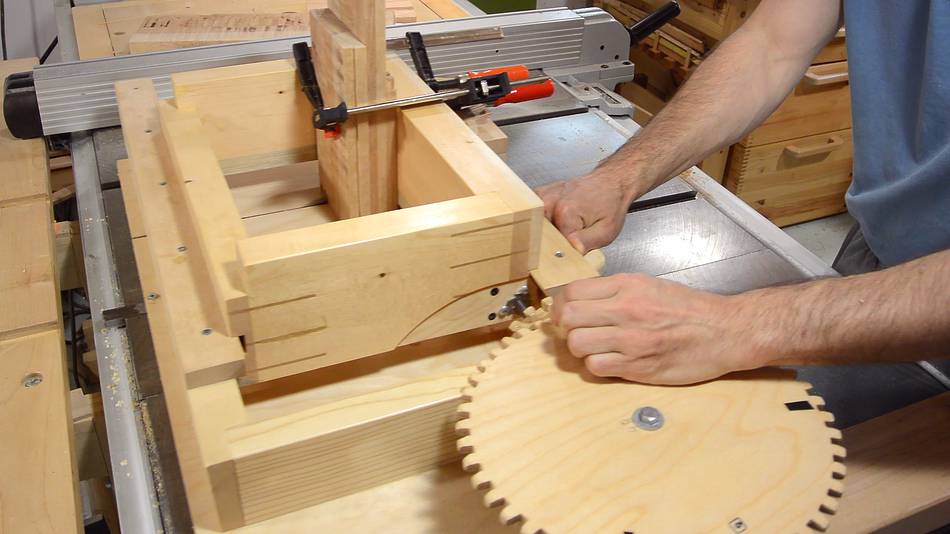
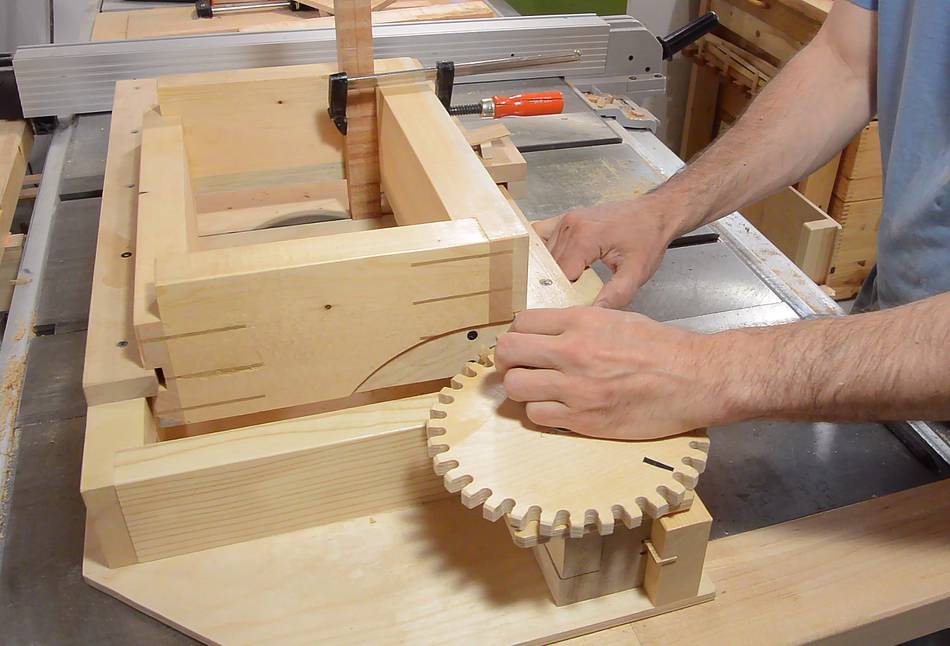
 Cutting the joints. Each 1/4" wide slot is made by making three cuts,
one with the crank handle nearest the meshing gears, the next with the
first black piece of tape by the gears, and another with a second black
piece of tape near the meshing gears. After the third cut, I turn the crank
further until the handle is left again, then another turn, and repeat.
More about that here
Cutting the joints. Each 1/4" wide slot is made by making three cuts,
one with the crank handle nearest the meshing gears, the next with the
first black piece of tape by the gears, and another with a second black
piece of tape near the meshing gears. After the third cut, I turn the crank
further until the handle is left again, then another turn, and repeat.
More about that here
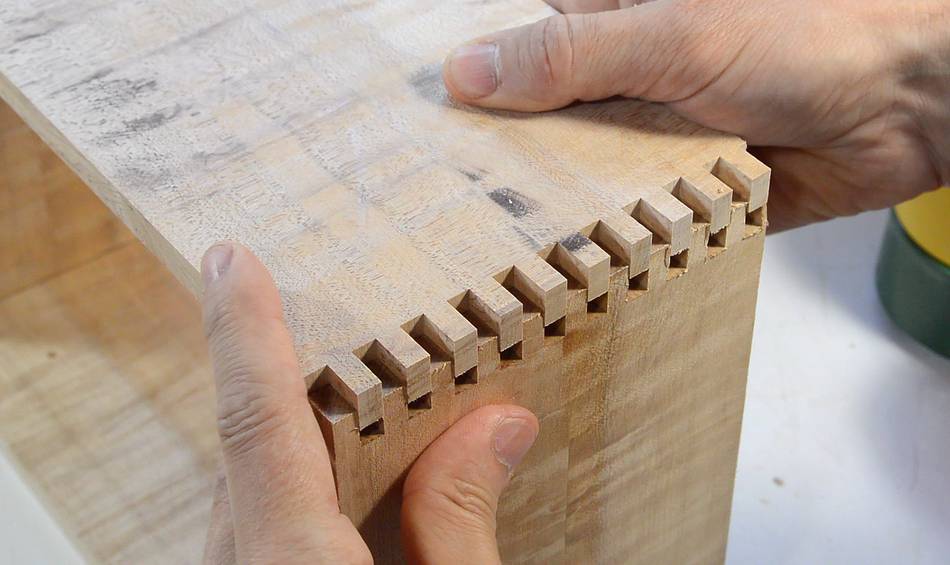 Checking the joint. Nice and crisp in the hard maple!
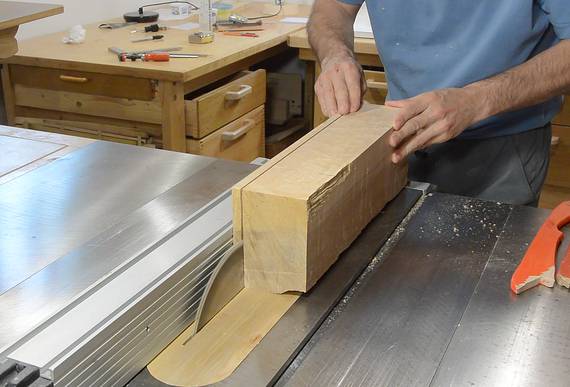
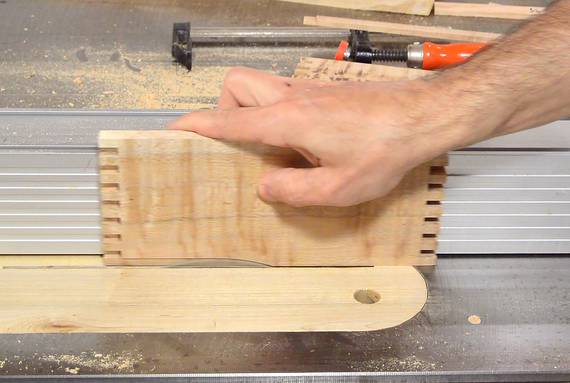
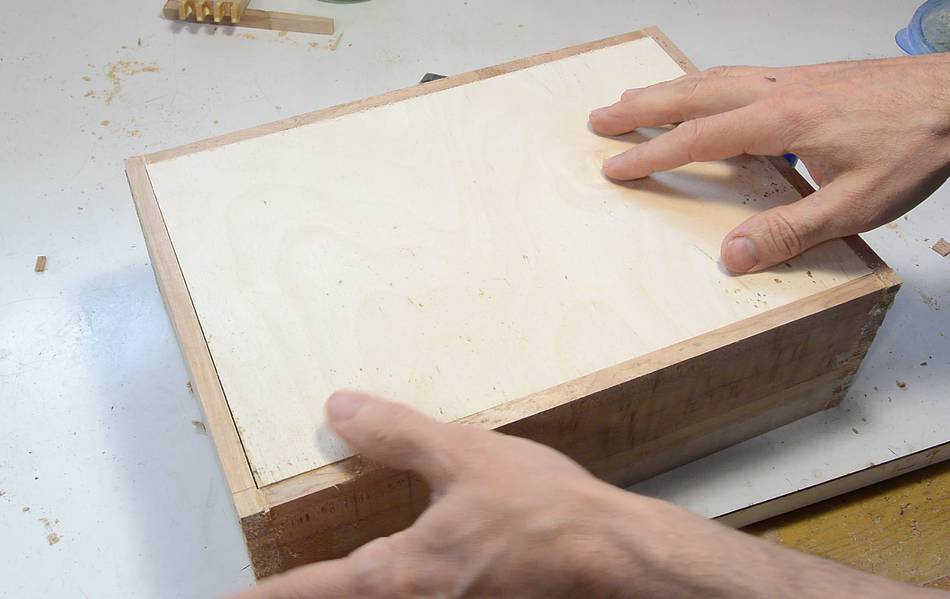
 I then ripped the pieces to their final width, and checked
how the box fits around the ramekins.
I then ripped the pieces to their final width, and checked
how the box fits around the ramekins.
 Before gluing the pieces together, I need to figure out how
to attach the bottom.
Before gluing the pieces together, I need to figure out how
to attach the bottom.
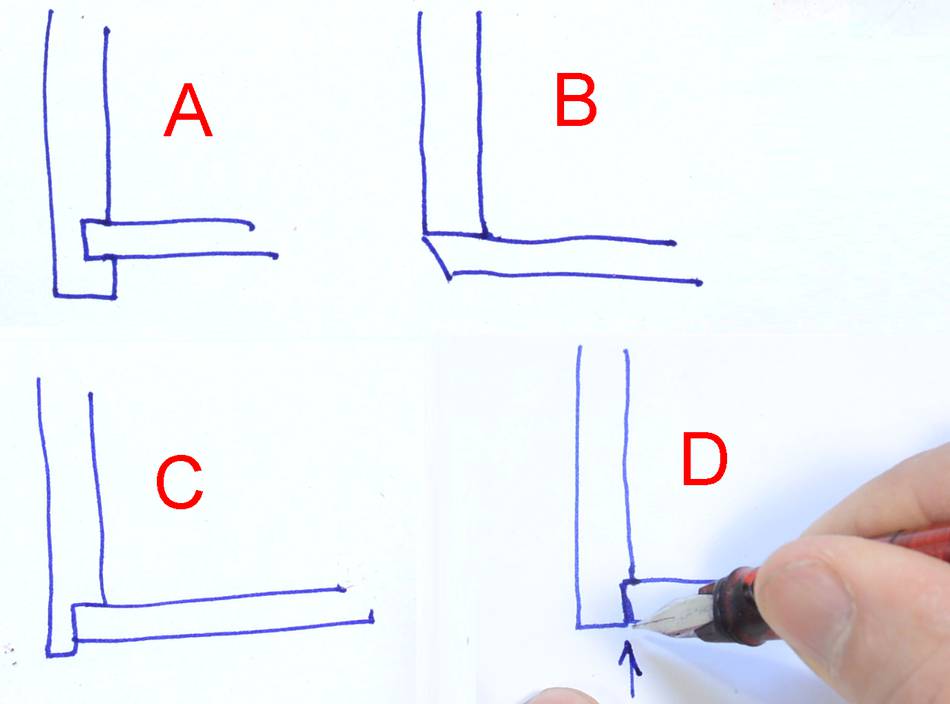
Traditionally, this is done by insetting the bottom in a rabbet (A), but this uses up a lot of height, and is not that strong because the rabbet weakens the side of the box. A simpler and stronger solution is to just glue the bottom on flat (B), but this doesn't look that good, even if the bottom is beveled. I could also rabbet the bottom in (C), but that leaves a relatively narrow piece of side on the bottom. I decided to put the bottom in with a very shallow rabbet (D), though this requires cutting the bottom very precisely so that there is a good glue bond on the surface (pointed at by the arrow). I cut that rabbet on the table saw.
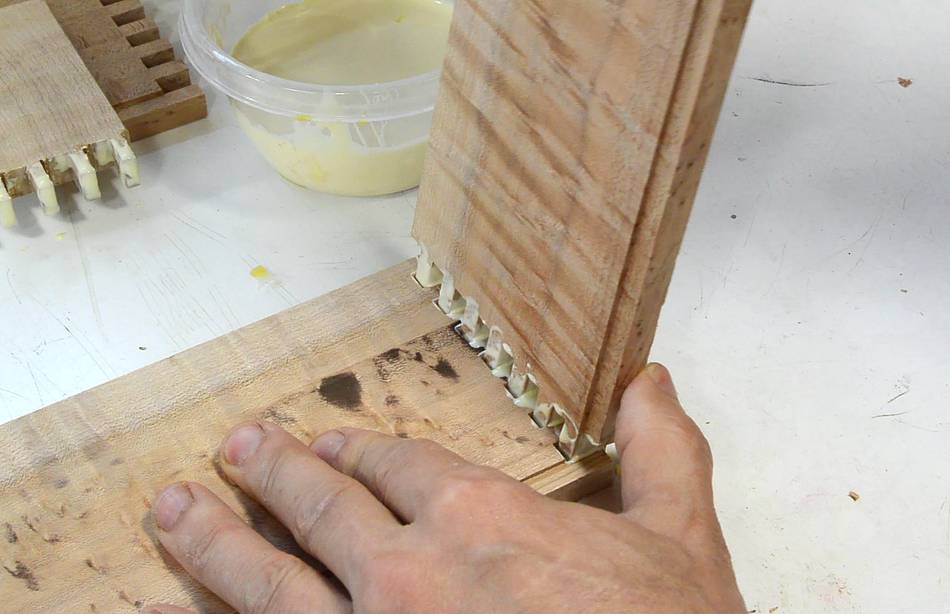
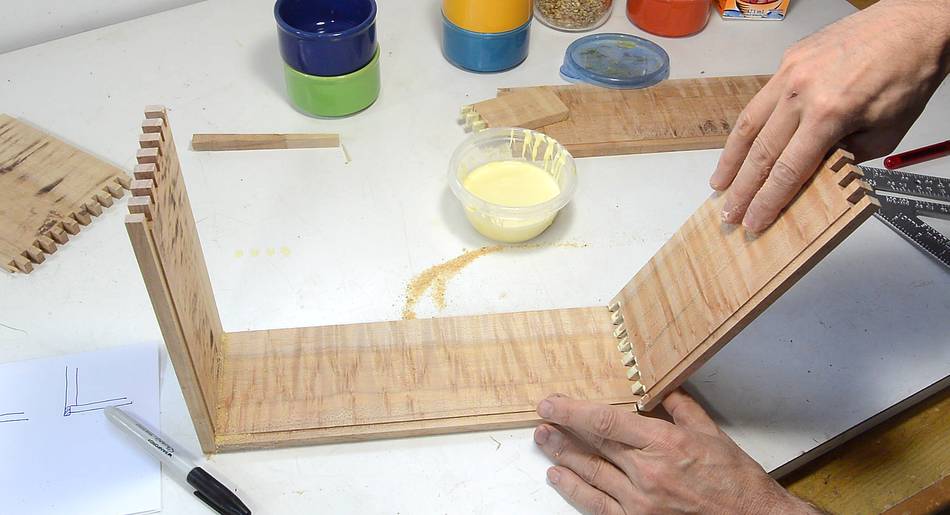
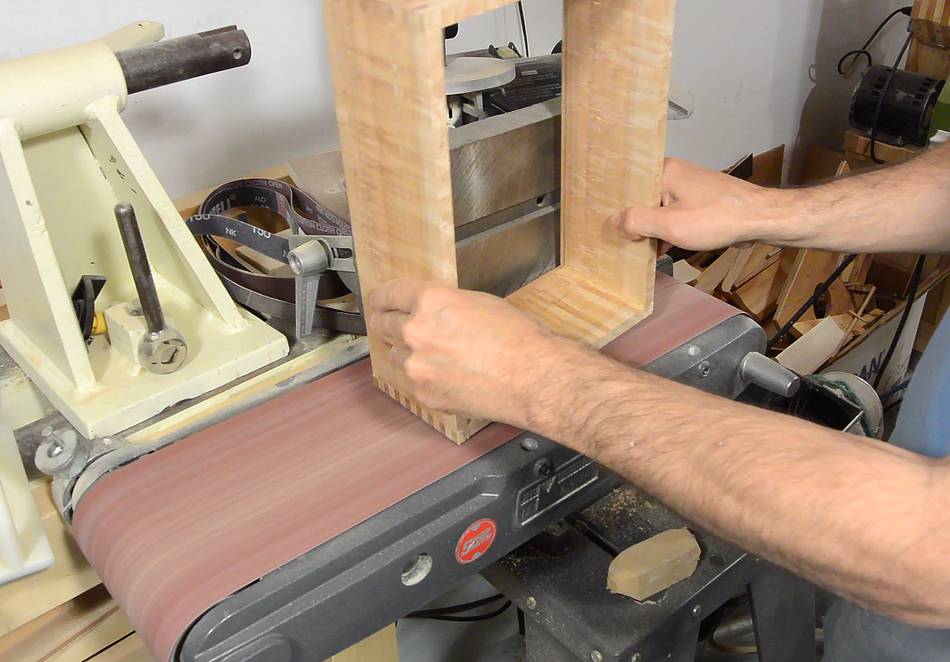
 With the rabbet cut, time to assemble the sides. I made a wooden
comb for applying glue to multiple fingers at once.
With the rabbet cut, time to assemble the sides. I made a wooden
comb for applying glue to multiple fingers at once.
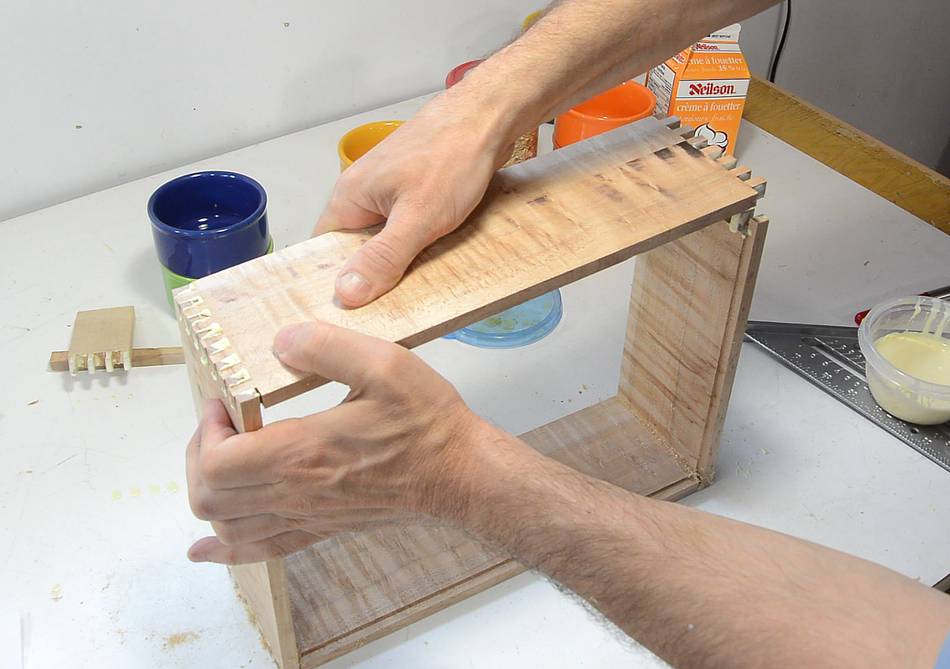
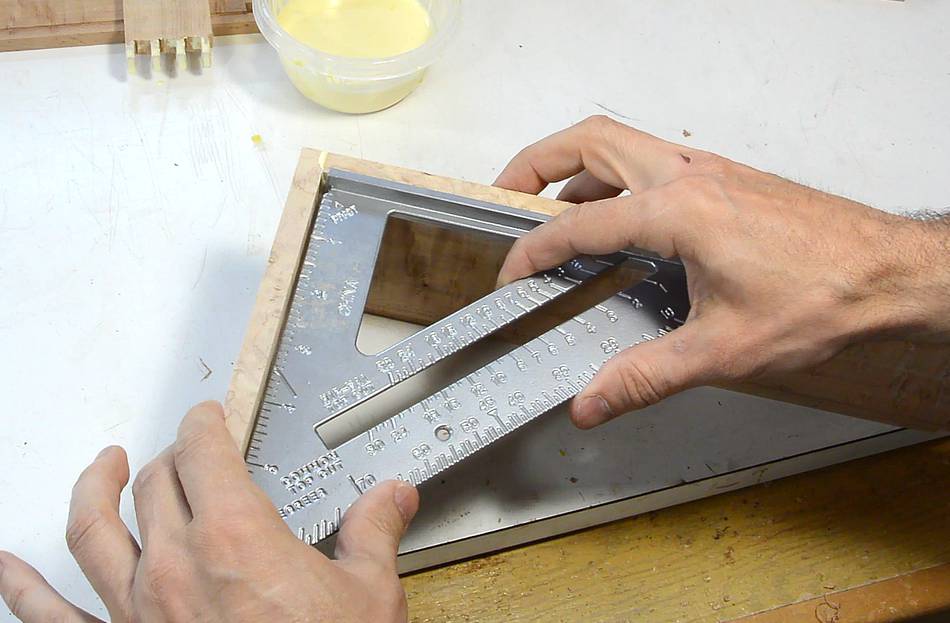 The thin layer of glue in tight finger joints can dry very quickly,
so I check that the assembled corner is square before going any
further.
The thin layer of glue in tight finger joints can dry very quickly,
so I check that the assembled corner is square before going any
further.
 Second side going on...
 ... and now the fourth side. Two glue joints need to be joined
at the same time.
... and now the fourth side. Two glue joints need to be joined
at the same time.
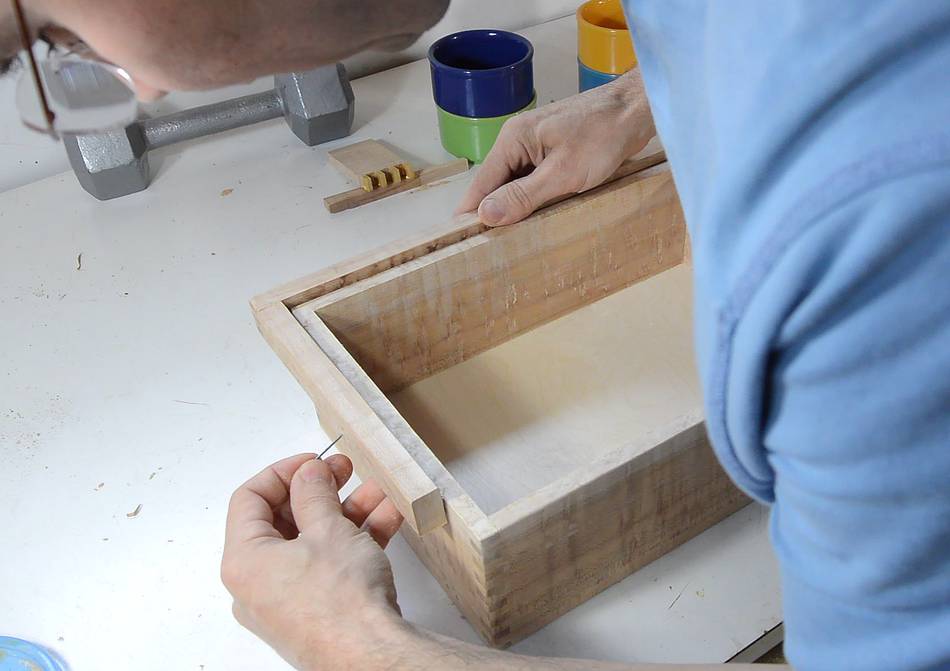
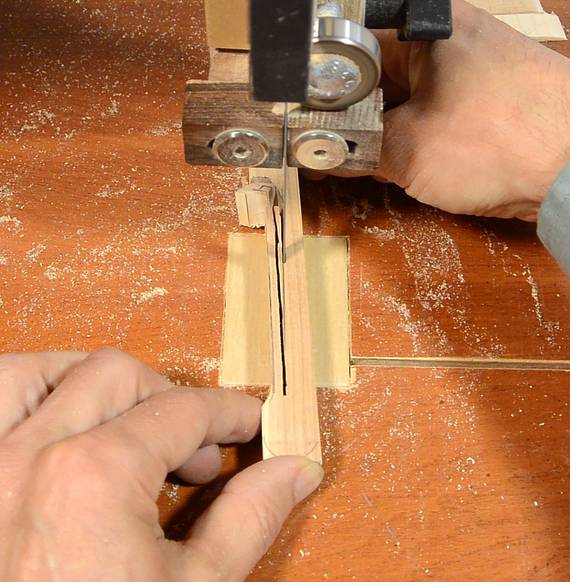
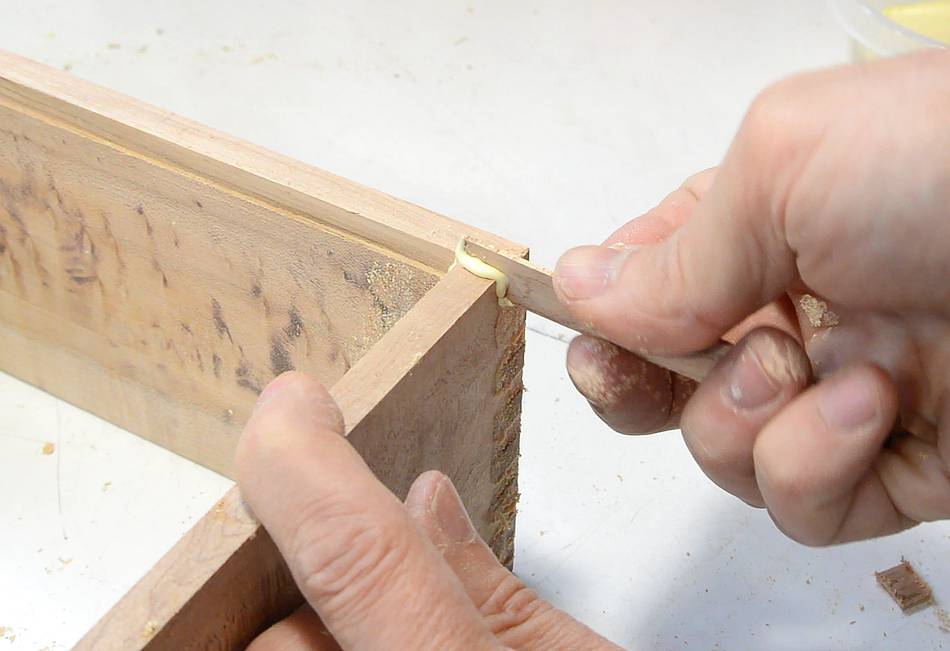 I glued wooden splints into the ends of the rabbets to fill the gap.
After the glue dried, I flush trimmed the splints.
I glued wooden splints into the ends of the rabbets to fill the gap.
After the glue dried, I flush trimmed the splints.
 The bottom needs to be made to fit very precisely. Here, marking
how wide it needs to be. I checked both ends of the box. One end
was about 0.2 mm wider. I used a folded piece of paper
to shim one end of the wood against the fence of the saw
as I ripped it for the final cut (not shown in the pictures)
The bottom needs to be made to fit very precisely. Here, marking
how wide it needs to be. I checked both ends of the box. One end
was about 0.2 mm wider. I used a folded piece of paper
to shim one end of the wood against the fence of the saw
as I ripped it for the final cut (not shown in the pictures)
 I didn't get the length of the wood as precise. There is a
half a millimeter gap on one end of the short edges.
I didn't get the length of the wood as precise. There is a
half a millimeter gap on one end of the short edges.
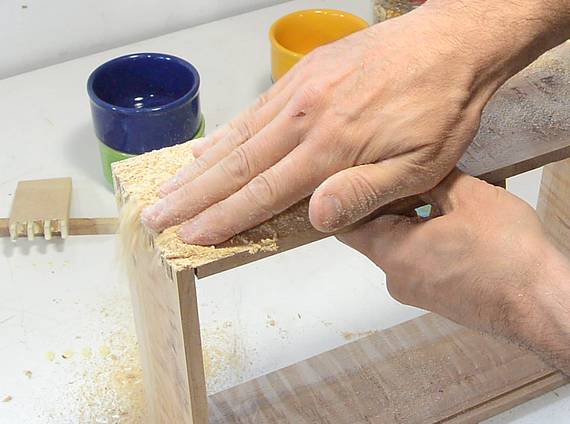
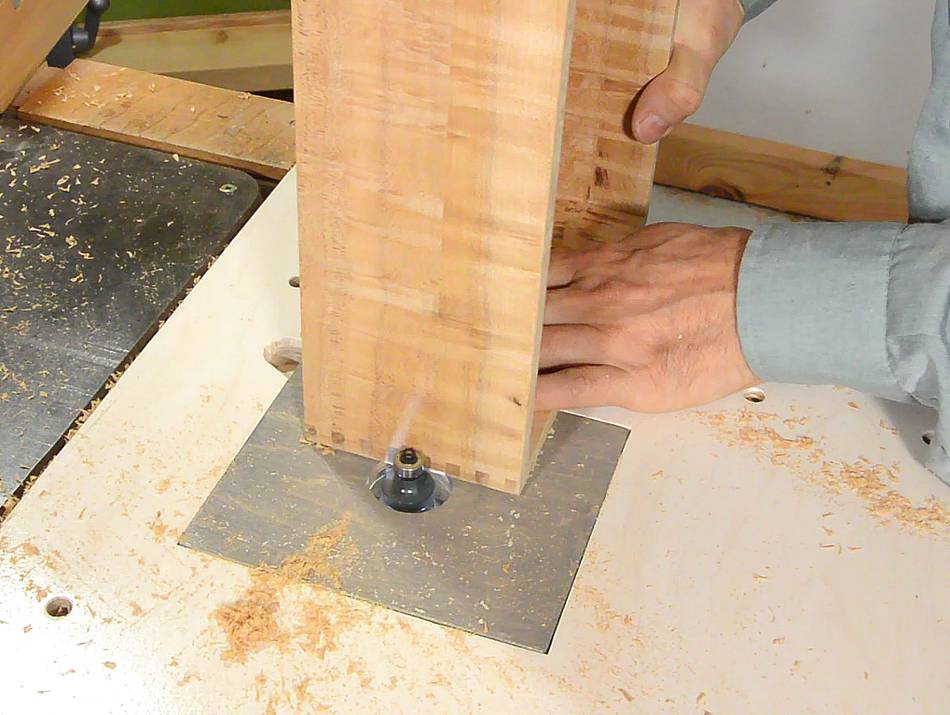
 It's easier to sand and clean up the insides before
the bottom is glued on.
It's easier to sand and clean up the insides before
the bottom is glued on.
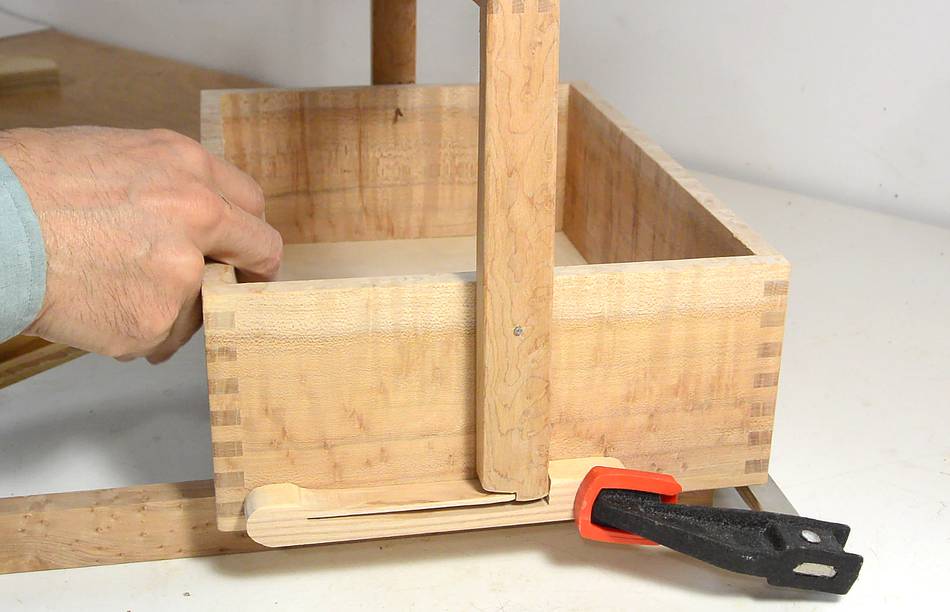
 Then gluing on the bottom, with lots of glue. I weighed it down
with a 10 pound barbell as it dried.
Then gluing on the bottom, with lots of glue. I weighed it down
with a 10 pound barbell as it dried.
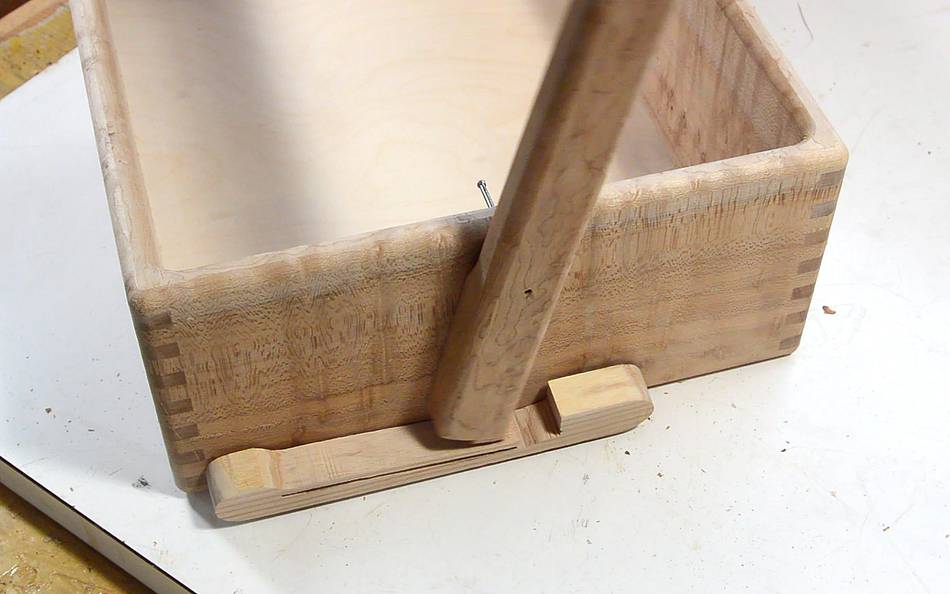
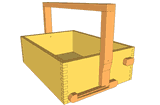
 I wanted a carrying handle, sort of like a basket.
I switched from the 48-tooth gear to a 35-tooth gear to cut narrower joints for that handle.
 I wanted the handle to flip over to the side but also lock in the
upright position. I wasn't sure how to do this. For starters,
I drilled some small holes and used finishing nails as pivots
while figuring out a mechanism.
I wanted the handle to flip over to the side but also lock in the
upright position. I wasn't sure how to do this. For starters,
I drilled some small holes and used finishing nails as pivots
while figuring out a mechanism.
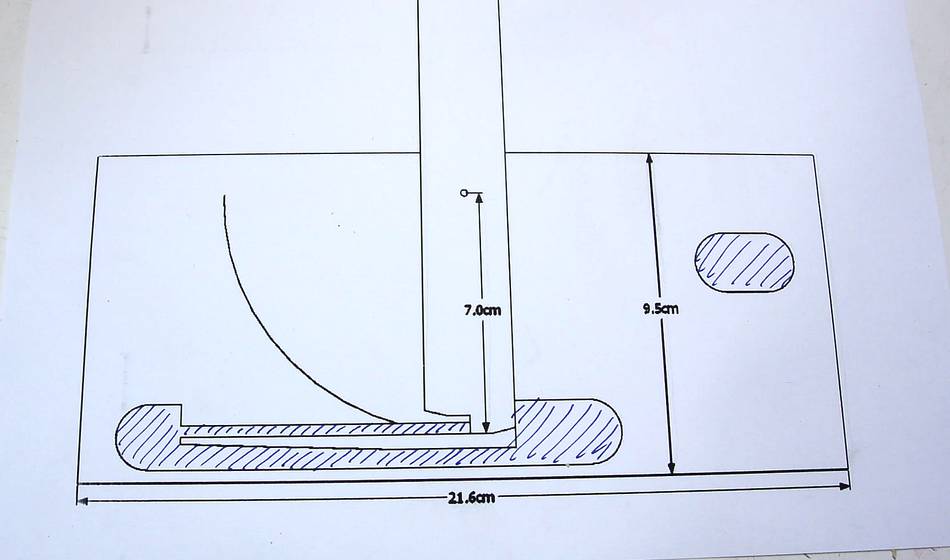
 I ended up drawing the mechanism in SketchUp.
I printed that 1:1 using my
BigPrint program, then copied the shape onto a piece of
wood and cut that out with the bandsaw.
I ended up drawing the mechanism in SketchUp.
I printed that 1:1 using my
BigPrint program, then copied the shape onto a piece of
wood and cut that out with the bandsaw.
You can get the template in the free plans
 The latch temporarily clamped in place, trying it out. It works!
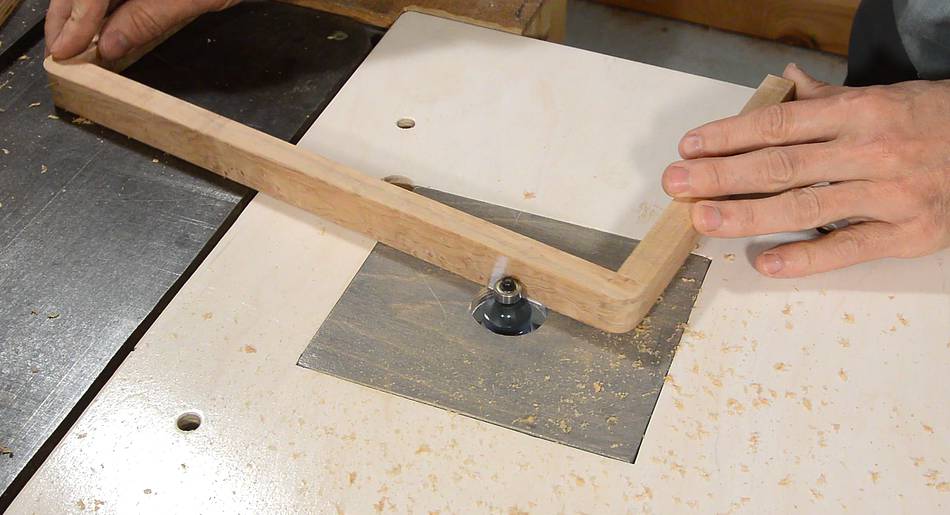 After that, rounding the handle edges...
 ... and then all the exposed edges of the box.

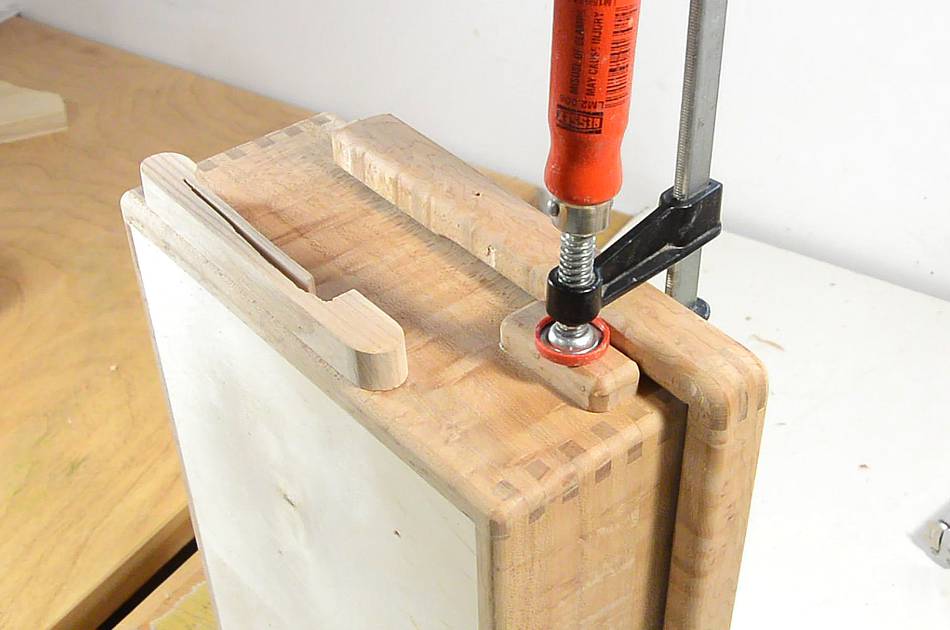
 The latch is screwed on from the inside. I figure I'll
varnish the latch separately and attach it afterwards. This
makes the finish job easier and ensures the latch won't get
gummed up with varnish.
The latch is screwed on from the inside. I figure I'll
varnish the latch separately and attach it afterwards. This
makes the finish job easier and ensures the latch won't get
gummed up with varnish.
 More testing it. The latches make such a satisfying click
when the handle is raised to vertical. I have a latch on
each side, though just one would have been enough.
More testing it. The latches make such a satisfying click
when the handle is raised to vertical. I have a latch on
each side, though just one would have been enough.
 A small block of wood glued to the side of the box
keeps the handle horizontal when it's flipped down.
A small block of wood glued to the side of the box
keeps the handle horizontal when it's flipped down.
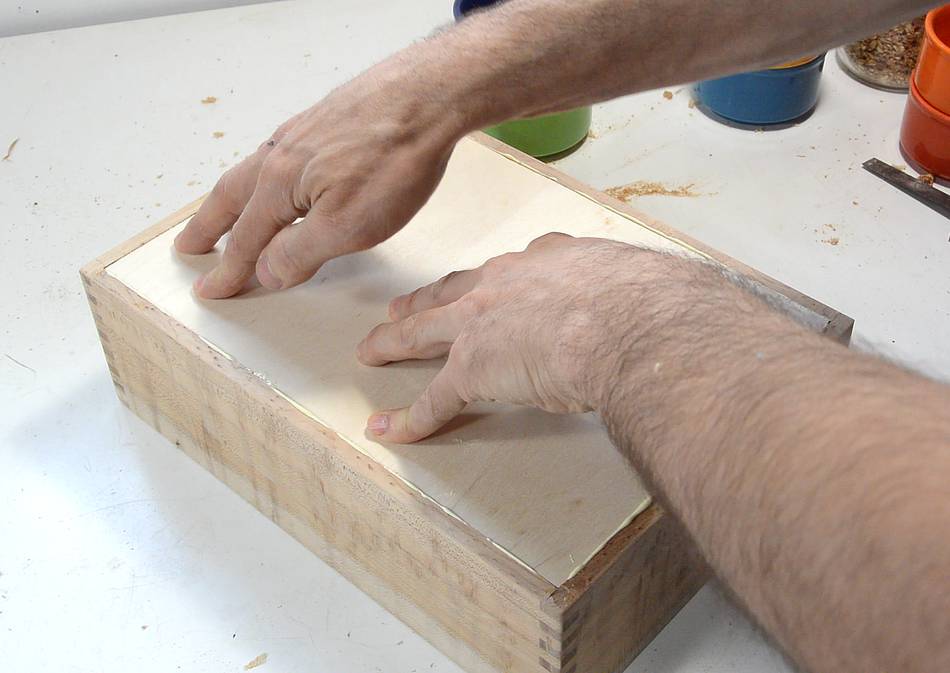
 I made a piece for the bottom of the box that fits around the
ramekins to keep them from sliding around.
First I traced around the piece with the ramekins on top...
I made a piece for the bottom of the box that fits around the
ramekins to keep them from sliding around.
First I traced around the piece with the ramekins on top...
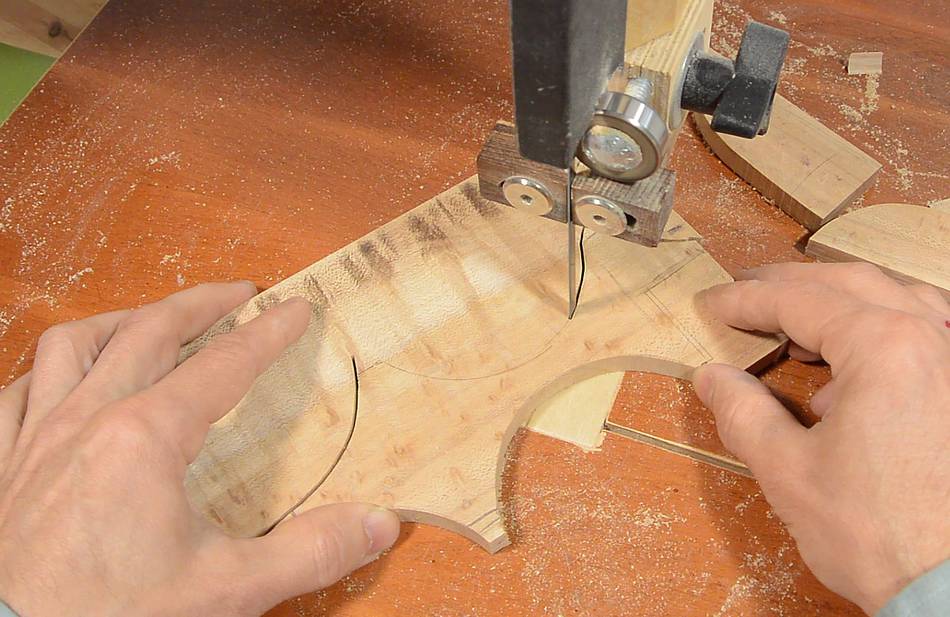
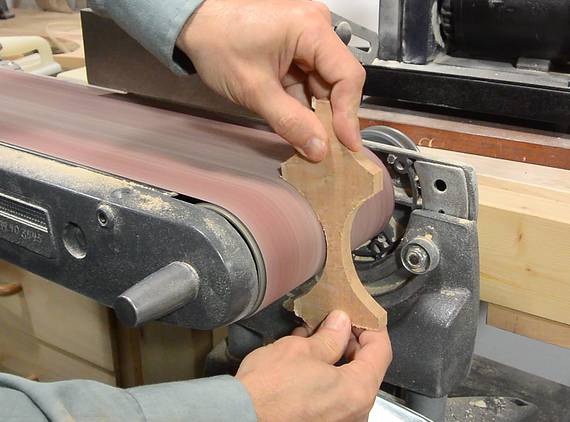 ... then cut it out on the bandsaw.
 The piece is attached with screws from the bottom. Like with the latch,
I figure it will be easier to varnish the box without that in place.
The piece is attached with screws from the bottom. Like with the latch,
I figure it will be easier to varnish the box without that in place.
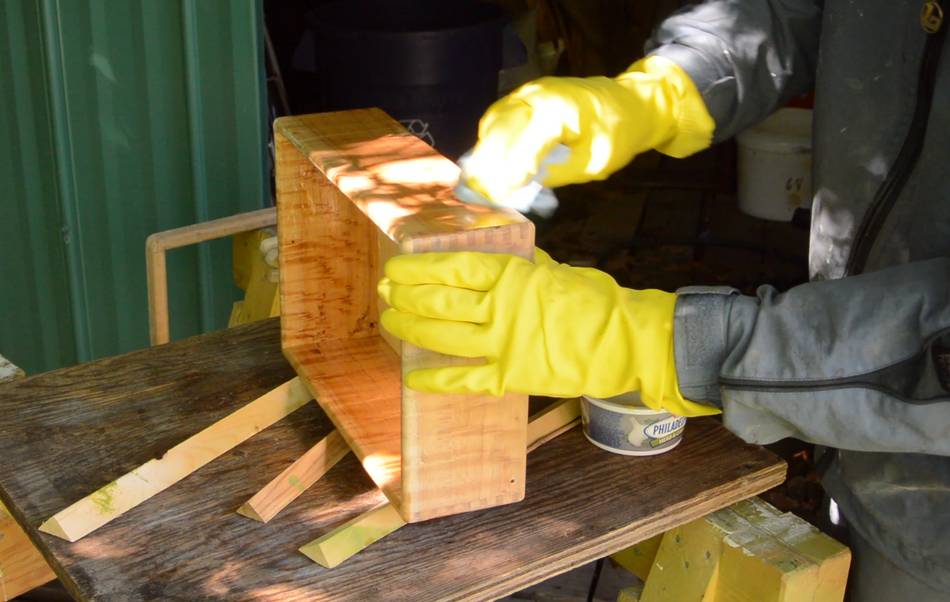 I varnished it with an oil based varnish. Oil based varnishes
are much better at preventing moisiture from getting into the wood,
and I figure that's important for something like this.
I varnished it with an oil based varnish. Oil based varnishes
are much better at preventing moisiture from getting into the wood,
and I figure that's important for something like this.
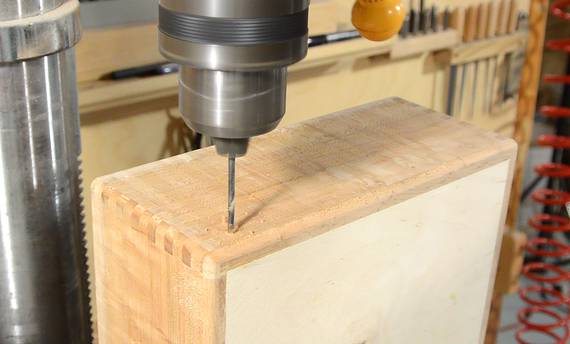
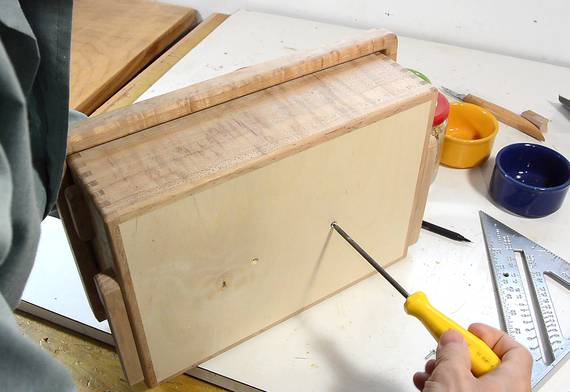
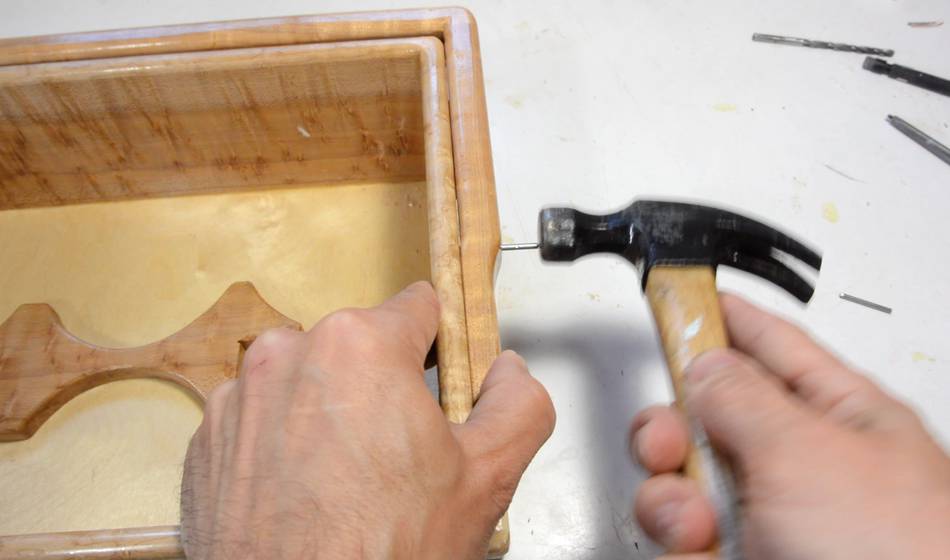 I used some thicker cut-off nails for the hinge pin. I drilled a hole
slightly smaller than the nail in the handle, and slightly larger than the nail
in the box. With the nail driven into the handle, it stays in place and
makes for a nice pivot.
I used some thicker cut-off nails for the hinge pin. I drilled a hole
slightly smaller than the nail in the handle, and slightly larger than the nail
in the box. With the nail driven into the handle, it stays in place and
makes for a nice pivot.
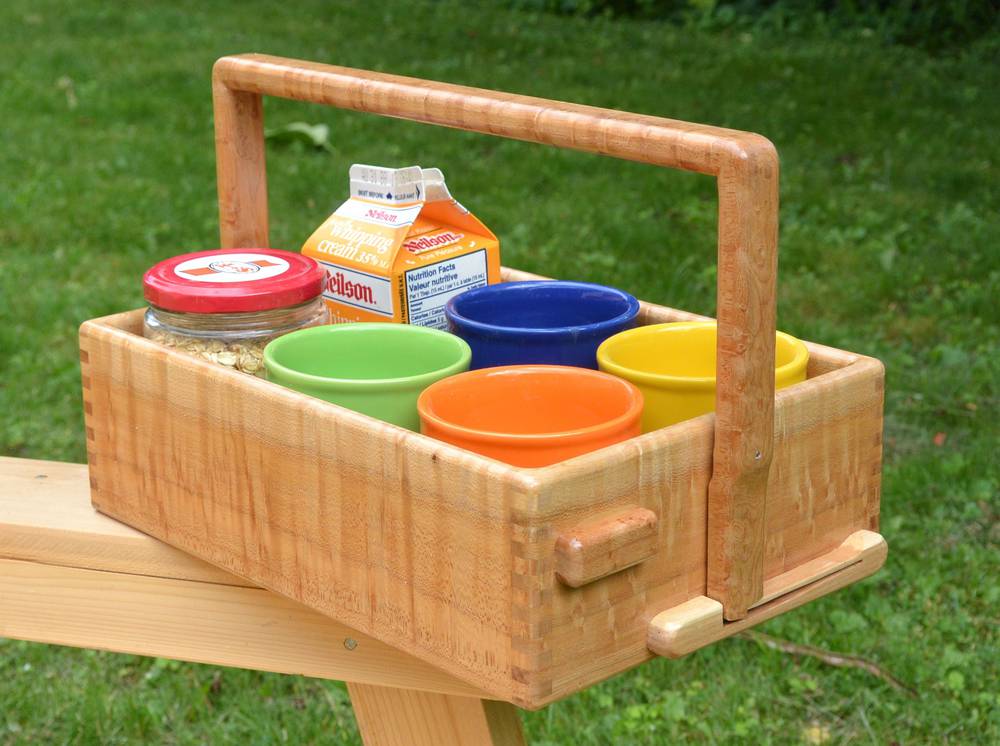 The completed tray.
I built this tray in 2014, but accidentally uploaded a low-res test render of the video. I noticed
too late, and re-uploading a video right away jinxes it with the algorithm because peple won't
re-watch it, and the algorithm thinks it's becasue the video sucks.
So I re-uploaded it in 2016, but some time in late 2021, YouTube managed to screw up the audio on the video. So in 2022, I re-edited it, down to 5 minutes from 8, and re-uploaded it a third time!
 Free plans for this flip handle tray
 Paper towel roll holder
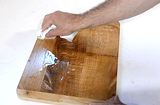 Warp-free cutting board
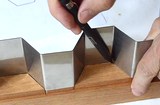 Hexagon cake knife
 Corner shelf
 Coat hooks
 Jewellery rack
 Kitchen chairs
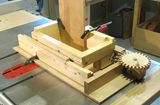 Box joint jig
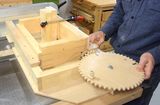 Box joints without a dado blade
 Making birdseye maple cutting boards
 Bowl on the lathe