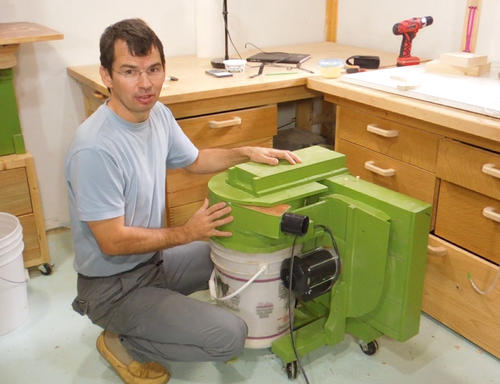
 For the separator for my small dust extractor, I figured I'd combine elements
of both. The top of the separator is like a traditional cyclone, but instead of
having a tapered cone towards the bottom, I'd just end it with a Thien-baffle
like disk.
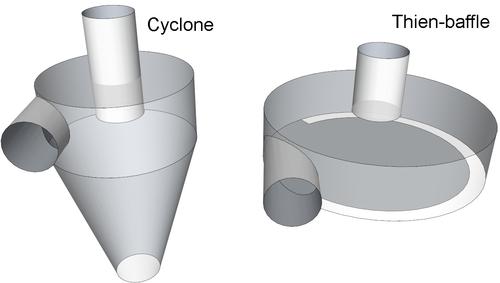 A conventional cyclone separator needs a fair amount of vertical height
to allow the dust to drop down the cone.
An alternative form of cyclone is what is known as a " Thien-baffle". In a Thien-baffle, the air spirals in a flat shape from the edge to the center, whereas in a cyclone it moves in more of a helical pattern down the cone and then back up the middle.
The advantage of a Thien-baffle is that it uses up very little vertical height.
 For the separator for my small dust extractor, I figured I'd combine elements
of both. The top of the separator is like a traditional cyclone, but instead of
having a tapered cone towards the bottom, I'd just end it with a Thien-baffle
like disk.
 I needed to make a cylindrical enclosure for my separator. I first
considered making this out of a plastic bucket, but attaching parts to a
cut up plastic bucket would introduce challenges of its own.
So I made it out of wood instead.
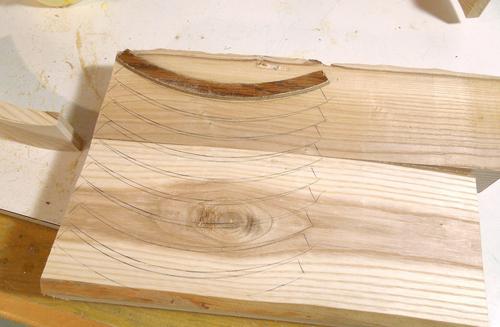
I started with an arc shaped template and used that to mark a series of arc outlines on a thick piece of hardwood. I then cut these out on the bandsaw.
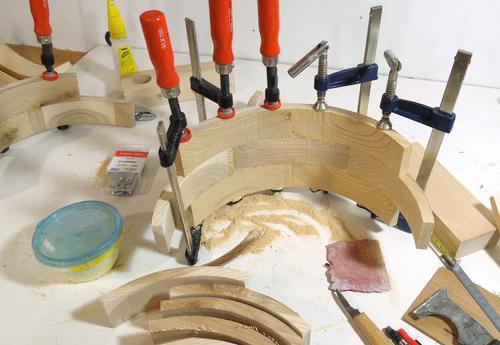 I glued these pieces together, offset from each other, building up three layers --
Not entirely unlike what is often done for segmented turning.
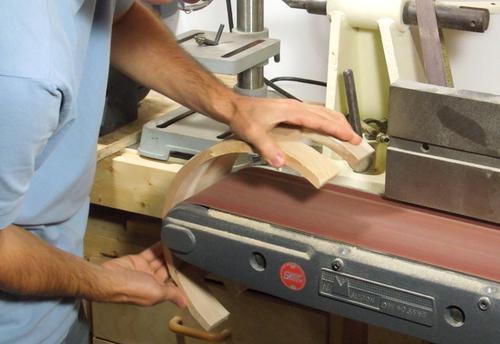 I built the cylinder as two halves, then sanded the inside of it before
joining them together. A drum sander could be used to sand everything once
it's assembled, but I don't have one.
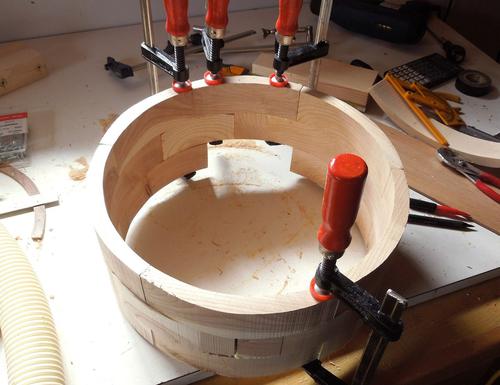 After smoothing the inside, I glued the two halves together.
It was quite a lot of work to make that cylinder. For a later cyclone build I just used 5 gallon bucket for the cylindrical part. Much easier.
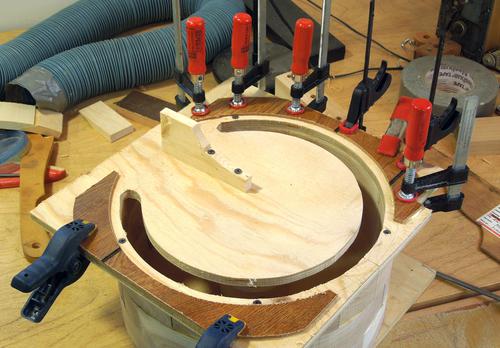 The bottom of the separator is a piece of plywood with an arc shaped slot cut out of
it, just like in a Thien-baffle.
I added a ledge of plywood to help keep the dust bucket aligned on the bottom.
With the separator ahead of the fan, the separator will always have a slight vacuum in it. With air leaking in instead of out, I don't have to worry about dust getting out of the bucket. So I don't need a completely airtight seal.
I also added a "vane" to the bottom of my separator to keep the air in the bucket from spinning too much, but with my bucket already mounted close to the floor on the finished unit, that vane made it difficult to get the bucket in and out, so I removed it later.
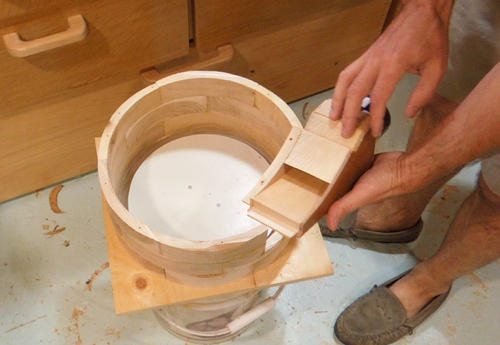 In a typical Thien-baffle, the air is injected using a pipe elbow.
But I didn't want the back of the elbow getting in the way of the
air circling around the chamber, so I made a sort of
"injector nozzle" to shoot the air in from the edge.
I tapered this injector a little to give the air a bit of extra speed as it enters the separator. I figured, compared to the air resistance of the corrugated hose, this slight contraction of the air stream shouldn't make that big a difference in terms of air resistance.
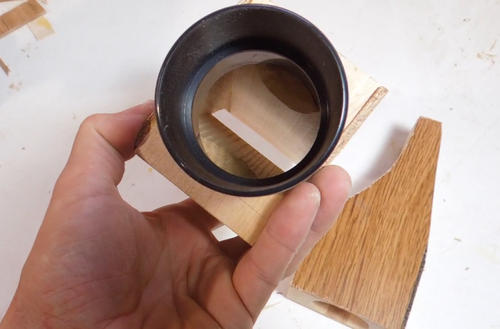 Looking into the end of the injector nozzle. I tried to make sure the nozzle
was fairly smooth the way it led to the narrower slot at the end
(this view makes the slot look narrower than it really is).
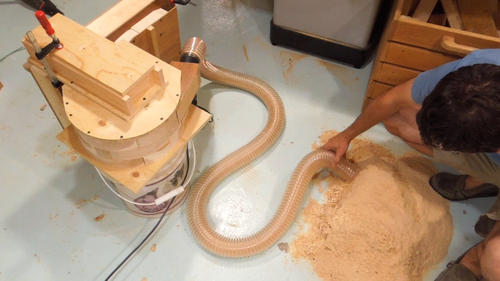 First tests. I dumped the sawdust drawer from my bandsaw and sucked up its
entire contents. Bandsaw sawdust, especially when using a fine blade, is
quite fine, so it's harder to separate.
It worked well enough, although I was getting some dust in the filter. The separator wasn't perfect with this test, but it worked.
For another test, I sucked the contents of my bandsaw sawdust drawer through as fast as possible. After finishing, I could see that dust was still flowing into the collection bucket. Apparently, the dust had started to pile up on top of the baffle in the cyclone. Checking the filter, it was completely caked with dust!
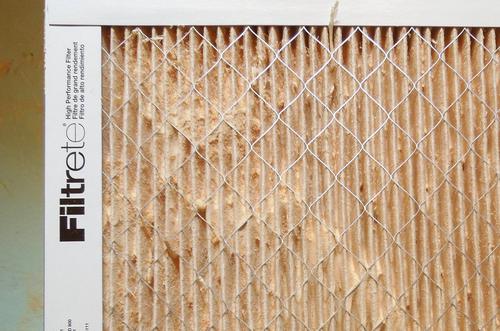 With the filter so caked with dust, I was wondering about the effectiveness of my
separator. But with further experimentation, I realized that I just way overloaded
the cyclone it and effectively "stalled" the circulating air flow.
With much dust and not enough air, dust started to pile up on top of the baffle,
which further reduced air circulation.
Trolling around YouTube, I found some interesting related videos:
Gas cyclone separator (effect of solid flow rate)
In this video, you can see particles moving more slowly around the cyclone for the simulation
with higher particle loading.
Clearvue Cyclone System in Action
This video first shows the cyclone with light load, followed by a heavy load. Again, you can see circulation slowing down. Slower circulation means less centrifugal force, and therefore less effective particle separation.
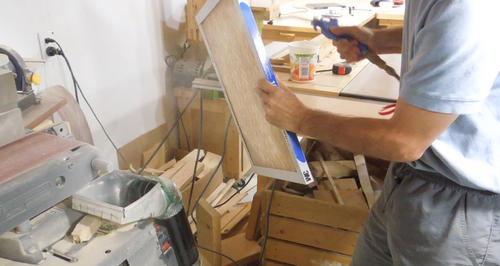 Though the furnace filter was meant to be disposable, I cleaned it out with
an air compressor. I had my other dust extractor running
to catch all the dust I'm blowing out. I learned not to
get too close to the filter itself with my air nozzle. 100 PSI air is
apparently enough to blow holes in a furnace filter. I fixed the holes
with a bit of glue.
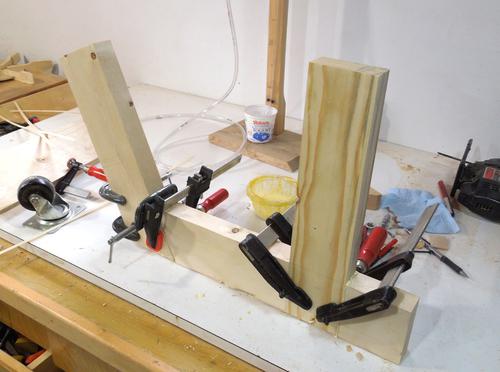 Having rigged my dust extractor together only temporarily so far,
it was time to put it together more permanently and make a stand.
My stand is just a funny shaped bracket for the wheels...
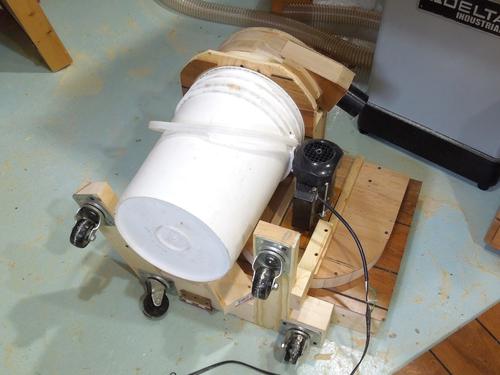 .. which attaches to the bottom of the filter box. I also added a few pieces
to hold the separator more firmly to the filter box. The filter box,
being the largest part of the dust extractor,
essentially became the "chassis" for the whole thing.
The whole unit looked a little messy, but I had some green paint left over from painting various homemade bandsaws and a jointer, so I used it paint this unit.
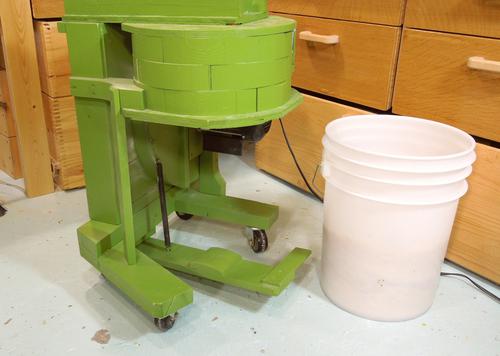 I added a spring-loaded lever to hold the bucket up against the separator.
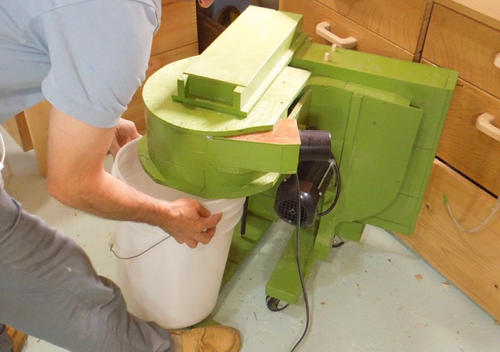 The lever protrudes beyond the bucket, so to change buckets, I just step
on the end of the lever and pull the bucket out.
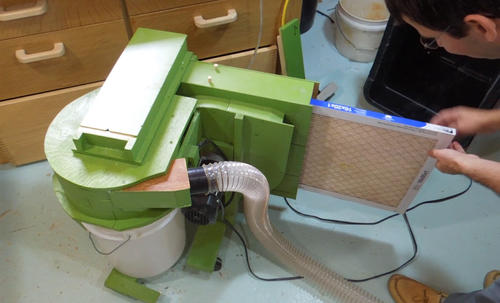 The filter, a "Airborne microparticle reduction" furnace filter,
can be slid in from the side of the filter box.
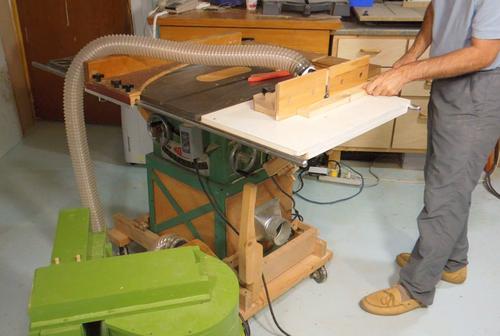 It's not a very powerful dust extractor, but it's good enough for things like
router tables. I tried it with my thickness planer, and it can just barely
keep up with that for moderate sized stock.
It won't move as much air as good size shop vac, but it's also much quieter and consumes much less power. If I was building it again, I'd look for a slightly bigger motor, maybe 1/2 HP.