Dowel jig T-square
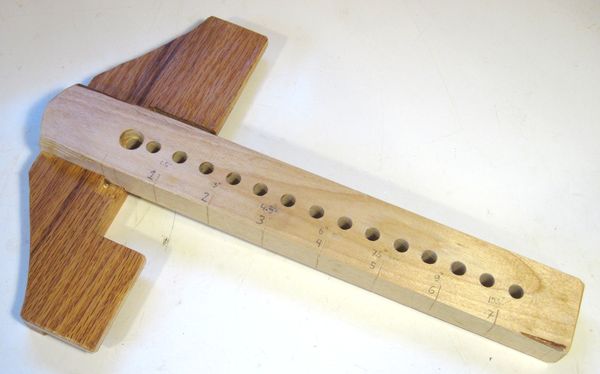
I recently bought one of those self centering dowel jigs, and used it to build a shoe rack shelf at my sister's. This dowel jig isn't really meant for doweling into flat surfaces, but I managed to improvise to make it usable for that purpose.
After that experience, I figured I could build a sort of jig to use with the dowel jig to make that type of joinery much easier.
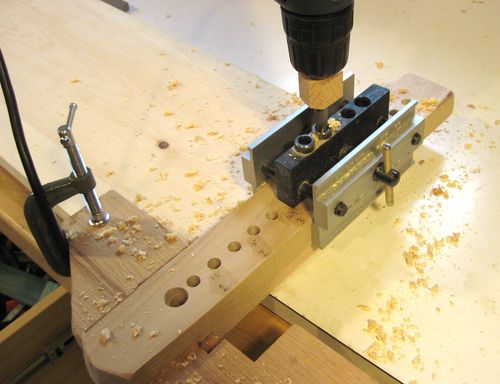 My jig is a sort of T-square that is clamped to the edge of a board. The self-centering
dowel jig is then clamped to the T-square's arm. The dowel jig is positioned such
that the nearest edge of the one of the aluminium flanges lines up with one
of the lines on the jig. Two holes can then be drilled through the dowel jig
before repositioning the dowel jig to line up with the next mark on the T-square's
arm.
A block of wood pushed onto the drill right in front of the chuck helps to limit the depth of the holes. Fine adjustment to the drilling depth can be made by varying how deep the drill is clamped into the drill's chuck.
The T-square and jig combination allows for holes to be drilled at precise 3/4" increments or multiples of 3/4".
The larger hole near the head for the T-square is for looking at the board and aligning the jig with a pencil mark on the edge of the board.
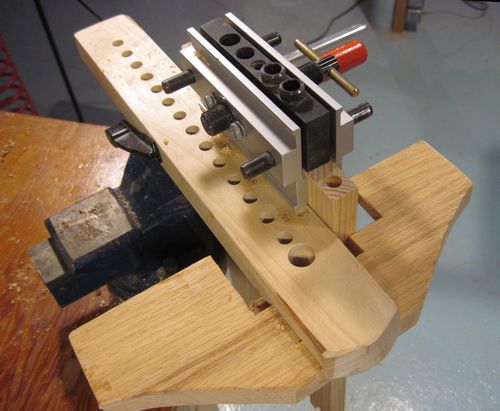 The same T-square can also be clamped to the end of a board. In this capacity, it
serves as a sort of ruler to repeat the same hole positions for drilling holes
into the end of a board.
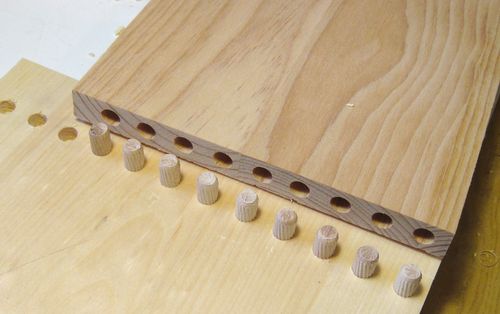 This is the type of joint that my dowel jig T-square is meant for.
The row of dowel holes can be at the edge of the board, or anywhere along the board.
 This is the dowel jig that I used with my T-square. It's a "self centering dowel jig".
If you search for "self centering dowel jig" on any website that sells woodworking tools,
you will find this jig, or a copy of it. It's reasonably priced - less than a
quarter of the cost of a Dowelmax jig, for example.
Making the doweling T-square
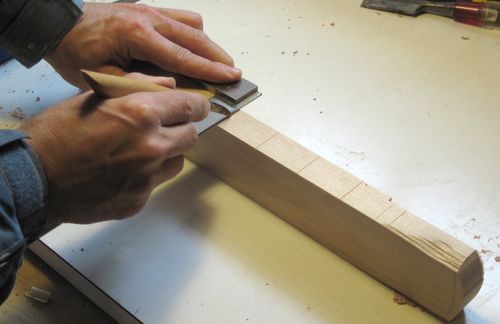 The bar of the T-square is as wide as the self centering jig will open up, and the same
thickness as the overhang of the clamping flanges on either side of the jig. That way,
the dowel jig's aluminium flanges will be just flush with the bottom edge of the bar.
I very carefully measured increments of 1.5", and scored them with a knife. Knife score lines are thinner and more accurate than pencil marks.
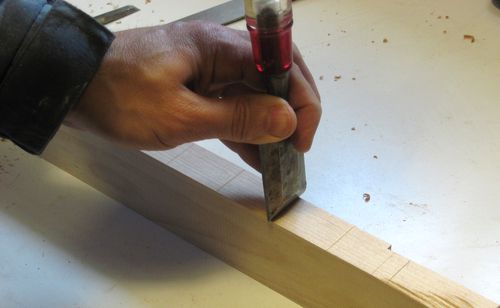 To make the score lines more visible, I next placed a chisel in the score lines and
hit it with a hammer.
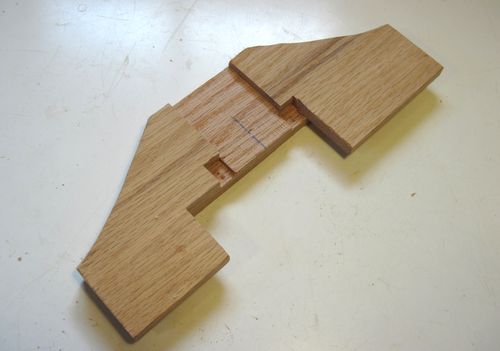 This is the head of the T-square. I made some cutouts near the bar to allow the dowel
jig to be moved a bit past the edge of the board. That way, the hole closest to
the edge of the board ends up about 3/8" (10 mm) from the edge of the board.
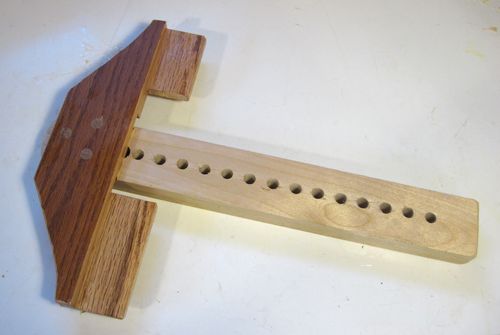 After gluing the bar to the head, I let the glue dry. I then added three dowels between
the bar and the head for extra reinforcements.
I also glued splines into the ends of the T-bar to reinforce the T-bar's flanges. The flanges are where the clamps get applied to clamp it to the workpiece, so they need to be fairly robust.
Next I drilled 3/8" holes in every position along the bar, so I wouldn't have to drill through the T-bar the first time I used the jig.
This jig would have been ideal for building this shoe rack, but it was this very job that inspired me to build the jig, so obviously I didn't have it yet for that job.
It would also be handy as a guide for when making shelves similar to this bookcase. Realistically though, while I'm in my workshop, I'm more likely to use my horizontal boring machine for this type of job. But it's a good jig to have when doing jobs outside the workshop.
I should have made this square a bit longer, because it turned out to be too short for the next project I could have used it for - my basement storage cabinet. Rathert than make another one, I just clamped a piece of wood to my panels as a substitute. I did however use it when I built this laptop computer table
More about doweling and using a dowel jig