Table saw dovetail jig: The pins jig
 I had the idea for this jig for some time, but only recently
experimented with actually building it. The idea was to swivel the workpiece over
the blade for making the tapered cut between dovetail joint pins.
I had the idea for this jig for some time, but only recently
experimented with actually building it. The idea was to swivel the workpiece over
the blade for making the tapered cut between dovetail joint pins.
 I used some scraps of plywood to build a test jig. It worked quite
well, so that got me experimenting with building a better jig.
I used some scraps of plywood to build a test jig. It worked quite
well, so that got me experimenting with building a better jig.
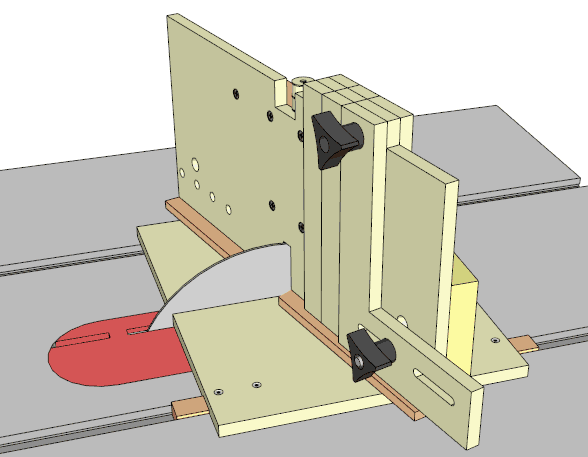 After my initial experiments, I designed a better jig in
SketchUp
based on what I learned.
After my initial experiments, I designed a better jig in
SketchUp
based on what I learned.
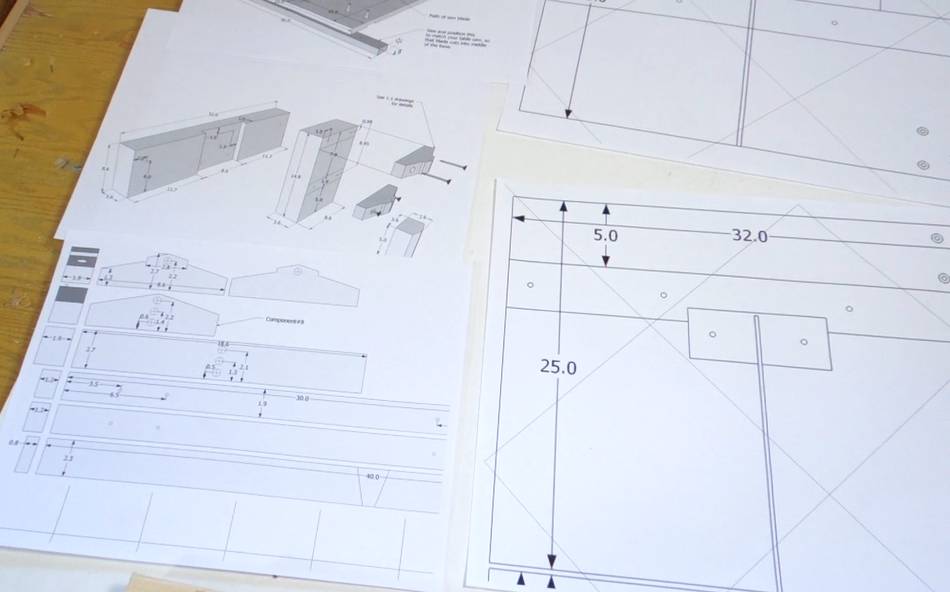
I made 1:1 drawings of the plywood parts. 1:1 drawings really cut down on needing to measure stuff, and errors!
Printable multi-page PDFs are included in the dovetail jig plans package that I have for sale. (you print them on a regular printer and then glue the pages together)
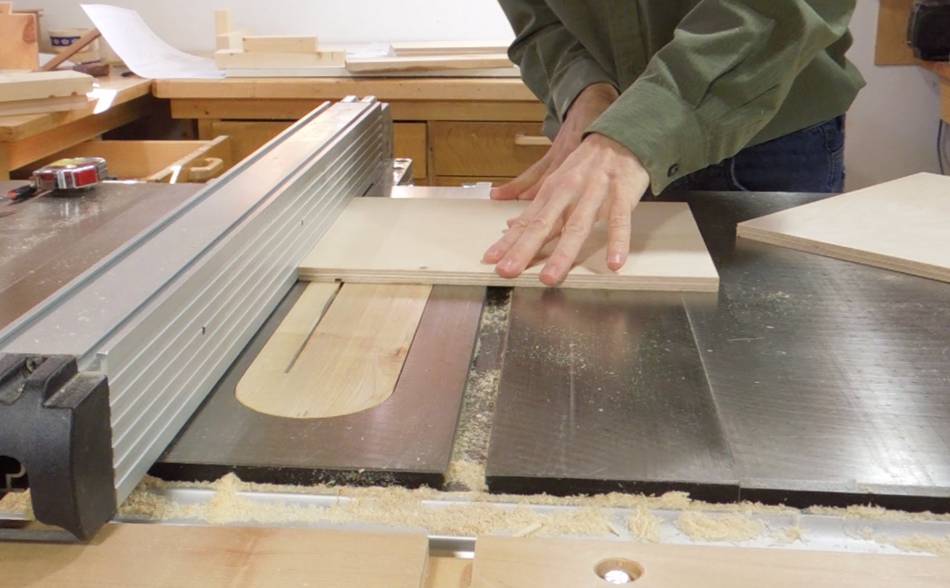
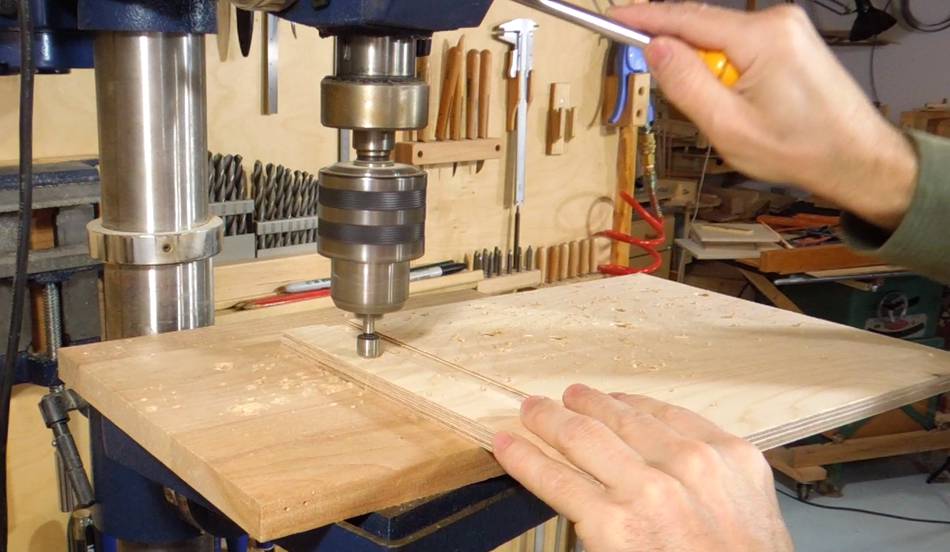
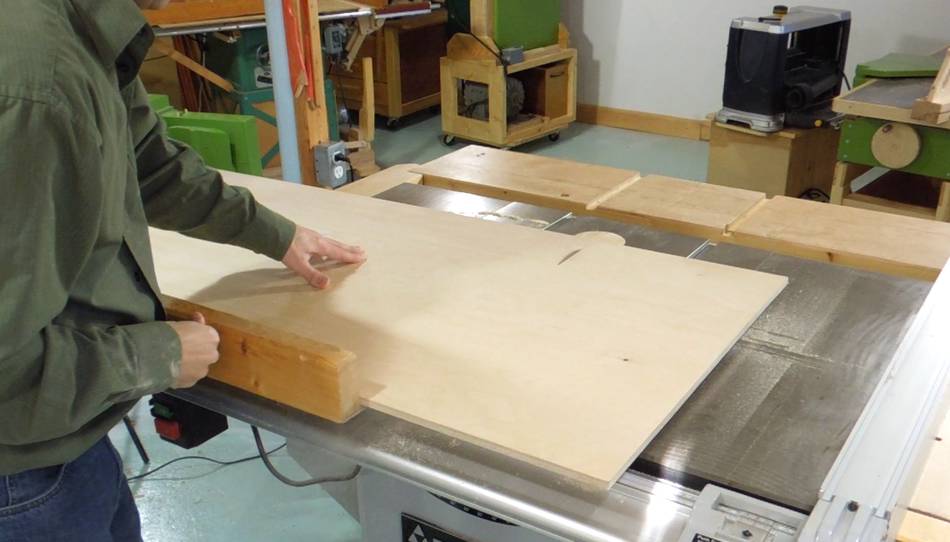 For the plywood, I started with a 1/4 sheet (2-foot x 4-foot) of 11 mm Baltic birch plywood
from The Home Depot. That is more than enough material. Here's
cutting it up, using my table saw sled
For the plywood, I started with a 1/4 sheet (2-foot x 4-foot) of 11 mm Baltic birch plywood
from The Home Depot. That is more than enough material. Here's
cutting it up, using my table saw sled
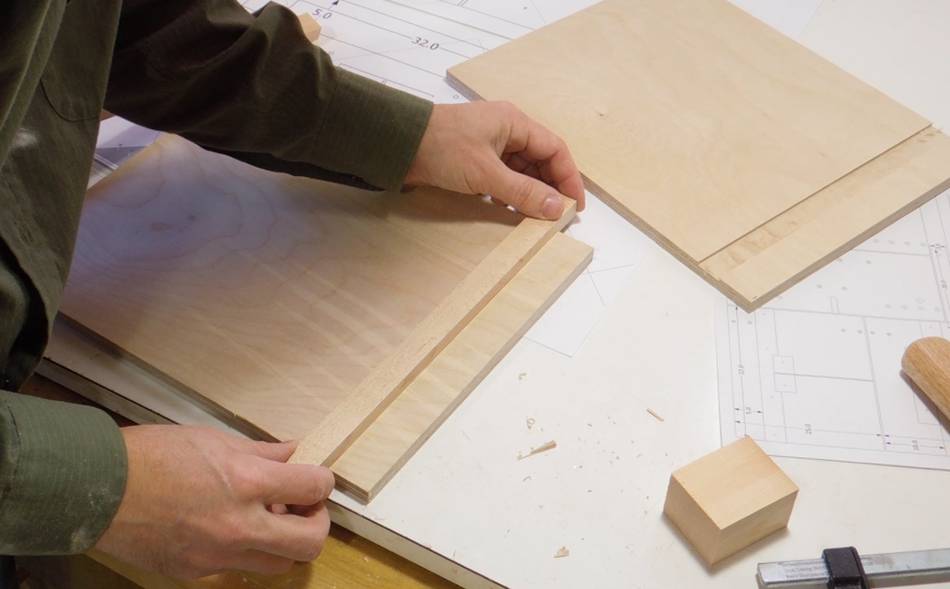
 I also used some spruce cut from construction lumber. I find that construction
lumber needs to be planed down slightly on all sides to make it precise.
I also used some spruce cut from construction lumber. I find that construction
lumber needs to be planed down slightly on all sides to make it precise.
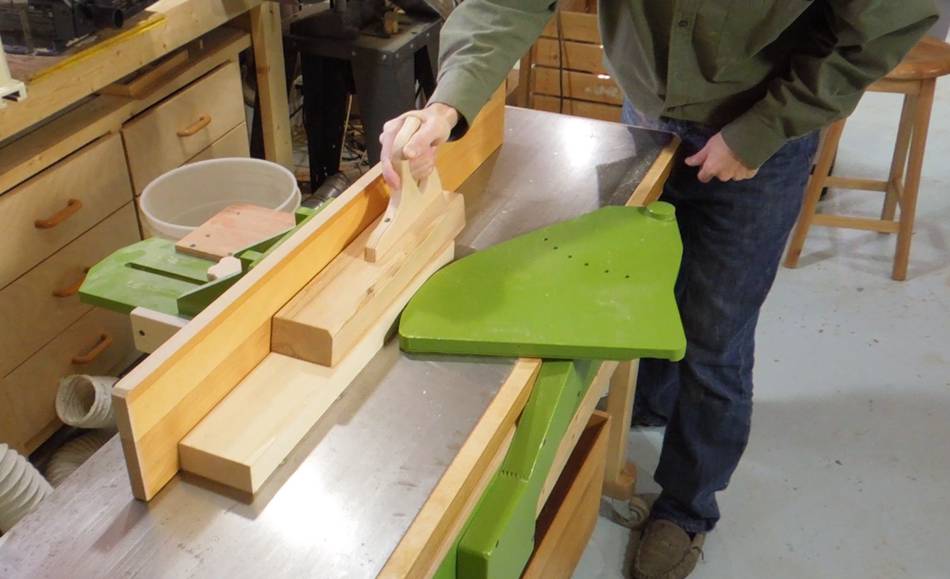
 Cutting the rabbet for the pivot support part of the pins jig. I used my
small table saw sled
to cut this with a series of cuts. I'm using the table saw fence as a
stop on the right and a small block of wood clamped to the sled as a stop on the left.
Cutting the rabbet for the pivot support part of the pins jig. I used my
small table saw sled
to cut this with a series of cuts. I'm using the table saw fence as a
stop on the right and a small block of wood clamped to the sled as a stop on the left.
 I made a series of cuts to make a 2 mm deep dado for the guide bar in
the bases for the pins jig and the tails jig.
A dado blade would be useful here, but it's hardly worth the time it takes to swap it
in and out, so I didn't bother.
I made a series of cuts to make a 2 mm deep dado for the guide bar in
the bases for the pins jig and the tails jig.
A dado blade would be useful here, but it's hardly worth the time it takes to swap it
in and out, so I didn't bother.
 I made a wooden guide bar to ride in the T-slot, the same way I did
for my small table saw sled.
It fit perfectly. The bar slides easily but has no noticeable play.
I made a wooden guide bar to ride in the T-slot, the same way I did
for my small table saw sled.
It fit perfectly. The bar slides easily but has no noticeable play.
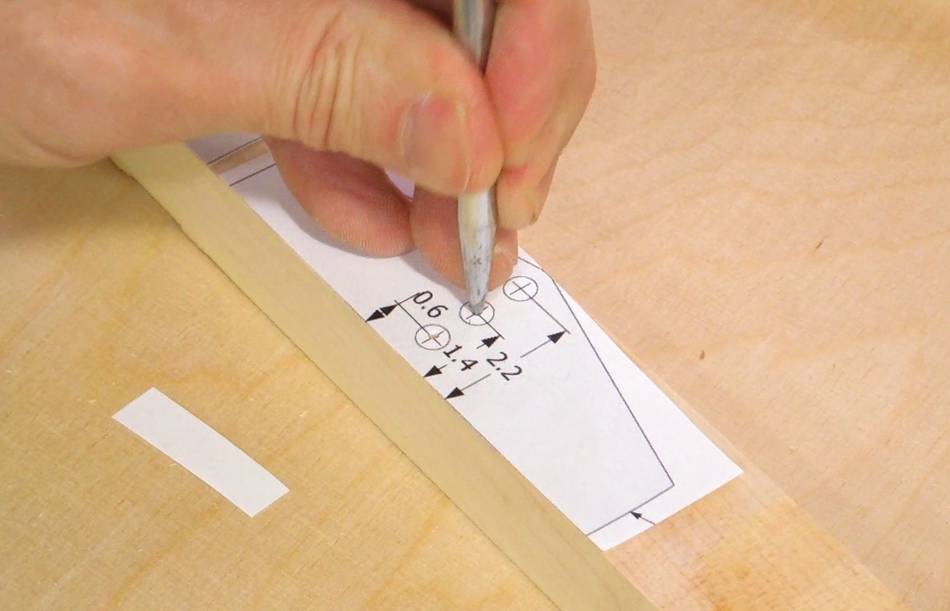
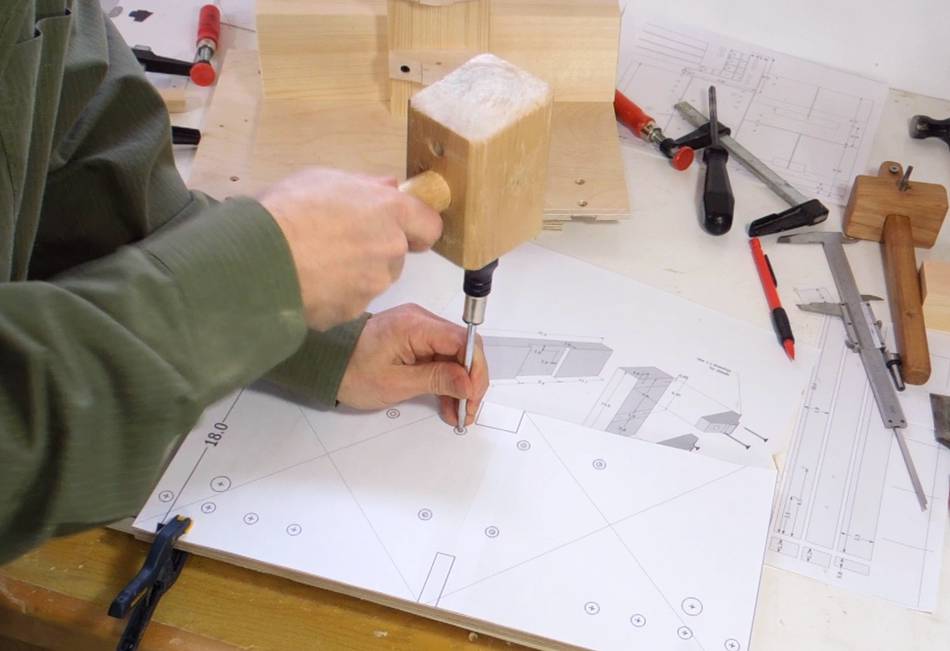
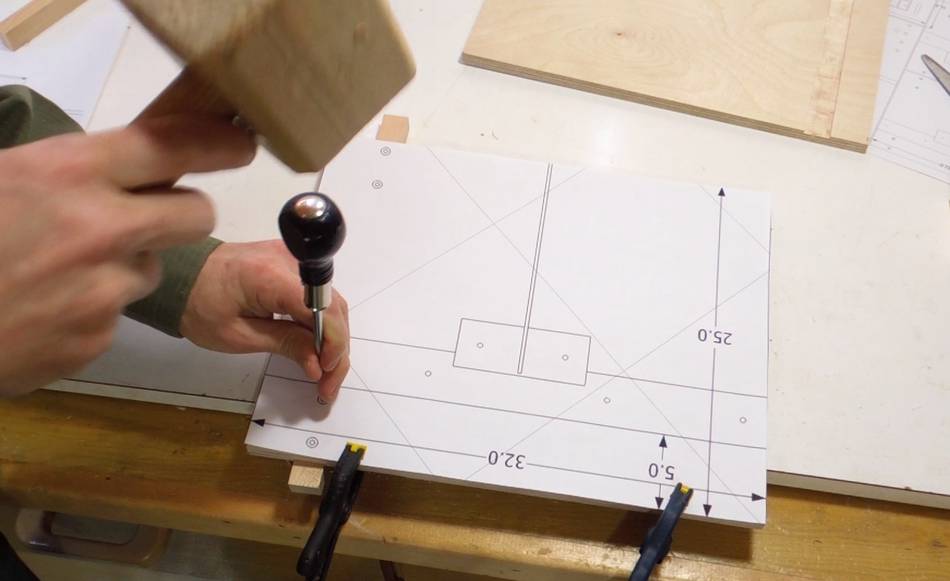 Next I marked the mounting hole positions on the base. I placed my 1:1 printout on top
of the base, then used an awl to punch the screw positions through the template.
Next I marked the mounting hole positions on the base. I placed my 1:1 printout on top
of the base, then used an awl to punch the screw positions through the template.
I also marked all the other hole positions, in both bases, while I was at it.
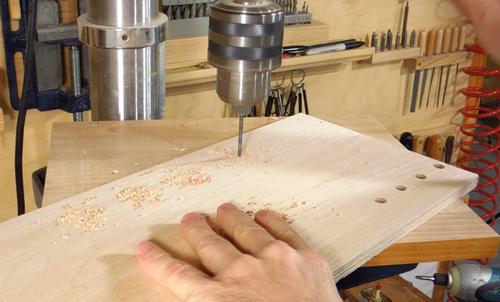
 Drilling all the holes and countersinks in both bases. This went quite quickly.
A lot of time normally goes into measuring and thinking, but having 20-odd holes already laid out and marked, just drilling and countersinking them all doesn't take much time.
Who needs a CNC milling machine when you already have a CNC template generator (otherwise known as an ink-jet printer)?
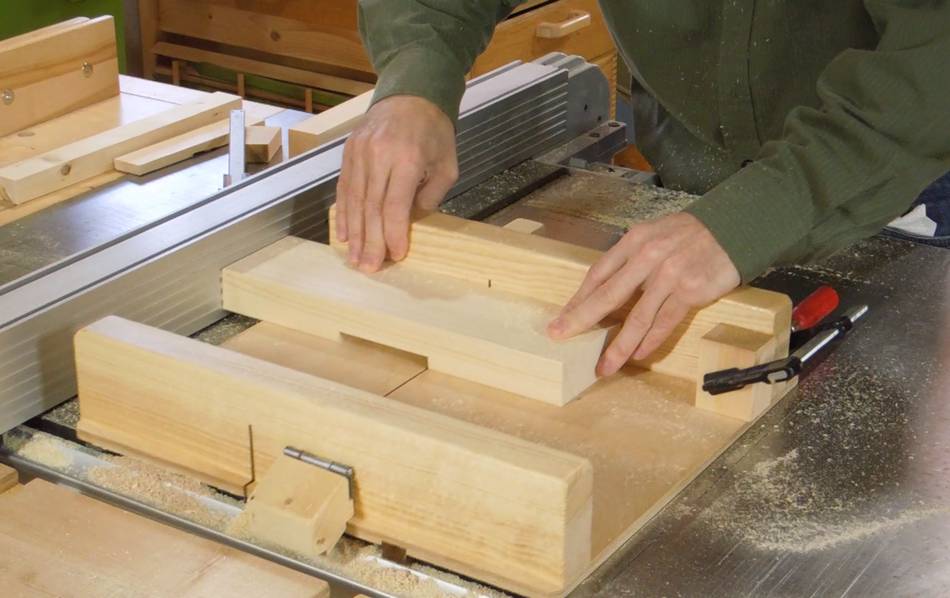
 Making the hardwood pivot mounting blocks for the pins jig.
I'm using 1:1 paper templates for these.
Making the hardwood pivot mounting blocks for the pins jig.
I'm using 1:1 paper templates for these.
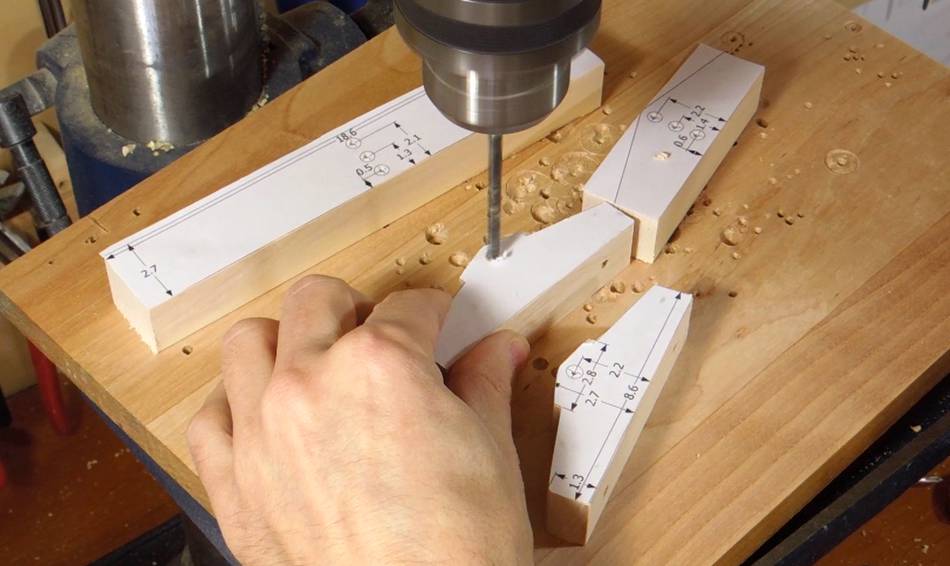 Drilling out the pivot holes.
 The holes, as drilled, were too tight a fit for the metal rod I had.
So I roughened up the end of a piece of metal rod with an angle grinder, and here I'm using that
as a reamer to enlarge the holes. I want a fit with a fair amount of friction (no play),
but still possible to insert the rod by hand!
The holes, as drilled, were too tight a fit for the metal rod I had.
So I roughened up the end of a piece of metal rod with an angle grinder, and here I'm using that
as a reamer to enlarge the holes. I want a fit with a fair amount of friction (no play),
but still possible to insert the rod by hand!
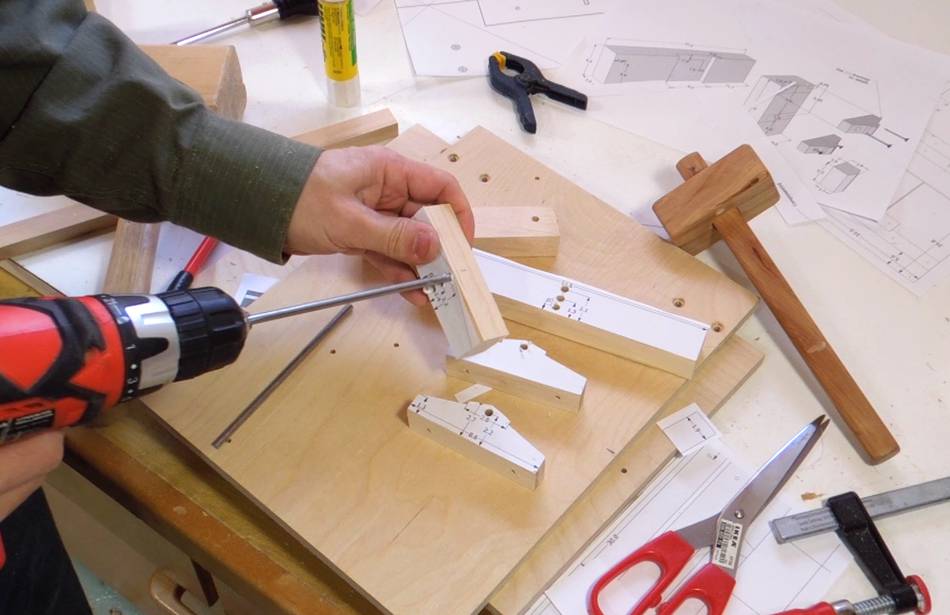
 Now attaching the pivot mounting blocks to the jig.
 The spruce parts are attached to the base with drywall screws from below.
 Next it's time to prepare the board for mounting the workpiece to.
This board has a number of holes that need drilling, so I start by clamping the
paper template to it and punching through all the hole positions.
Next it's time to prepare the board for mounting the workpiece to.
This board has a number of holes that need drilling, so I start by clamping the
paper template to it and punching through all the hole positions.
 I then drill out all the holes. I also do this for the backer board for
the tails jig.
I then drill out all the holes. I also do this for the backer board for
the tails jig.
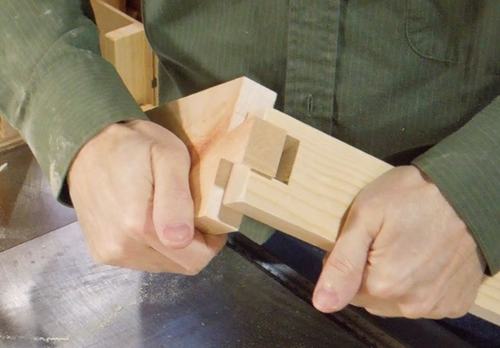
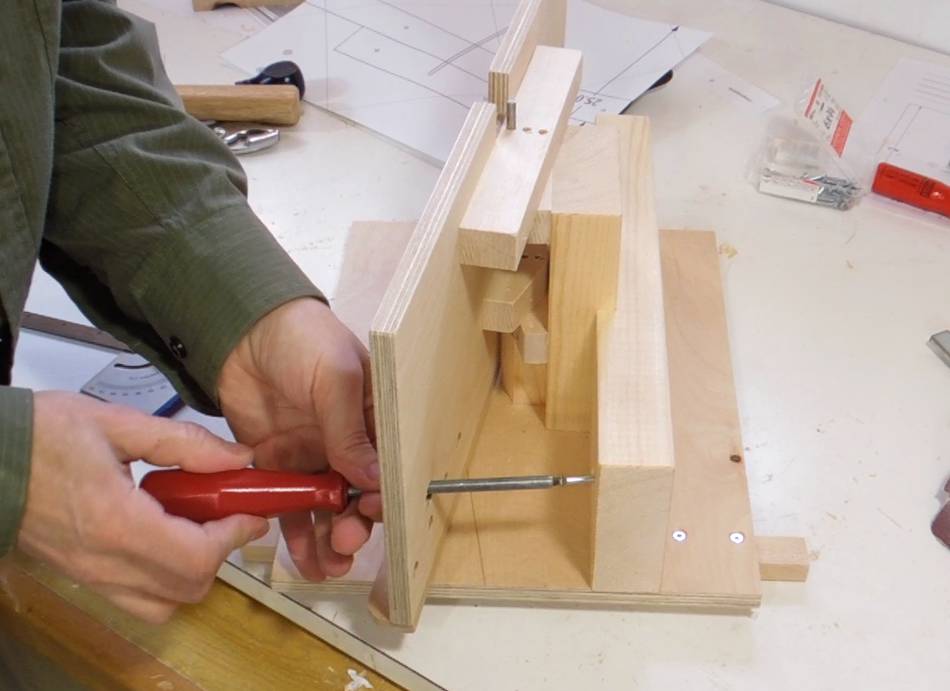
 Adding the shaft and blocks that mount the stock mount to the pivot
blocks. The shaft was a bit hard to slide in, so I'm tapping it in with
a mallet.
Adding the shaft and blocks that mount the stock mount to the pivot
blocks. The shaft was a bit hard to slide in, so I'm tapping it in with
a mallet.
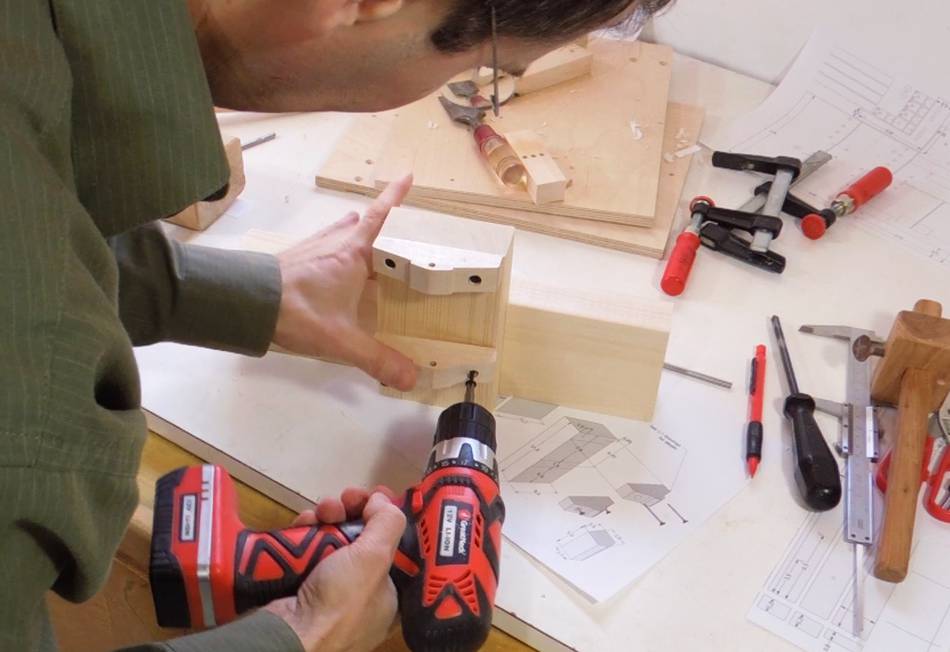
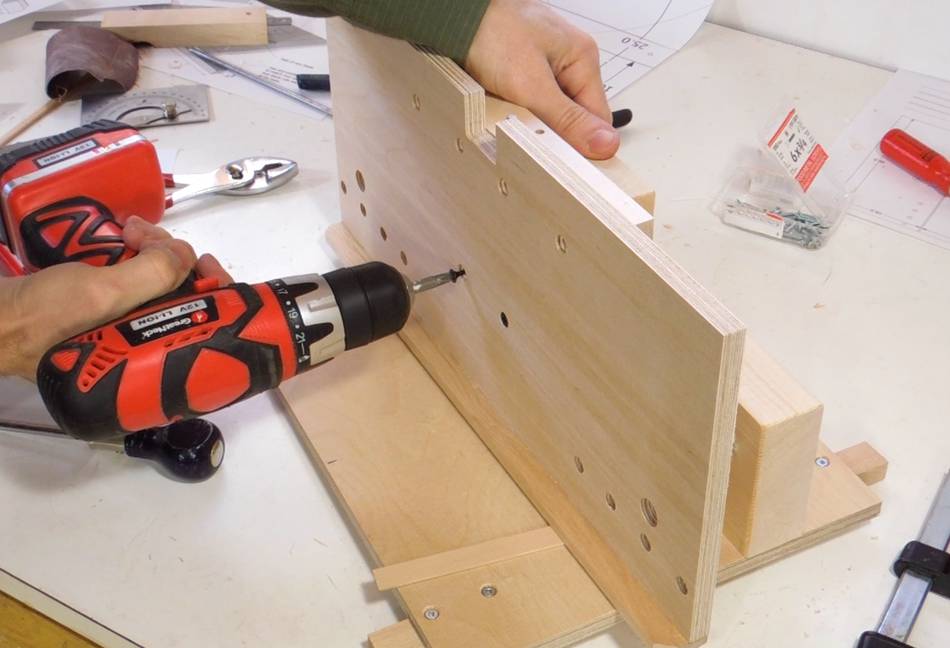
 I made sure all the blocks are in place, I then clamped the backer board
onto the blocks. The backer board needs to be 2 mm above the base, so I put
some 2 mm thick pieces of wood under it to act as spacers (you can barely
see one of them, near the guide bar in this picture).
I made sure all the blocks are in place, I then clamped the backer board
onto the blocks. The backer board needs to be 2 mm above the base, so I put
some 2 mm thick pieces of wood under it to act as spacers (you can barely
see one of them, near the guide bar in this picture).
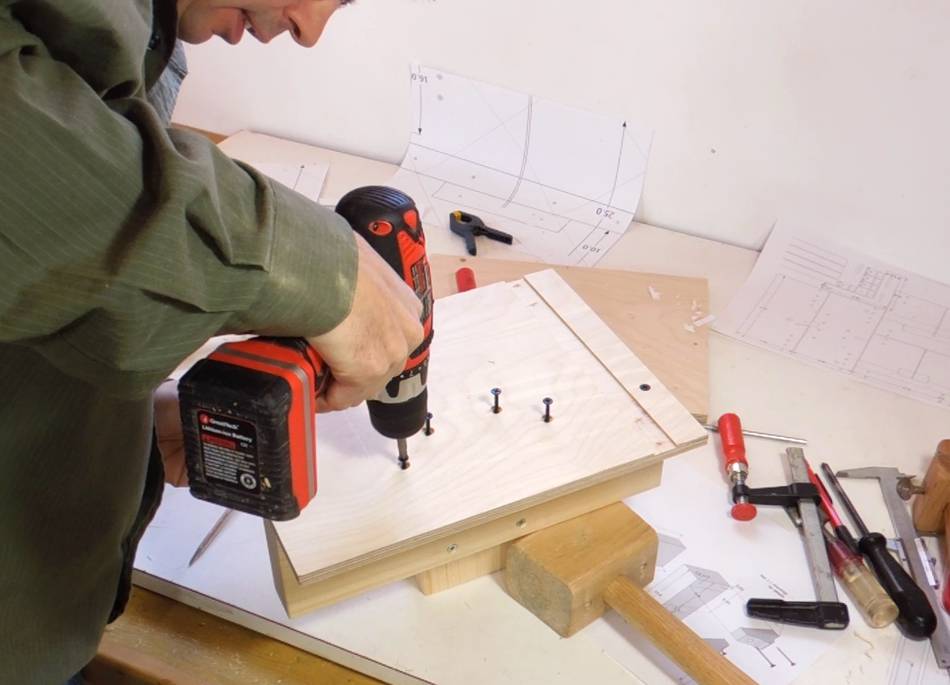
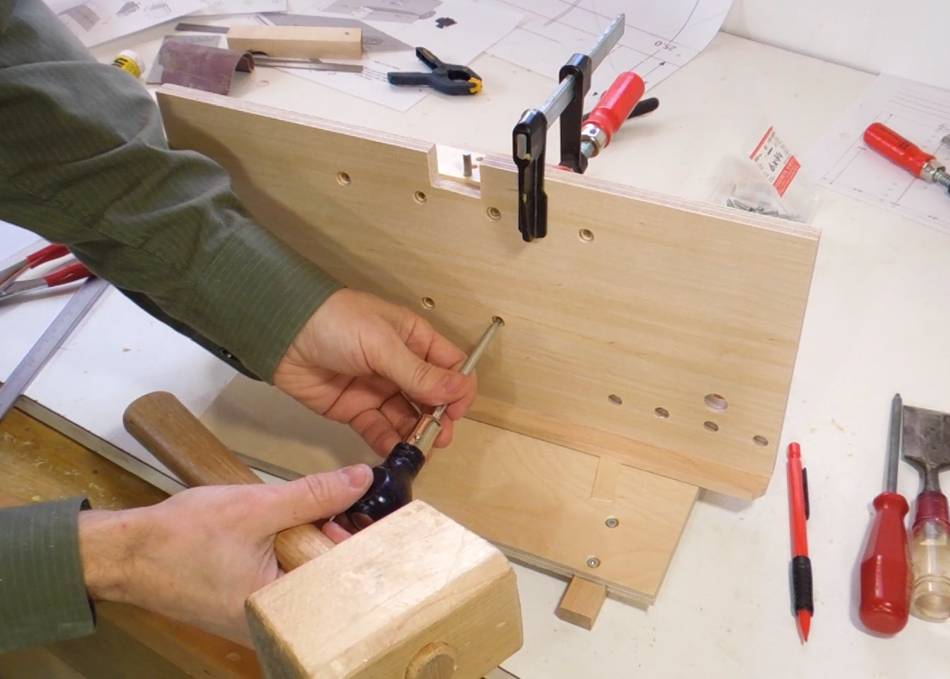
After marking the pilot hole locations, I took it apart again and drilled pilot holes in the mounting blocks. Then I screwed everything together.
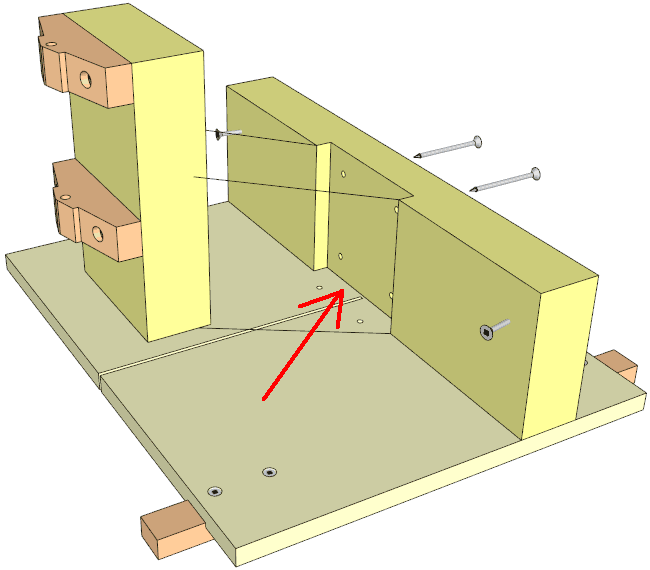
 Two wood screws are screwed into the base at an angle
to act as angle stops. The clever bit is how the holes in the pivoting
plywood allow the screws to be turned with a screwdriver, but when the
plywood is pivoted towards the screw, it no longer lines up, so the
screw head acts as an angle stop.
Two wood screws are screwed into the base at an angle
to act as angle stops. The clever bit is how the holes in the pivoting
plywood allow the screws to be turned with a screwdriver, but when the
plywood is pivoted towards the screw, it no longer lines up, so the
screw head acts as an angle stop.
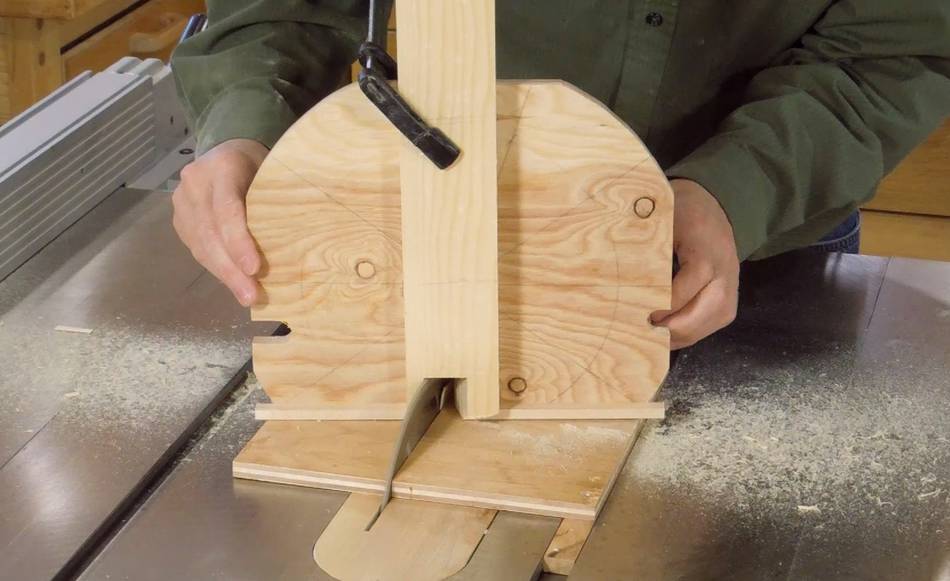
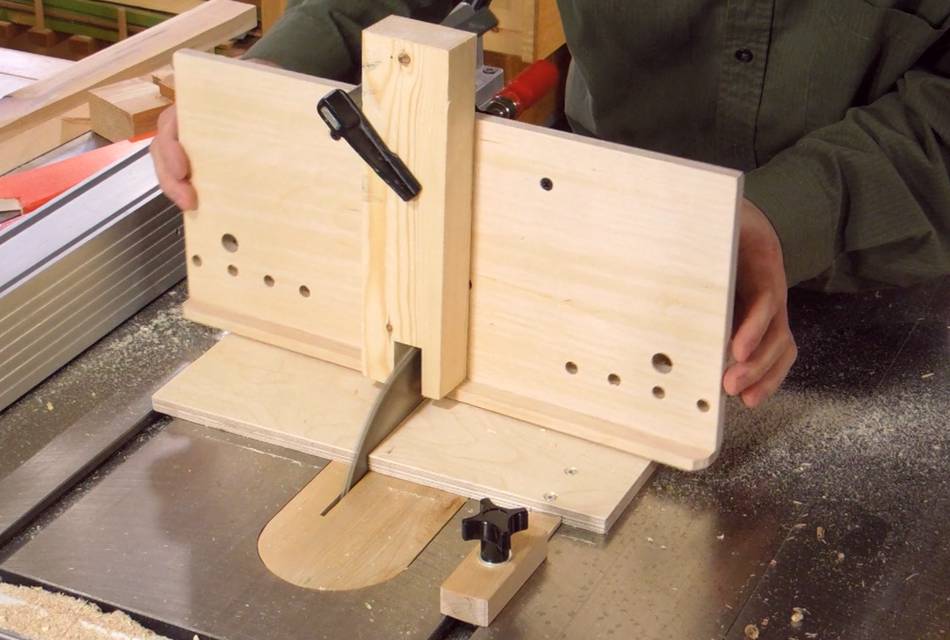 First test of the new jig. I'm cutting a single slot for a dovetail in
a piece of lumber 3.6 cm thick. The jig doesn't need lumber this big, but
it can handle thicker stock, so might as well try it with that!
First test of the new jig. I'm cutting a single slot for a dovetail in
a piece of lumber 3.6 cm thick. The jig doesn't need lumber this big, but
it can handle thicker stock, so might as well try it with that!
I start by making a cut with the jig pivoted in either direction, then make a series of cuts at different angles to hog out the material. After that, I slowly move the jig over the blade as I pivot it back and forth to clean out the bottom of the cut.
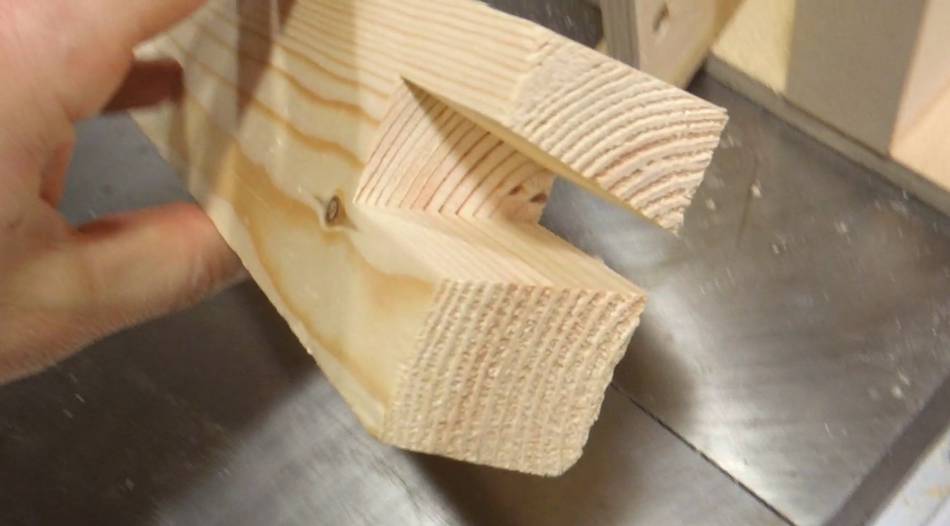 Finished dovetail slot.
Next: The tails jig