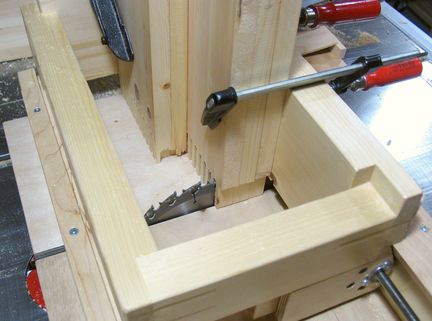
 But with my fancy jig, I can safely and accurately cut box joints that are
quite deep. This enables me to make a bit of a T-joint for the drawer front.
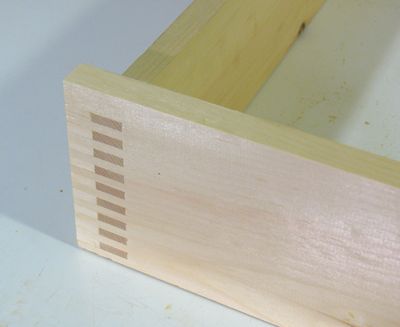 A traditional method of joining the drawer front to the sides of a drawer is to
use a rabbeted dovetail joint. This is an elaborate and time consuming joint
to cut, even with a dovetail jig. On top of that, a dovetail joint
is not even as strong as a box joint
if you make the box joint fingers at all reasonably narrow.
Not that all this matters so much, even simply
rabbet joined drawers hold up well enough.
But after having built my super fancy box joint jig, I explored an interesting idea for how to use it to attach drawer fronts. The main problem being that a box joint normally forms a corner of a box, and not a T-type joint that is needed for a drawer.
 But with my fancy jig, I can safely and accurately cut box joints that are
quite deep. This enables me to make a bit of a T-joint for the drawer front.
Basically, I cut the box joint about 2 cm deeper into the drawer front than
I would if I were to just make a box.
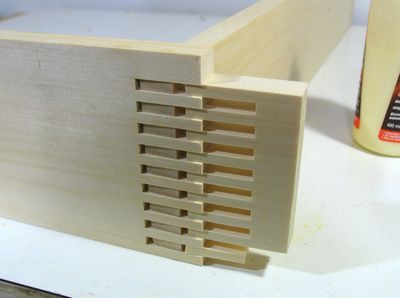 With the slots cut very deeply, the fingers stick out way beyond the corner joint,
and I can then just use another scrap piece with fingers cut into it to
fill the gaps. The image at left shows a test fitting of this.
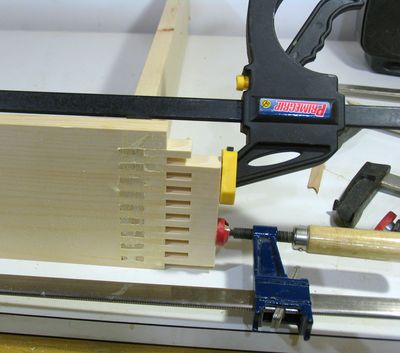 Having the extra piece with the fingers in it is actually quite handy for gluing
the drawer together, as it's a convenient spot to put a clamp on, without getting
glue all over the clamp.
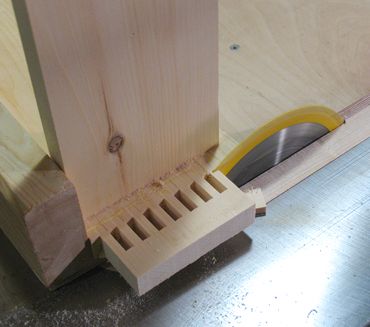 After the glue has dried, I cut off the rest of the excess of the fingers on my table saw. I am as usual using my table saw sled to do this. |
 The next step is to shave just a little bit off the drawer front with my jointer. The resulting finish actually looks quite nice, and would make for a very intriguing drawer front. |
Update: I have since built my slot mortising machine which I have used to make similar drawers and T-joints but without cutting a slot all the way to the edge.
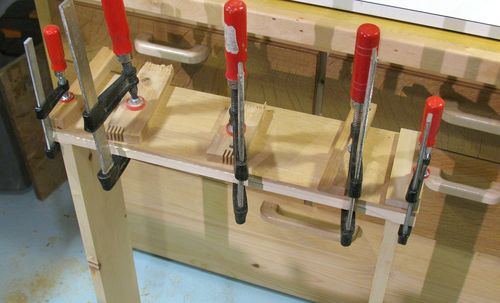 Although the drawer front looked kind of intriguing as it was, I wanted the drawer
face to be made of hardwood. I had some nice pieces of white oak that i had
been saving, that I resawed to thin slabs
to glue onto the faces of these drawers. That way, the drawer fronts won't get
banged up as quickly.
 I used this same method of construction for the four upper drawers of this workbench.
The bottom drawer is also box joined (see in this video). It rolls on wheels just like these under bed drawers that I had built earlier.
 Under bed drawers