 Sharpening bandsaw blades. Takes less time than buying a new blade.
 A blade guide for wide lumber on a 14" bandsaw, No riser block needed
 The 1/4" blade that I got for my home made bandsaw
turned out to have teeth with a rather aggressive set to them.
Before I added bandsaw tires,
my lower wheel was just a bare wooden wheel without a tire on it,
and I could see wear marks on the wheel from the teeth.
My upper bandsaw wheel had a rubber tire on it, and I could see no signs
of wear on it, though I'm sure over time these sharp teeth would cause
wear in the rubber as well.
 I also was not very happy with how rough the cuts were from this blade. So I
tried using a cheap sharpening stone to grind the sides of the blade a little.
That is to say, I was stoning the sides of the teeth themselves, with the
blade running.
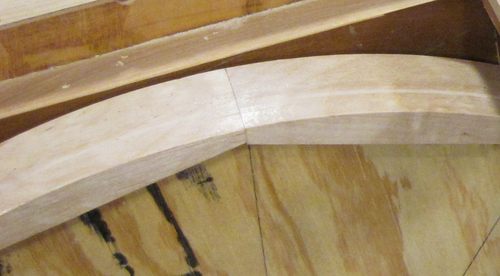
 Here are two shots cut with my 1/4" blade. The cut at left was made with the
blade as I got it, and the cut at right was made after stoning. The cut
was noticeably cleaner after stoning.
Stoning did have an effect on how tight a radius I could cut with the blade. Before stoning, I could cut a radius as tight as 11 mm. Afterwards, the tightest turns I could cut had a radius of about 14 mm.
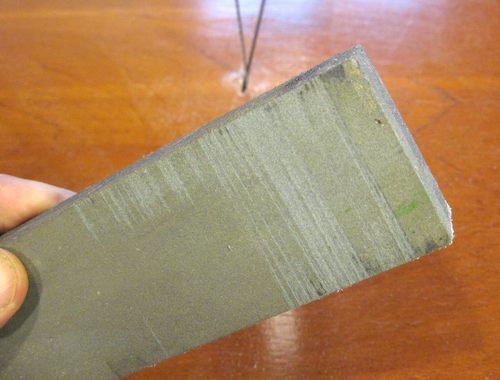 The stoning wasn't so good for my stone either. It is a wet stone, and it probably
would have done a little better if I had wetted it before using it. But this stone
isn't a very good one, and I have abused it before, such as using it to
grind the arbor of my table saw
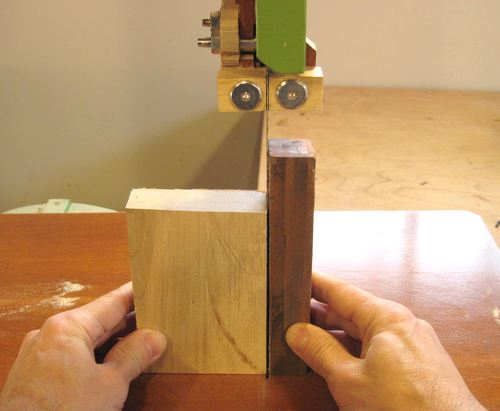 After the improvement on my 1/4" blade, I stoned my 1/2" blade as well.
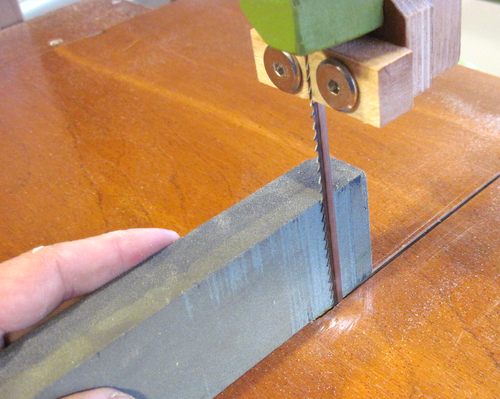
This time, I refined my technique. I used a harder, less aggressive stone, and
squeezed the blade between a block of wood and the stone. My rationale
was that the wood should steady the blade.
I figure if some teeth stick out more than others, the blade can't just move
out of the way, so the teeth that stick out to the side the most should
get ground level with the other teeth.
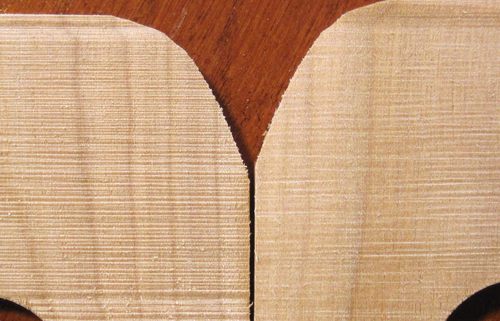 I didn't grind away all that much, but the before and after cuts at left do show
that it makes a difference. Left is before, right is after.
The difference is most pronounced when making a steady continuous cut. I still get waviness if I start and stop my cut mid way.
Grinding the teeth even more would make for a smoother cut with a narrower kerf, but a thinner kerf makes it harder to cut curves. A thinner kerf also means that the saw's fence needs to be very precisely aligned to the blade's drift angle when making any sort of rip cuts with a fence, such as for resawing.
 Sharpening bandsaw blades. Takes less time than buying a new blade.
 A blade guide for wide lumber on a 14" bandsaw, No riser block needed
Back to my Woodworking website.