Mitch's bandsaw / sawmill
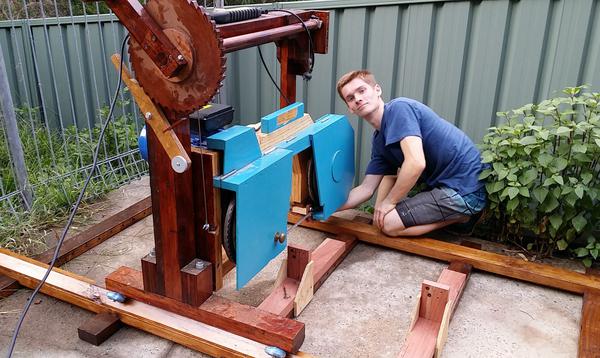 Mitch, from Australia, writes:
Hi Matthias,
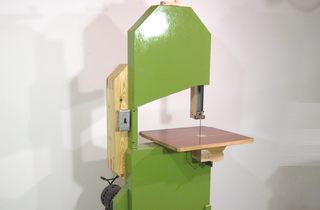
I'm a (now) 18 year old woodworker from Sydney, Australia and finished
building your 14 inch wooden bandsaw and sawmill from the plans you
designed whilst I was 17. I must start off by thanking you for the
fantastic plans,
they were very detailed and because they were in
SketchUp
I could easily find measurements and actually understand how
parts fit together. I had been wanting to build your saw for a couple
years, mainly because the cheap bandsaw I had previously was so weak
that it couldn't cope cutting wood over an inch thick!

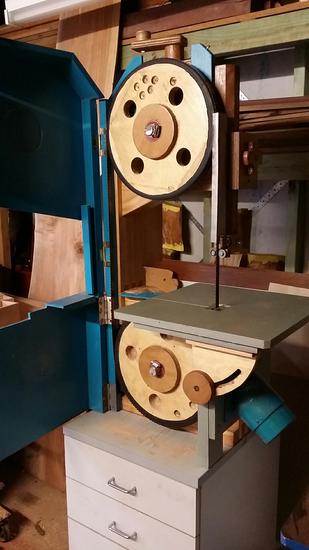 The wood frame went together very well, although there were one or two
gluing mistakes which were fixed easily enough. The wood for the frame
was salvaged from an old pine table top. Next up was the wheels, which I
made by gluing two 12mm thick pieces of plywood together. The wheels
turned out fine (pun intended), with the only issue being the first
wheel being accidentally turned substantially undersized. It would have
been much easier to make a new wheel, however I had run out of 12mm
plywood. So to make do with the undersized wheel I cut the circular
wheel into a hexagon, then cut a segmented solid wood ring and glued it
in place, just as you had done with your 18 inch bandsaw wheels.
The bearings and shafting material were bought at a local store, and it
took about an hour to hand sand the shafts until they just barely slid
through the bearings (the shafts were a few tens of thousandths of a
inch too large). I bought a new 2hp (1.5kW) 1410rpm motor, as I didn't
want to take any safety risks with old electric motors. The rest of the
build went great, and all in all it took me six weeks part time to
construct the wooden bandsaw. I did deviate from your blade guide
designs and used the side bearing and rear thrust bearing as noise
wasn't a concern for me as I always use ear muffs anyway. I also used an
electrical power bar to plug the motor into as I don't have any wiring
experience. Finally I added a dust collection port which hooks up to the
dust collector, which removes about 95% of all the dust.
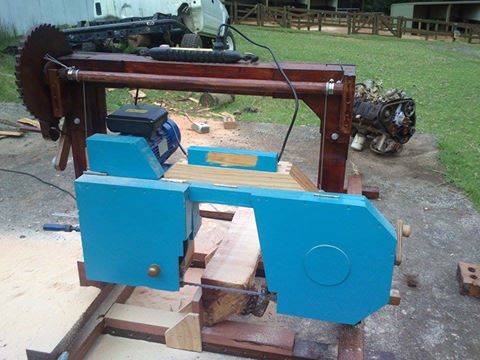
The bandsaw works very well, being able to resaw 29cm of dry Australian
eucalypt hardwood is a testament to this. After about a week of getting
used to the new saw I knew I had to build the sawmill. This took me 3
weeks part time, and at the end I had a fully functioning sawmill. I
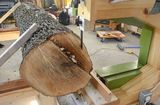
have used the sawmill a few times, mainly at my mate's large farm where
we have slabbed up fallen trees from his property (see photo for a bunch
of sheoak logs we slabbed). When using the bandsaw in sawmill mode I use
a 1.3TPI bimetal blade, which was only about twice the cost of a regular
bandsaw blade and should outlast carbon blades by about four fold. Also,
any old nails which may be embedded in these trees won't dull or destroy
the bimetal blade.
I tried as best as I could to scavenge as many materials to keep the
costs low, with the other costs as follows:
Motor - $160
Shaft - $8
Wheel and blade guide bearings - $35
Drive belt - $22
Bandsaw and sawmill miscellaneous hardware (nuts, bolts, washers, hose clamps etc) - $100
Small quantity of wood/plywood - $100
2 bandsaw tire bike inner tubes - $5
1.3TPI bimetal bandsaw blade - $66
Roller blade wheels for sawmill - $10
In total the bandsaw cost $506. This I consider to be very cheap,
considering I now have a strong, reliable saw as well as a portable
sawmill. I also love the idea that I can customize this saw however I
like, as well as never having to send the saw out to be repaired as I
can repair it myself.
To make assembling/dismantling the bed which the sawmill rides on
easier I made a system of half lap joints. These slot into each other and
ensures that the distance between them is always the same. This means I
don't need to use any screws to connect these frame parts, which speeds
assembly and disassembly up significantly.
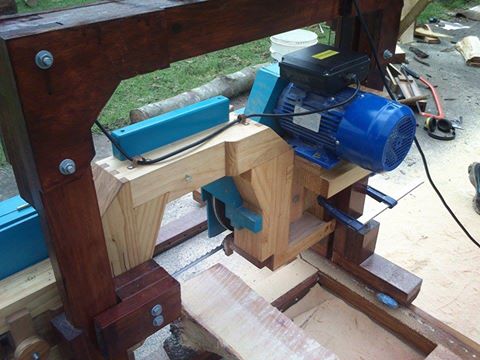
I also tried to replicate how commercial bandsaw sawmills hold their
logs (that is with the lathe like system with a back vertical support
and a large screw to pinch it secure). However, this didn't quite work
out in practice, with the components hitting the bandsaw before the
bandsaw was low enough to cut a log. I went back and built your log
holder designs and they worked perfectly.
I thought you might be interested Matthias that I'm studying civil
engineering at university, following the 'Woodworking for Engineers'
motto :).
Thanks again for the plans and videos, I'm sure this won't be the last
machine of yours I build.
Cheers,

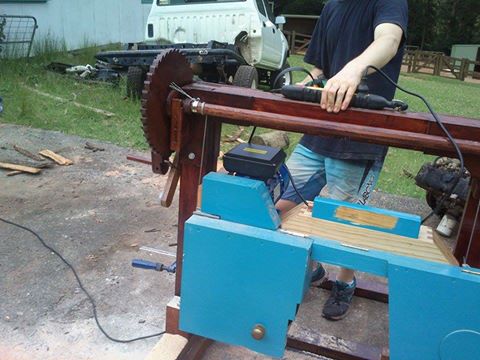

 The wood frame went together very well, although there were one or two
gluing mistakes which were fixed easily enough. The wood for the frame
was salvaged from an old pine table top. Next up was the wheels, which I
made by gluing two 12mm thick pieces of plywood together. The wheels
turned out fine (pun intended), with the only issue being the first
wheel being accidentally turned substantially undersized. It would have
been much easier to make a new wheel, however I had run out of 12mm
plywood. So to make do with the undersized wheel I cut the circular
wheel into a hexagon, then cut a segmented solid wood ring and glued it
in place, just as you had done with your 18 inch bandsaw wheels.
 Mitch, from Australia, writes:


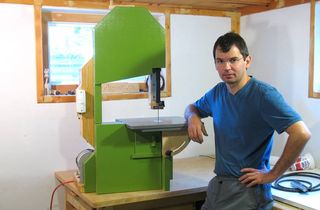 14" bandsaw/sawmill
 16" bandsaw
 More reader built
 Bandsaw on a dolly sawmill