
 I previously wrote about this
homemade air gun on my other website in 2004.
I get the odd email from people who couldn't figure out how it works from
the pictures, so I thought I'd do another write up on this air gun, this time
with more pictures.
I previously wrote about this
homemade air gun on my other website in 2004.
I get the odd email from people who couldn't figure out how it works from
the pictures, so I thought I'd do another write up on this air gun, this time
with more pictures.
I previously wrote about this
homemade air gun on my other website in 2004.
I get the odd email from people who couldn't figure out how it works from
the pictures, so I thought I'd do another write up on this air gun, this time
with more pictures.
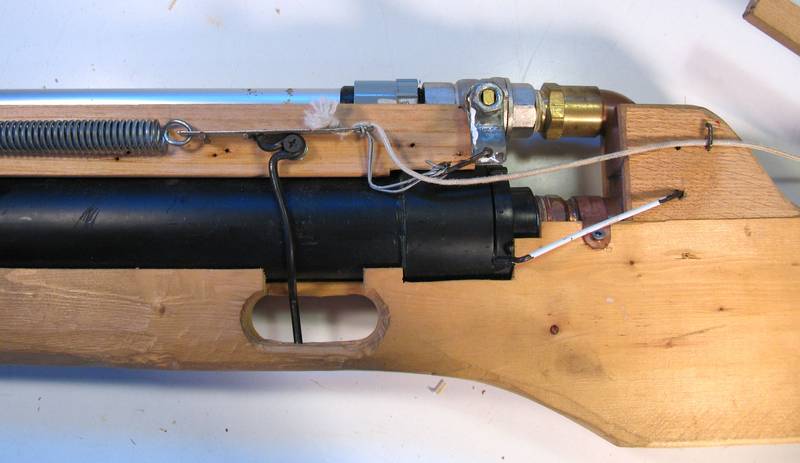 The part that people ask about most often is how the trigger works. I hope this photo
helps explain (click photo to enlarge). The trigger pull is a bent piece of wire, pivoting
around a screw. The top end of it forms a hook which goes through a hole in a strip
of metal. When you pull the trigger, the wire turns counter clockwise around the screw
and the hook pulls down and out of the metal strip. Some nails (barely visible)
keep the strip from moving down with the hook. The spring from the left then pulls
the strip left. The two grey pieces of string (tennis racquet string, actually) then goes
taut and pulls the lever on the ball valve. This causes the lever to turn 90
degrees, opening the ball valve very rapidly. I left some slack in the grey string
so that the spring and strip of metal would accelerate before starting to open
the valve so that the actual valve rotation would happen with more of a sudden jerk.
The part that people ask about most often is how the trigger works. I hope this photo
helps explain (click photo to enlarge). The trigger pull is a bent piece of wire, pivoting
around a screw. The top end of it forms a hook which goes through a hole in a strip
of metal. When you pull the trigger, the wire turns counter clockwise around the screw
and the hook pulls down and out of the metal strip. Some nails (barely visible)
keep the strip from moving down with the hook. The spring from the left then pulls
the strip left. The two grey pieces of string (tennis racquet string, actually) then goes
taut and pulls the lever on the ball valve. This causes the lever to turn 90
degrees, opening the ball valve very rapidly. I left some slack in the grey string
so that the spring and strip of metal would accelerate before starting to open
the valve so that the actual valve rotation would happen with more of a sudden jerk.
 Once the valve opens, it releases the entire content of the air tank, which is
made of black ABS drain pipe. The air rushes through the barrel of the gun,
shooting whatever was in it out the front.
Once the valve opens, it releases the entire content of the air tank, which is
made of black ABS drain pipe. The air rushes through the barrel of the gun,
shooting whatever was in it out the front.
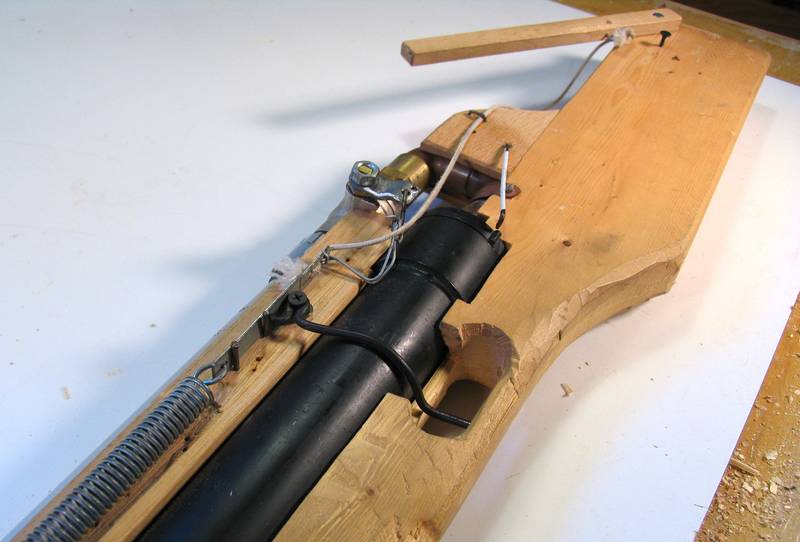
To set the gun, the spring needs to be pulled and the metal strip hooked onto the trigger, then the valve is closed, and the air tank pressurized with an air compressor.
That spring is quite hard to pull back, so I added a string and a lever to help pull it when setting it. You can see the lever towards the back of the photo. The white string is attached to the lever and pulls the strip back when the lever is rotated back and down.
 The air tank has a bicycle valve in the front of it. The bike valve is pushed into
a tight hole on the air tank. The rubber stem of the valve forms a tight seal in the
hole without the need for any sealant or glue.
The air tank has a bicycle valve in the front of it. The bike valve is pushed into
a tight hole on the air tank. The rubber stem of the valve forms a tight seal in the
hole without the need for any sealant or glue.
I clamped a block of wood around the bike valve to avoid accidentally pushing it into the barrel. Also, I figured the weakest point of this tank was the end cap. I was worried that that end cap might explode while I was charging it up. So I tied it to the rest of the gun using a piece of coat hanger wire. This wouldn't stop the cap from failing, but if it does fail, the block and valve won't turn into a projectile. I would prefer that this air gun be dangerous only to objects in front of it!
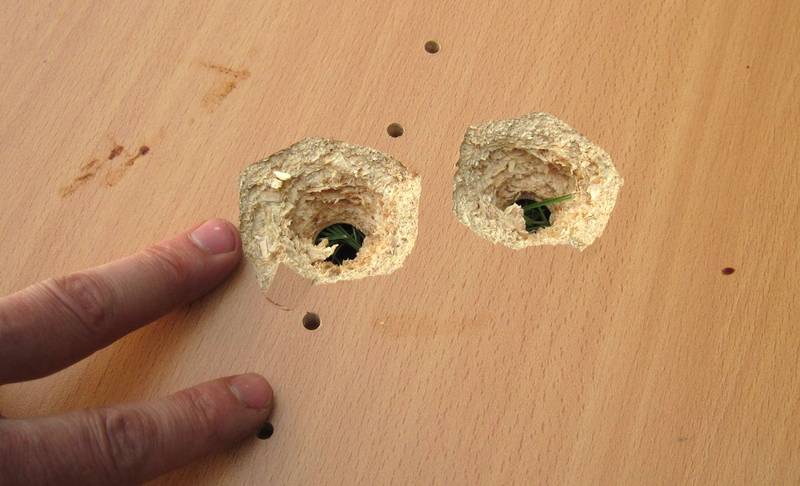 The gun will put a marble through a piece of 3/4" inch (19 mm) particle board or plywood.
I managed to put a hole through 1 1/4" (30 mm) particle board with a steel ball. 5/8"
Steel balls weigh about three times as much as marbles, so they pack more of a punch.
I got these from an industrial bearing store, but they cost $1 each.
The gun will put a marble through a piece of 3/4" inch (19 mm) particle board or plywood.
I managed to put a hole through 1 1/4" (30 mm) particle board with a steel ball. 5/8"
Steel balls weigh about three times as much as marbles, so they pack more of a punch.
I got these from an industrial bearing store, but they cost $1 each.
 I figured another way to get injured by the gun is if the U-shaped piece of 3/4" copper
pipe somehow came loose. That would be particularly bad as it would potentially hit me in the
face.
I figured another way to get injured by the gun is if the U-shaped piece of 3/4" copper
pipe somehow came loose. That would be particularly bad as it would potentially hit me in the
face.
So I added a big piece of hardwood to "hold" the U-shaped pipe if it should come loose.
 Here's a bottle of wine shot with a marble. There seems to be quite a bit of dust around
the bottle. I can only assume that that's from pulverizing the marble. We couldn't find a
trace of it afterwards at any rate.
Here's a bottle of wine shot with a marble. There seems to be quite a bit of dust around
the bottle. I can only assume that that's from pulverizing the marble. We couldn't find a
trace of it afterwards at any rate.
 The barrel is a piece of aluminium tubing with just over 5/8" inch (16 mm) inside diameter.
While most of the materials for the gun came from the plumbing department of a hardware store,
this part came from where various pieces of angle iron and rod are sold (from The Home Depot)
The barrel is a piece of aluminium tubing with just over 5/8" inch (16 mm) inside diameter.
While most of the materials for the gun came from the plumbing department of a hardware store,
this part came from where various pieces of angle iron and rod are sold (from The Home Depot)
I wrapped a few turns of electrical tape around the barrel where it's mounted to act as a sort of spacer. That way, the barrel doesn't touch the wood it's mounted on except for the front and back. I figure it's more likely to stay straight that way.
I had also rifled the inside of the barrel at some point. But my helical scratches weren't deep enough, and over time they smoothed out enough to be ineffective. I think I'd have to use a steel barrel and cut the grooves deeper for them to really work. Rifling the barrel gives the projectile a spin, which stabilizes it. Otherwise, the projectile eventually starts spinning in a random axis, and the Magnus effect subsequently increases the spin and causes a random side deflection. This is why the old smooth bore musket firearms were so inaccurate at a distance.
 The other end of the barrel mounts using a grey electrical conduit end to the ball valve.
I wrapped a few turns of electrical tape around the barrel until it fit tightly in the 3/4"
hole of this part.
The other end of the barrel mounts using a grey electrical conduit end to the ball valve.
I wrapped a few turns of electrical tape around the barrel until it fit tightly in the 3/4"
hole of this part.
It's not a perfectly airtight seal, but this side of the valve is only pressurized for a few milliseconds before the marble is shot out the front, so a bit of leakage here doesn't cause the tank to drain.
One time, I filled the barrel of the gun with water and shot up to see what would happen. The water had a bit of friction with the side of the barrel, so the whole barrel shifted forward until it pulled out of the mount. The water then got splattered towards me. so a word of caution - this sort of air gun can backfire.
The ball valve has a relatively large opening (I think about 1/2" or 13 mm), and it's straight through for minimal air resistance. Taking audio and video of the valve opening, the as best as I can tell, it rotates through 90 degrees in about 8 milliseconds. That's a lot faster than a sprinkler valve would open. But that doesn't stop people from suggesting that I switch to a sprinkler valve, because something bought surely must be better.
 Here's the non-trigger side of the gun. The block of wood with the four screws helps hold the
stock to the piece of wood that supports the barrel. I had to cut away quite a bit of the stock
for the trigger, but it seems to hold together alright.
Here's the non-trigger side of the gun. The block of wood with the four screws helps hold the
stock to the piece of wood that supports the barrel. I had to cut away quite a bit of the stock
for the trigger, but it seems to hold together alright.
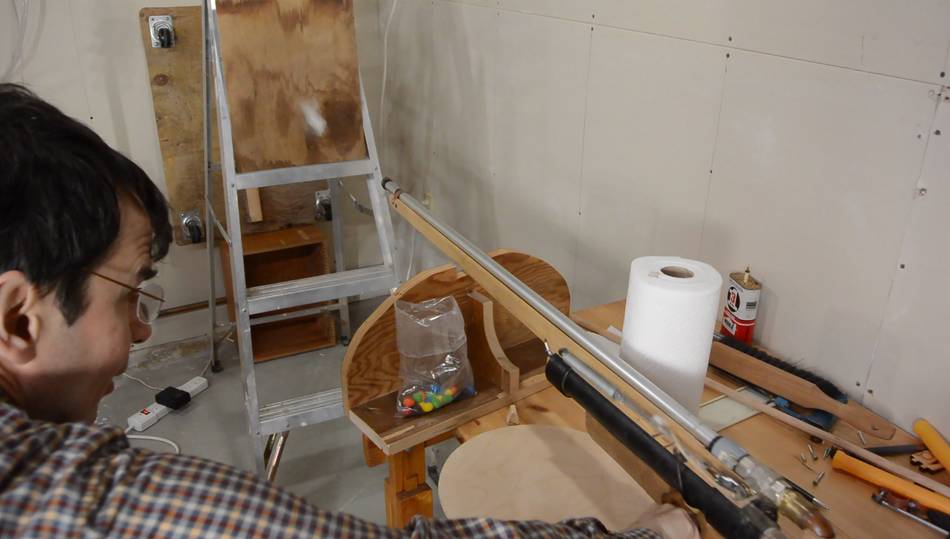
 Here's shooting at a 2-liter pop bottle, filled with sawdust and compressed air. I pressurized
the bottle by mounting a bicycle valve in the bottle cap. Once the marble goes through the
bottle, it explodes, and air pressure spreads the contents around. I was actually hoping
to make a dust explosion. A lit blowtorch nearby was supposed to light the dust cloud.
I don't know what went wrong, maybe the dust didn't hit the blowtorch, or maybe it just wouldn't
ignite. Sawdust is generally too coarse for a dust explosion, but given enough ignition
energy, it should be possible to light coarse dust as well.
Here's shooting at a 2-liter pop bottle, filled with sawdust and compressed air. I pressurized
the bottle by mounting a bicycle valve in the bottle cap. Once the marble goes through the
bottle, it explodes, and air pressure spreads the contents around. I was actually hoping
to make a dust explosion. A lit blowtorch nearby was supposed to light the dust cloud.
I don't know what went wrong, maybe the dust didn't hit the blowtorch, or maybe it just wouldn't
ignite. Sawdust is generally too coarse for a dust explosion, but given enough ignition
energy, it should be possible to light coarse dust as well.
I didn't have another bottle with sawdust handy to try to refine this experiment.
 Cleaning up after a whole bunch of shooting. Having some dead electronics around is handy
for that. I even shot up a 2002 vintage Blackberry!
Cleaning up after a whole bunch of shooting. Having some dead electronics around is handy
for that. I even shot up a 2002 vintage Blackberry!
 Back in 2004 when I built this air gun
I experimented with shooting M&Ms through plywood with this
air gun, but didn't take video of it. I thought it would be cool
to do this, and capture some high-speed footage.
Back in 2004 when I built this air gun
I experimented with shooting M&Ms through plywood with this
air gun, but didn't take video of it. I thought it would be cool
to do this, and capture some high-speed footage.
But before that, I filmed the valve opening at 1200 frames per second. It takes 5 milliseconds for the valve to go from fully closed to fully open. I'm pretty sure that's faster than a sprinkler valve type thing that many suggest I use. Also, this ball valve is straight-through, so it should have better flow than a solenoid valve.
But it took me three shots on the same spot to put an M&M through 1/4" (6 mm) plywood. After that I tried 3 mm baltic birch plywood and was able to get through that with the first shot.
 But looking at the high speed footage, the M&M seemed faster than I
reviously measured the marbles coming out, so I set it up for
measuring that. I used a dark background and lots of lights.
But looking at the high speed footage, the M&M seemed faster than I
reviously measured the marbles coming out, so I set it up for
measuring that. I used a dark background and lots of lights.
I first tried it with black cloth for wadding, but I think I got too much blow-by with that cloth because the M&M was slower than it seemed in my previous shots, and I could see blow-by coming out before the projectile.
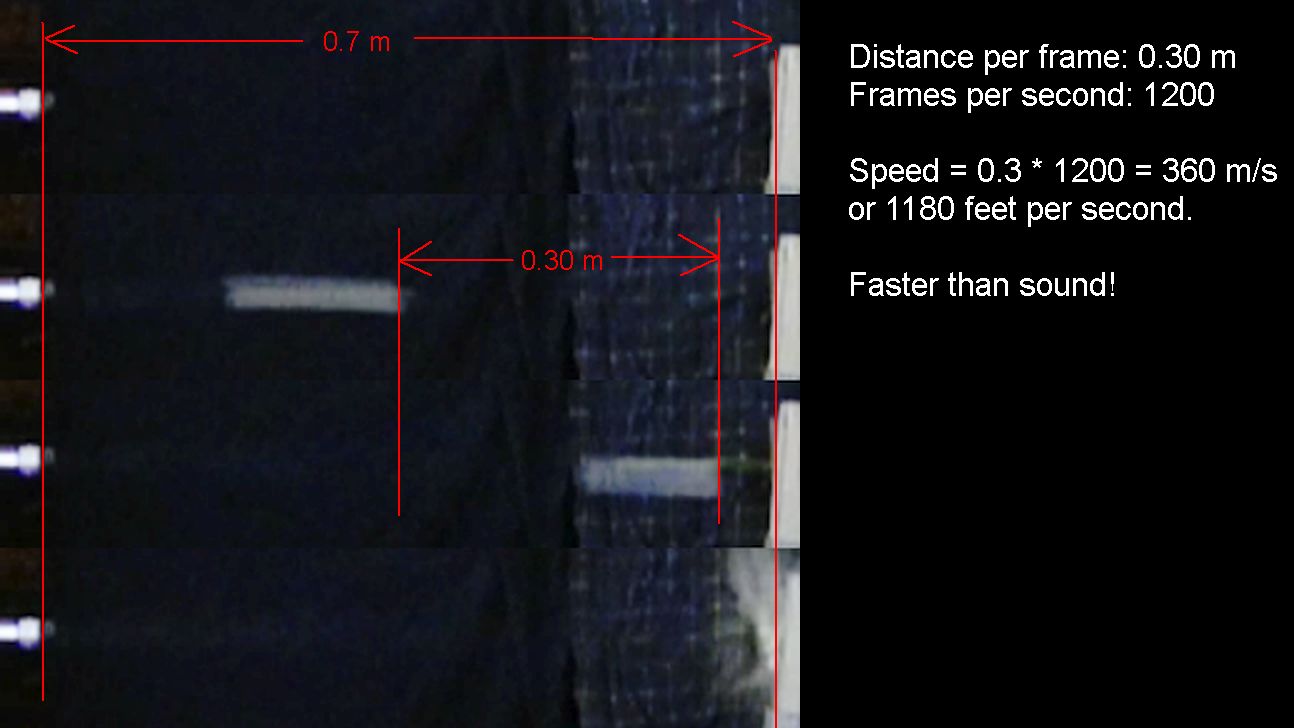 I switched back to paper towel wadding. At left, four frames stacked on
top of one another. I measured the distance the white
streak had traveled between two frames. 30 cm in 1/1200'th of a second,
or 360 m/s. That's faster than sound.
But that's measuring the speed of the wadding. I'm pretty sure the faint streak
to the right of the wadding in the third frame is the M&M getting ahead
of the wadding. The streak from the wadding is also shorter in the third
frame, so clearly the wadding is slowing down fast.
I switched back to paper towel wadding. At left, four frames stacked on
top of one another. I measured the distance the white
streak had traveled between two frames. 30 cm in 1/1200'th of a second,
or 360 m/s. That's faster than sound.
But that's measuring the speed of the wadding. I'm pretty sure the faint streak
to the right of the wadding in the third frame is the M&M getting ahead
of the wadding. The streak from the wadding is also shorter in the third
frame, so clearly the wadding is slowing down fast.
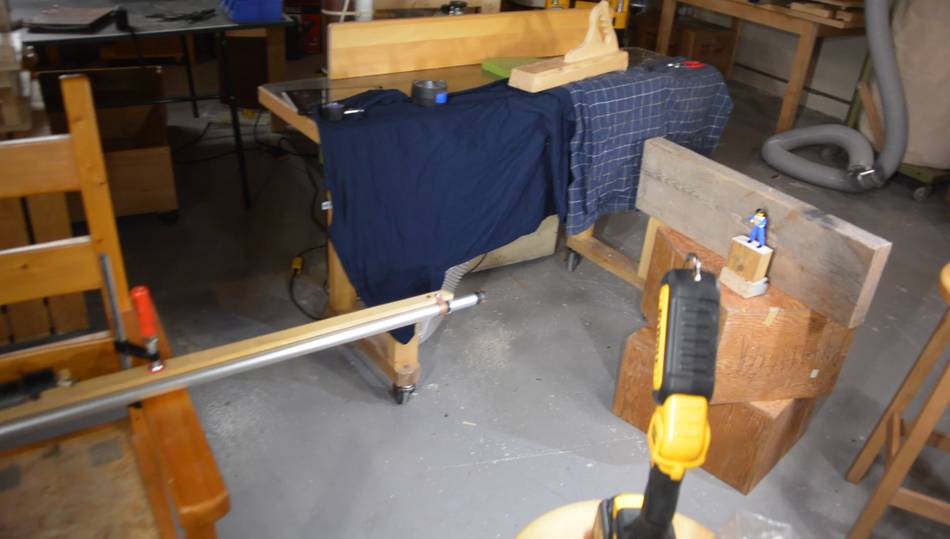
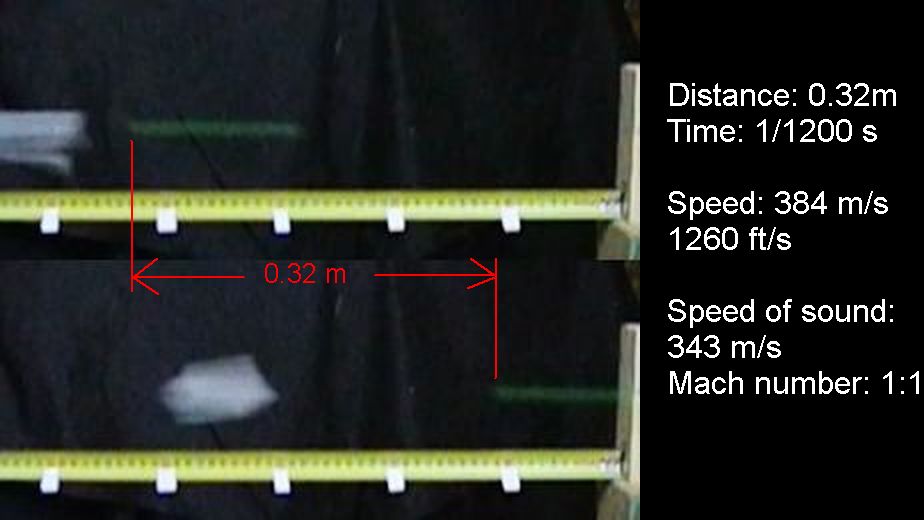 I set up another shot, this time filming some distance from the muzzle,
so the M&M is well ahead of the wadding when it went past the camera.
I set up another shot, this time filming some distance from the muzzle,
so the M&M is well ahead of the wadding when it went past the camera.
At left, two frames, with a tape measure below the flight path. The M&M travelled 32 cm in 1/1200 of a second, so that's 384 m/s, or Mach 1.1
And that's with just 100 PSI in the compressor, probably less than that in the gun because it takes some amount of pressure just to get the air through the tire valve I used. Unfortunately I no longer have my pancake compressor that could do 130 PSI.
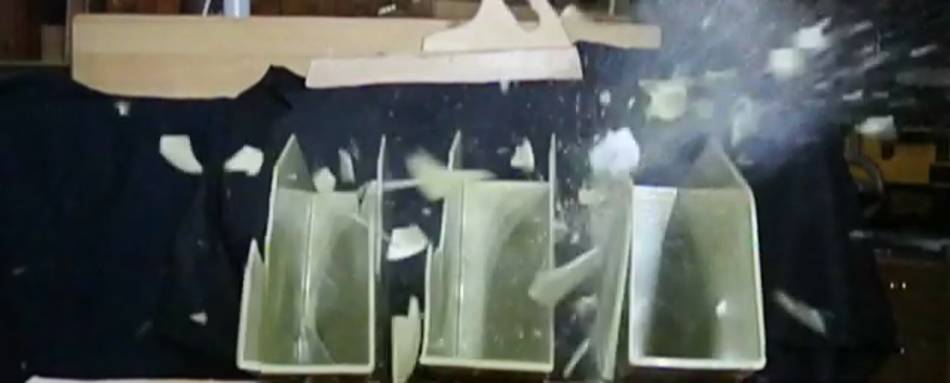
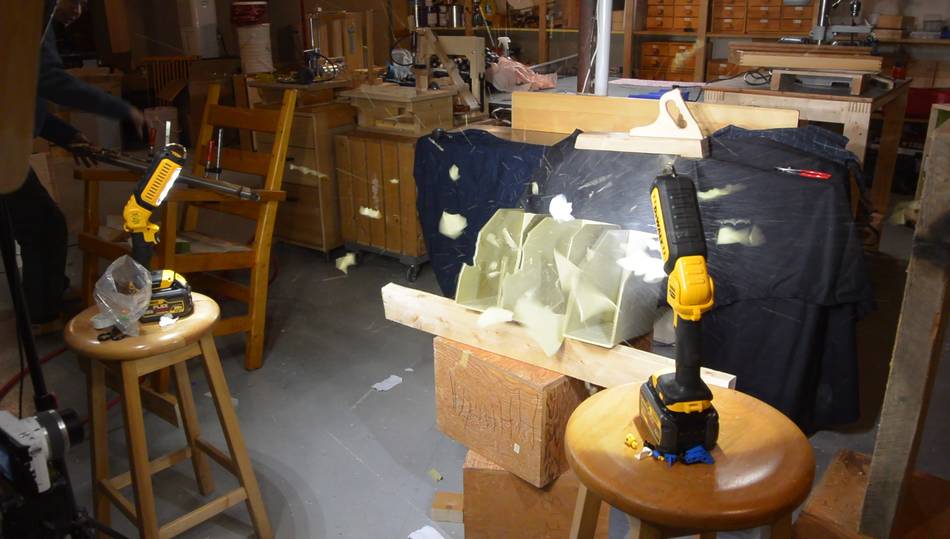 After that, some fun. These plastic file holders are too brittle to still use,
so I shot an M&M at them. Lots of plastic bits flying!
After that, some fun. These plastic file holders are too brittle to still use,
so I shot an M&M at them. Lots of plastic bits flying!
 And for good measure, I also shot a marble at it.
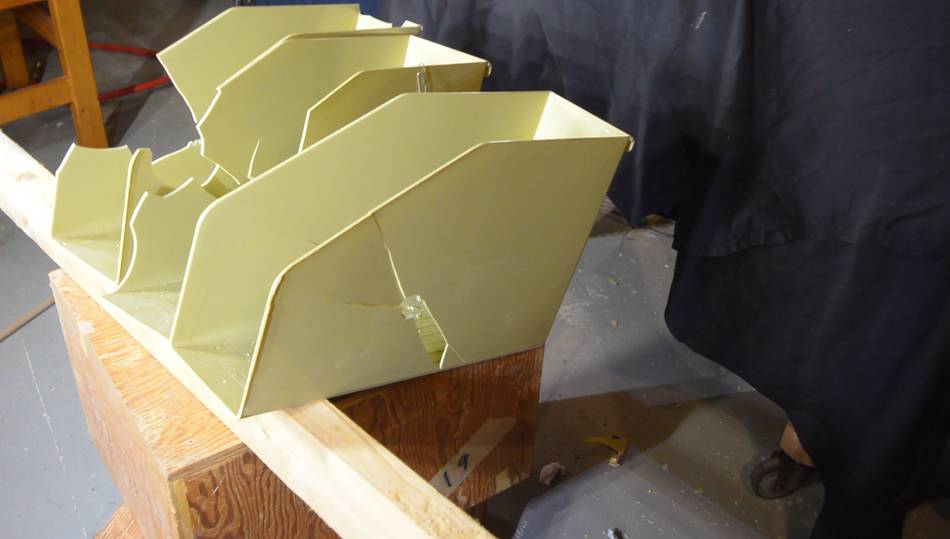
The marble went through all the folder holders. It was less spectacular because the marble didn't break up, so it only made a marble sized hole in most of the folder holders.
My previous write up about my air guns from 2004
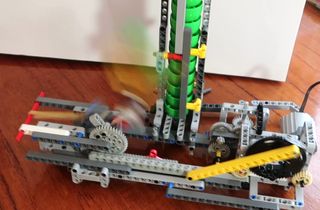 Lego machine catapult Shoots every second
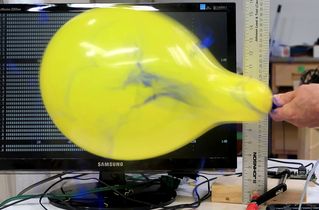 Exploding balloons in baloons, presure testing
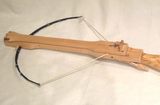 Marble shooting crossbow
 Smashing BlackBerry devices with a cannon
 Wasp sucking machine XL
 Marble machines
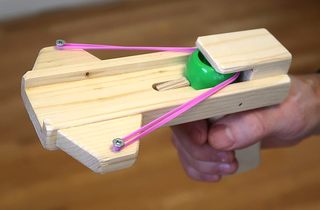 Plastic cap shooter
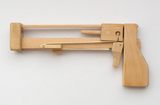 Jenga pistol
 Lawnmower of destruction
 Reusing an air conditioner compressor